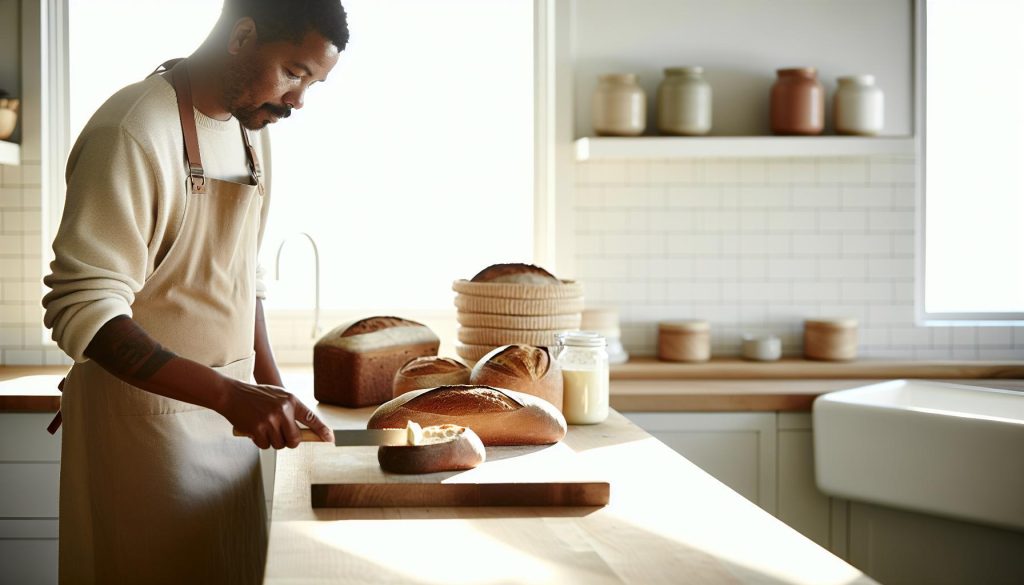
Imagine walking into your kitchen and being greeted by the warm, inviting aroma of freshly baked butter bread. With its soft, fluffy texture and rich flavor, this homemade delight is not just bread-it’s an experience that brings comfort to every meal. Whether you’re planning a cozy family dinner or just want a simple snack, this butter bread recipe is here to elevate your baking game. You don’t need to be a pro to create bakery-style loaves; all you need are a few basic ingredients, a little time, and the joy of experimenting in your kitchen. Ready to make your home smell amazing? Let’s dive into this easy, delightful recipe that will have everyone asking for seconds!
Soft Butter Bread Recipe: Ingredients You’ll Need
The secret to achieving that perfect, soft, and fluffy butter bread lies in the quality of your ingredients. Here’s a simple list of essentials you’ll need to whip up a delightful loaf that feels like a warm hug with each slice.
- Flour: Use all-purpose flour for general recipes, but bread flour can be utilized for a sturdier texture.
- Active Dry Yeast: Opt for fresh yeast to ensure your bread rises beautifully. Check the expiration date!
- Sugar: A touch of sugar adds sweetness and helps feed the yeast for a better rise.
- Salt: Essential for flavor, salt also regulates yeast activity, ensuring even fermentation.
- Butter: For a rich, buttery flavor, use unsalted butter at room temperature to blend seamlessly into the dough.
- Milk: Whole milk adds moisture and enhances the bread’s tenderness; alternatives like almond or oat milk work well too.
- Egg: While not always necessary, an egg enriches the bread, giving it a beautiful color and richer texture.
- Water: Use warm water (around 110°F or 43°C) to activate the yeast effectively.
Before you start baking, gather these ingredients, and you’ll be on your way to making bakery-style butter bread right at home. Don’t be afraid to experiment with variations, like using honey instead of sugar or adding whole grains for different textures. Each attempt is a step closer to mastering your personal favorite version!
Essential Tools for Baking Perfect Loaves
Baking perfect loaves of butter bread at home can feel like magic, but having the right tools is key to success in the kitchen. You don’t need a fancy setup to create bakery-style bread; just a few essential items can make a world of difference. From mixing to kneading and baking, each tool plays a crucial role in crafting that incredibly soft loaf we all love.
Start with a good mixing bowl. Opt for a sturdy, non-slip bowl that can handle the heft of your bread dough without sliding around. If you have a stand mixer with a dough hook, that’s a wonderful investment; it makes kneading simpler and more efficient. However, a hand mixer with dough hooks works fine too, or even good old-fashioned elbow grease if you’re feeling spirited!
A reliable kitchen scale is incredibly useful for measuring ingredients accurately, especially flour and water. Baking is all about precision, and it’s much easier to achieve consistent results when you measure by weight rather than volume. Next, a bench scraper can help you manipulate the dough effortlessly. It’s perfect for cutting, lifting, and transferring dough without it sticking to your hands or countertop.
Don’t forget essential bakeware! A quality loaf pan is essential for shaping your bread. Look for one made of heavy-duty, non-stick material to ensure even cooking and easy release. For added texture and crust, consider using a baking stone or baking sheet; they help distribute heat evenly for a perfect crust. Lastly, an oven thermometer is a great tool to verify your oven’s temperature, ensuring your bread bakes evenly and thoroughly.
With just these essential tools in your kitchen, you’re well on your way to producing loaves that are deliciously soft and perfectly baked. Embrace the creativity of baking, and remember that practice makes perfect; the more you bake, the more confidence you’ll gain!
Step-by-Step Instructions for Bakery-Style Bread
Creating a soft, fluffy loaf of butter bread at home is not just a culinary task; it’s a delightful journey. The aroma of fresh bread baking fills your kitchen, and the satisfaction of pulling a perfectly golden loaf out of the oven is unmatched. Follow these straightforward steps to achieve that bakery-style perfection every time.
Start by gathering your ingredients. You’ll need:
- 3 ½ cups all-purpose flour
- 3 tablespoons granulated sugar
- 2 teaspoons salt
- 1 tablespoon active dry yeast
- 1 cup warm milk (about 110°F or 45°C)
- 4 tablespoons unsalted butter, softened
- 1 large egg
Once everything is ready, here’s how to proceed:
Mix the Dough
In a large mixing bowl, combine the warm milk and sugar, then sprinkle the active dry yeast on top. Allow it to sit for about 5-10 minutes until frothy. This step ensures your yeast is active and ready to help your bread rise. Next, add the softened butter, egg, and salt to the bubbly yeast mixture. Slowly incorporate the flour, starting with a wooden spoon, and then transition to your hands or a mixer with a dough hook as the dough begins to form.
Knead to Perfection
Turn the dough out onto a lightly floured surface. Knead for about 8-10 minutes, folding the dough over and pressing down with your palms. If the dough sticks, sprinkle a little more flour, but avoid adding too much-it should be smooth and elastic when you’re done. If you have a stand mixer, this process can be simplified significantly; just mix and knead with the machine until the dough pulls away from the bowl sides.
First Rise
Place the kneaded dough in a greased bowl, cover it with a damp cloth or plastic wrap, and let it rise in a warm place until it doubles in size-usually about 1 to 1.5 hours. You can speed this up by placing it in an oven set to the lowest temperature or in a sunny spot.
Shape Your Loaf
After it has risen, punch the dough down to release air. Transfer it back onto your floured surface and shape it into a loaf. To do this, flatten it into a rectangle, then roll it tightly from one end to the other. Pinch the seams to seal, ensuring the ends are tucked under for a neat finish.
Second Rise and Bake
Place the shaped loaf into a greased loaf pan and cover it again. Let it rise until it almost doubles in size, roughly 30-45 minutes. Preheat your oven to 350°F (175°C) about 15 minutes before baking. Once the dough has risen, bake it for approximately 30-35 minutes, or until the top is golden brown and sounds hollow when tapped.
Cool Before Slicing
Allow your bread to cool in the pan for about 10 minutes, then transfer it to a wire rack to cool completely. This step is crucial, as slicing too early can result in a gummy texture. Let your masterpiece rest, and prepare to enjoy the fruits of your labor!
With these steps, you’ll master the art of butter bread making, bringing that bakery-style joy right into your home. Happy baking!
Tips for Achieving a Soft, Fluffy Texture
A soft, fluffy texture in butter bread is the hallmark of a truly delightful loaf, inviting you to take that first heavenly bite. Achieving this lightness is all about technique and a little bit of love. Here are some essential tips to ensure your homemade bread turns out irresistibly soft and airy.
To start, use fresh ingredients. Check the expiration dates on your yeast and flour, as aged ingredients can negatively impact your bread’s rise and texture. When measuring your flour, fluff it up first to aerate, then spoon it into your measuring cup and level it off with a knife. This prevents packing too much flour, which can lead to a denser bread.
Another critical factor is temperature. Yeast thrives in a warm, draft-free environment. As you mix your dough, ensure the liquid (milk or water) is warm but not hot-around 110°F (43°C) is perfect. After kneading, let it rise in a slightly warm spot, like an oven preheated to the lowest setting for a few minutes before turning it off. The warmth encourages the yeast to work its magic, creating small, fluffy pockets of air.
Kneading your dough properly also contributes to a tender loaf. Aim for about 8-10 minutes of kneading, or until your dough is smooth and elastic. This process develops gluten, which is crucial for bread structure. Don’t forget to let your dough rise until it has doubled in size-this can take anywhere from 1 to 1.5 hours. Patience is key; a longer rise leads to better flavor and texture.
Lastly, consider your fat content. The butter in your recipe not only adds flavor but also moisture, contributing to that delightful tenderness. If you want to elevate the buttery flavor, try incorporating flavored butters, like garlic or herb butter, into the dough before the second rise. This simple tweak can add a gourmet touch to your loaves.
Remember, baking is both an art and a science, so feel free to experiment with these tips to discover what works best for you. With a little practice and attention, you’ll be pulling perfectly soft, fluffy loaves from your oven in no time!
How to Enhance Flavor with Different Butters
Using butter in your bread not only enriches its flavor but also adds a wonderful moistness that makes each bite melt in your mouth. However, experimenting with different types of butter can take your homemade loaves to the next level, inviting a world of flavor right into your kitchen. From sweet to savory, the variety of butters available enables you to tailor your bread to complement any meal or occasion.
One delightful way to enhance your bread is by using flavored butters. Imagine a loaf of soft bread infused with the rich taste of garlic and herb butter. Simply mix softened butter with minced garlic, fresh herbs like rosemary or thyme, and a pinch of salt, then work this mixture into your dough before the second rise. This technique not only adds depth to the bread’s flavor but also makes the crust wonderfully aromatic. You can also try using cinnamon sugar butter for a sweet version, perfect for breakfast or a light dessert. Blend softened butter with cinnamon and sugar, then swirl it through the dough for a lovely sweet surprise.
Another idea is to incorporate compound butter directly into the baking process. For a herby twist, prepare a compound butter with flavors like sun-dried tomatoes and basil or even blue cheese and chives. Once your dough has risen, knead the compound butter into it, which will create pockets of flavor that burst with each bite. Allow the dough to rise again for even distribution, and you’ll have a loaf that’s as flavorful as it is soft.
Finally, don’t overlook the power of using different types of butter. Crafting bread with European-style or cultured butter can yield a more complex flavor profile due to higher fat content and a slight tanginess. These types of butter melt beautifully into the dough, contributing to a richer taste and texture. If you want to add a nutty finale, consider browning your butter before mixing it in. The nutty aroma and flavor will elevate your bread to new heights.
Baking with butter should be a delightful adventure, so feel free to play around with these suggestions. Each butter variation you try not only enhances the flavor but also sparks creativity in your baking journey. Enjoy the process of experimenting, and before you know it, you’ll have a loaf that’s uniquely yours, bursting with flavor and warmth.
Creative Variations: Adding Herbs and Spices
Enhancing your homemade butter bread with herbs and spices can transform an ordinary loaf into something extraordinary. Imagine the inviting aromas of fresh herbs wafting through your kitchen as you create a bread that not only tastes delightful but also impresses everyone at the table. Adding flavor through herbs and spices is a simple way to elevate your baking game without needing any special equipment or extensive culinary skills.
To infuse your bread with flavor, consider incorporating a mix of herbs into the dough. Herbs like rosemary, thyme, and basil work wonders. For a fragrant herb bread, finely chop a tablespoon of your chosen herb and mix it with your softened butter before incorporating it into the dough. This technique will ensure that the flavors meld beautifully throughout the loaf. For instance, a garlic-rosemary butter can add a savory punch that’s perfect for pairing with soups or stews.
Spices can also play a starring role in your bread creations. For a sweet twist, try cinnamon, nutmeg, or cardamom to create a warm, inviting loaf. Blending ground spices right into the dough or swirling them into the butter mixture can offer delightful surprises in every bite. A swirl of cinnamon sugar butter not only adds sweetness but creates a beautiful marbled effect when sliced. This is an excellent choice for breakfast or an afternoon snack.
Don’t shy away from experimenting! You could combine different flavor profiles to create something uniquely yours. Why not mix sun-dried tomatoes and basil for a Mediterranean twist, or perhaps add a touch of chili powder for a subtle heat? The options are endless! Remember, the key to successful flavor additions is balance; you want the herbs and spices to complement the buttery richness of your bread, not overpower it.
As you experiment with these flavorful variations, take notes on what you love and what works best. Knowing how to enhance your bread with simple herbs and spices can turn any meal into a gourmet experience right from your home oven. Enjoy the process, and let your creativity shine!
Storing and Freezing Your Homemade Bread
To keep your homemade butter bread as delightful as the day you baked it, mastering proper storage is essential. A well-stored loaf can maintain its soft texture and buttery flavor for days, allowing you to enjoy fresh bread anytime you crave it. Here are some straightforward methods for storing and freezing your bread, ensuring it stays delicious and ready to use.
Storing at Room Temperature
For short-term storage, let your bread cool completely after baking. Then, wrap it in a clean kitchen towel or place it in a breadbox. This method helps absorb moisture and keeps the crust nice and crisp. If you prefer a plastic bag, ensure it’s not airtight; otherwise, the crust can become soggy. Ideally, your bread will stay fresh for about 2-3 days at room temperature.
Longer Storage Options
If you know you won’t finish your bread within a couple of days, freezing is your best bet! Here’s how to do it effectively:
- Slice Before Freezing: If you know you’ll use your bread in slices, consider slicing it before freezing. This way, you can take out only what you need without thawing the entire loaf.
- Wrap Well: Use plastic wrap or aluminum foil to tightly wrap each slice or the whole loaf. You can also place the wrapped bread in a resealable freezer bag to prevent freezer burn.
- Label and Date: Don’t forget to label your bag with the date. Properly stored, your butter bread can last up to three months in the freezer without losing its quality.
Thawing Your Bread
When you’re ready to enjoy your frozen bread, simply remove the desired portion and let it thaw at room temperature for about 1 to 2 hours. If you want to revive that fresh-baked warmth, you can pop the slices in a toaster or warm the entire loaf in a 350°F oven for about 10-15 minutes.
By using these simple storage techniques, you can enjoy your homemade butter bread at its best, whether it’s fresh from the oven or pulled from the freezer. Remember, a little care goes a long way in preserving your baking creations!
Troubleshooting Common Baking Issues
When baking butter bread, it’s not uncommon to hit a few bumps along the way. Fortunately, many of the common issues are easy to troubleshoot. If your bread didn’t rise as expected, try checking your yeast-make sure it’s fresh and active. A simple test involves dissolving a teaspoon of sugar in warm water and sprinkling the yeast on top. If it bubbles after a few minutes, you’re ready to go!
Another frequent problem is a dense texture. This might happen if you over-knead the dough or don’t give it enough time to rise. Kneading is crucial for developing gluten, but too much can lead to a tough loaf. Aim for a smooth, elastic dough without going overboard, about 8-10 minutes usually does the trick. Plus, during rising, ensure your dough is in a warm, draft-free place. A cold environment can slow down yeast activity, resulting in a heavy loaf.
In the unexpected event that your bread comes out overly dry, this often stems from either incorrect measurements or baking too long. Be precise with your ingredients, especially when it comes to flour, which can vary in weight. Always spoon the flour into your measuring cup and level it off with a knife. For baking time, start checking your bread a few minutes before the recommended time; this way, you can pull it out just as it reaches that perfect golden crust.
Finally, if you notice your bread has a crust that’s too hard, consider placing a pan of water in the oven while it bakes. The steam helps to create a softer crust. And if you prefer a perfectly buttery finish, brushing the top with melted butter right after it comes out can elevate it to bakery-style perfection. Enjoy the process, and remember, every loaf is a chance to refine your skills!
Understanding the Science Behind Bread-Making
Baking the perfect loaf of butter bread involves more than just mixing a few ingredients-it’s truly a delightful dance of science and art in the kitchen. At the heart of this transformation are simple ingredients that work together in surprising ways. When you mix flour with water and yeast, you kick off a process called fermentation, where yeast converts sugars into carbon dioxide and alcohol. This gas forms bubbles in the dough, allowing it to rise and develop that lovely, airy texture we all crave in a soft loaf.
Another crucial component is gluten, which is formed when flour is mixed with water. Kneading the dough helps stretch and develop gluten strands, creating a web that traps the gases produced by the yeast. Think of it as building a cozy structure that holds everything together. The more you knead, the stronger this structure becomes, which in turn affects the texture of your bread. Aim for a balance-under-kneading can lead to a crumbly bread, while over-kneading can produce a tough loaf.
To enhance the chemistry of your butter bread, consider the role of fat-specifically, butter. Adding butter to your dough enriches it, contributing to a tender crumb and moist texture. The fat coats the gluten strands, which limits gluten development and results in a softer bread. It’s that little secret that brings bakery-style softness right to your home kitchen. Plus, don’t forget to properly hydrate your dough. The right balance of moisture not only helps achieve a velvety texture but also supports yeast activity, adding to the overall flavor and freshness of your creation.
Lastly, keep an eye on the final stages of the science. As your dough bakes, the heat causes the gases to expand further, lifting the loaf. The Maillard reaction kicks in, turning the crust golden and giving it that irresistible aroma. Understanding these processes allows you to troubleshoot effectively-if your bread isn’t rising, for instance, you might need to check the temperature of your water, as yeast loves warmth yet can be killed by heat. With each loaf, you’re not just baking; you’re taking part in a fascinating transformation fueled by science, turning simple ingredients into something warm, inviting, and utterly delightful.
Best Practices for Kneading and Shaping Dough
Kneading and shaping dough may seem daunting at first, but with a little practice, you can master these essential techniques to create a soft, bakery-style butter bread. The key to successful kneading lies in developing the gluten, which gives your bread structure and texture. Start with a clean, floured surface, and don’t be afraid to get your hands in there. Lightly flour your hands and your workspace to prevent sticking, and remember, the goal is to create a smooth, elastic dough that feels slightly tacky but not overly sticky.
To knead effectively, push the dough away from you with the heel of your hand, then fold it back over itself. Rotate it a quarter turn and repeat the process. This motion encourages the gluten within the dough to stretch and develop. Aim for about 8-10 minutes of kneading; your dough should become smooth and elastic. An excellent tip is to do the “windowpane test”: take a small piece of dough and stretch it gently. If it holds together and forms a thin membrane without tearing, you’re good to go!
Once your dough is kneaded, it’s time to shape it for the final rise. Gently flatten the dough into a rectangle, and then fold the edges towards the center, creating a seam. Flip it over so the seam is on the bottom and roll it into a tight log. This shaping technique helps create surface tension, which is essential for a nice rise in the oven. When you place your shaped dough into a greased loaf pan, make sure the seam side is down. Cover it with a clean kitchen towel and let it rise until it doubles in size-this can take anywhere from 30 minutes to an hour, depending on the temperature of your kitchen.
Another important practice is to be mindful of your dough’s environment while it rises. A warm, draft-free spot is perfect, so consider placing your dough in an unheated oven with just the light on, or in a sunny corner of your kitchen. If you notice your dough isn’t rising as you’d expected, it might need a bit more warmth. Once it’s properly risen, you’re ready to bake-just remember to preheat your oven! With these tips, you’ll enjoy the delightful process of creating soft, aromatic butter bread that’s sure to bring smiles at your table.
How to Make Your Bread Last Longer
Keeping your butter bread fresh and delicious can enhance your baking experience and ensure that every slice is as delightful as the first. Did you know that bread can last longer if stored properly? Here are some tips to maximize the freshness of your homemade loaves, ensuring every bite remains soft and flavorful.
Start by allowing your bread to cool completely after baking. This prevents condensation from forming inside the packaging, which can lead to sogginess or mold. Once cooled, you can wrap your loaf tightly in plastic wrap or aluminum foil. This helps lock in moisture while keeping air out. For even better protection, consider placing the wrapped bread in a resealable plastic bag.
Best Storage Options
The right storage temperature is crucial. For short-term storage (up to about 3 days), keep your bread at room temperature in a cool, dry place. A bread box is ideal, as it offers ventilation and shielding from light. If you anticipate that your bread won’t be consumed within a few days, freezing is your best bet. Slice the bread before freezing, allowing you to take out just what you need. Wrap each slice individually or use a freezer-safe bag, ensuring to squeeze out as much air as possible to prevent freezer burn.
Defrosting and Reheating
When you’re ready to enjoy frozen bread, you can thaw it at room temperature (for about 1-2 hours) or pop it straight into the toaster. Toasting from frozen not only refreshes the texture but also gives a delightful crust. Alternatively, warming slices in a microwave for about 10-15 seconds helps restore softness, though be careful not to overdo it to avoid a chewy texture.
Enhancing Longevity
To prolong your bread’s freshness even further, consider adding a natural preservative. For example, including fat in your dough, such as butter, can improve shelf life due to its moisture-retaining properties. A small amount of milk or honey can also help, as they both naturally ward off spoilage.
With these simple strategies, you can savor your homemade butter bread for days, enjoying that cozy bakery-like softness with every bite! Whether you’re storing for a special occasion or making sandwiches for lunch, proper care will keep your delicious creation at its best. Happy baking!
Serving Suggestions and Pairings for Your Bread
There’s nothing quite like the aroma of freshly baked butter bread wafting through your home, inviting everyone to gather around the table. Once you’ve mastered that soft, bakery-style loaf, the real fun begins-serving it! This delicious bread shines in countless settings, whether for a cozy family breakfast or a festive dinner. Here are some delightful ways to showcase your homemade creation.
Start your day with a simple yet indulgent breakfast by pairing toasted slices of butter bread with fresh fruit preserves or handmade jams. The sweetness of strawberry or raspberry jam complements the rich, buttery flavor beautifully. For a more decadent option, try spreading a thin layer of cream cheese topped with sliced cucumbers and a sprinkle of dill, creating a refreshing open-face sandwich that’s perfect for brunch.
For lunch, this bread excels as the base for grilled cheese sandwiches. Imagine gooey, melted cheddar between two slices of perfectly toasted butter bread, served with a side of tomato soup. You can also cube the bread to make delightful croutons that elevate your salads or soups. Just toss them with olive oil, garlic powder, and your favorite herbs, then bake until crispy.
When it comes to dinner, use your butter bread to soak up sauces or serve alongside a hearty stew. It also works wonderfully as a base for bruschetta; top slices with diced tomatoes, basil, and a drizzle of balsamic glaze for an exquisite appetizer. If you’re feeling creative, consider making French toast with your butter bread. Dip thick slices in an egg mixture flavored with vanilla and cinnamon, cook in a hot skillet, and serve with maple syrup and fresh berries for a luxurious breakfast twist.
Storing and Repurposing: If you find yourself with leftover bread, don’t fret! Besides freezing for later use, you can turn stale slices into delicious recipes like bread pudding or bread crumbs for coating chicken or sprinkling on top of casseroles. With a bit of creativity, your butter bread can shine throughout all your meals. Embrace the joy of serving and sharing your baking masterpiece!
Frequently asked questions
Q: What makes butter bread soft and fluffy?
A: *Soft and fluffy butter bread* is achieved through proper kneading and rising. The key is to use warm liquids to activate yeast and incorporating enough butter for moisture. Ensure you let the dough rise fully before baking, which helps develop its airy texture.
Q: Can I use unsalted butter in my butter bread recipe?
A: Yes, *unsalted butter* is a great choice for butter bread. It allows you to control the salt levels in your recipe. Just remember to adjust the added salt in the dough as per taste, especially if you typically use salted butter.
Q: How long should I let my butter bread dough rise?
A: The dough should rise for about *1 to 2 hours* or until it doubles in size. Factors like room temperature can affect rising time, so look for the dough to have visibly expanded rather than sticking to a specific clock time.
Q: What is the best method to shape butter bread loaves?
A: To shape butter bread loaves, gently deflate the risen dough and shape it into a rectangle. *Tuck the edges toward the center* and roll tightly into a log. This encourages a uniform rise and prevents air pockets during baking.
Q: How can I enhance the flavor of my butter bread?
A: You can enhance the flavor by experimenting with *different types of butter,* like garlic, herb, or compound butters. Adding ingredients like honey or sugar can also create a richer taste while adding to the sweetness of the bread.
Q: What is the ideal baking temperature for butter bread?
A: The ideal baking temperature for butter bread is typically *350°F (175°C)*. This allows for even cooking and a golden-brown crust. Preheating the oven ensures consistent results.
Q: How do I know when my butter bread is done baking?
A: Your butter bread is done when it has a *golden crust* and sounds hollow when tapped on the bottom. You can also use a thermometer; a reading of *190°F to 200°F (88°C to 93°C)* indicates it’s perfectly baked.
Q: Can I freeze butter bread? If so, how?
A: Yes, you can freeze butter bread! Allow it to cool completely, then wrap it tightly in plastic wrap and aluminum foil. This prevents freezer burn and keeps the bread fresh. Thaw at room temperature when you’re ready to enjoy it again.
Future Outlook
Congratulations on mastering the art of creating soft, bakery-style butter bread! This delightful recipe is not only a treat for your taste buds but also a chance to impress friends and family with your baking skills. Don’t let your delicious creation sit alone-slice it up and share your results with us in the comments! Or maybe snap a photo and tag us on social media; we love to see how you bring your own flair to our recipes.
Want to elevate your baking further? Check out our guide on different types of butter and how to use them or explore our insights on healthy butter options. Remember, experimenting with ingredients can lead to fantastic new flavor profiles!
Don’t miss out on future recipes-sign up for our newsletter to get updates straight to your inbox. Happy baking, and we hope to see you back here for more tasty adventures!


