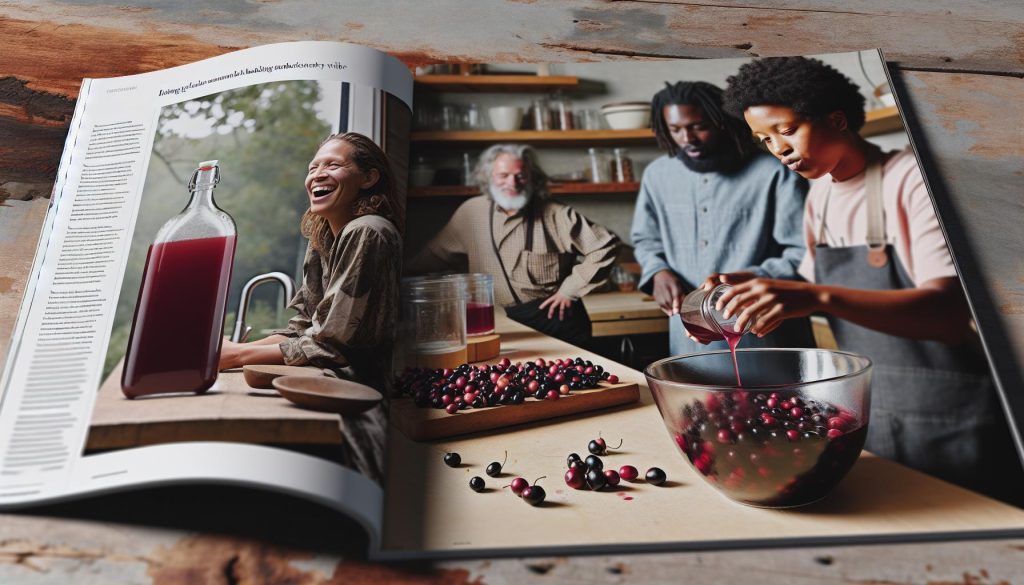
Have you ever tasted a homemade wine that captivates with its bold and unique flavor? Chokecherry wine is a delightful choice that combines sweet and tart notes, making it a fantastic addition to your culinary repertoire. Making this distinctive fruit wine not only connects you to nature but also allows you to enjoy the fruits of your labor. Whether you’re a seasoned winemaker or a curious beginner, the process is simpler than you might think-it requires just a few basic ingredients and a bit of patience.
As you embark on this winemaking adventure, you’ll discover how satisfying it is to create something truly special. Imagine sharing a glass of your homemade chokecherry wine with family and friends, sparking conversations and creating lasting memories. So, roll up your sleeves and get ready to explore the rich flavors and charming possibilities that chokecherry wine brings to your table!
Choosing the Right Chokecherries for Winemaking
Selecting the right chokecherries is crucial for creating a flavorful and vibrant wine. Chokecherries, known for their bold flavor profile, can vary significantly in taste and sweetness depending on their ripeness and the specific variety. For the best results, aim to harvest chokecherries that are fully ripe, which typically occurs in late summer to early fall. These berries should be deep purple to black, signaling they have reached their peak sweetness. Picking them just before a frost can also enhance their flavor by concentrating the sugars.
When gathering your chokecherries, consider where you find them. Look for healthy wild shrubs away from heavy traffic areas or pollution sources, as these factors can affect the quality of the fruit. Always wash the berries thoroughly to remove any impurities or pesticide residues. If you’re fortunate enough to have access to cultivated chokecherry varieties, these can sometimes offer a more consistent flavor and size, making them easier to work with in winemaking.
It’s also wise to taste-test a few berries before committing to a large batch. This will give you a sense of their sweetness and flavor complexity. If you encounter berries that are overly astringent or lacking in flavor, it’s best to look for alternative sources. Sweetness can also be adjusted later in the winemaking process, but starting with quality fruit sets the foundation for your wine’s overall character. By choosing ripe, flavorful chokecherries, you’ll be well on your way to crafting a unique and enjoyable wine.
Essential Tools for Home Winemaking Success

Making chokecherry wine is a delightful endeavor, and having the right tools can elevate your winemaking experience. You don’t need any fancy equipment to begin; in fact, many items you probably already have in your kitchen will do just fine. Here’s a rundown of the essential tools that will help guide your journey to creating delicious and bold chokecherry wine.
Basic Equipment
To start, gather these fundamental items:
- Fermentation Vessel: A glass carboy or a food-grade plastic bucket works well. This is where your wine will ferment, so ensure it’s clean and sanitized.
- Airlock: This fits into the fermentation vessel and allows gases to escape while preventing contaminants from entering.
- Siphon and Bottling Equipment: A siphon (or racking cane) will help you transfer your wine without disturbing the sediment. For bottling, consider a funnel to make pouring easier without spills.
- Hydrometer: Although optional, a hydrometer helps measure sugar content, which can inform you about the potential alcohol level of your wine.
- Sanitizing Solution: Keeping everything spotless is crucial. Use a no-rinse sanitizer or a simple bleach solution to sanitize your equipment before use.
Ingredients and Additives
Next, gather your ingredients. Essential items include ripe chokecherries, sugar, and yeast. A few optional ingredients can enhance your flavor:
- Yeast Nutrient: This provides extra nutrients for the yeast, especially useful if you’re using wild chokecherries.
- Acid Blend: This can balance out sweetness and enhance the wine’s overall flavor profile.
Measuring Tools
Precision in winemaking matters, so include measuring cups and spoons in your toolkit. You’ll want to accurately gauge your sugar and water ratios to create a balanced wine.
Creative Extras
Lastly, let your creativity shine! Consider adding unique elements like herbs, spices, or even other fruits during the fermentation process. Adjustable tools like a fine mesh bag for botanicals can allow you to experiment with flavors while keeping your wine clean.
By assembling these essential tools, you’ll be well-prepared to embark on your chokecherry winemaking adventure. Remember, the process is just as enjoyable as the final product, so don’t hesitate to experiment and find your unique twist!
Step-by-Step Chokecherry Wine Recipe

Making chokecherry wine at home is a delightful way to capture the vibrant flavors of summer in a bottle. With a few ingredients and some patience, you can create a delicious, bold wine that celebrates the unique character of these little berries. Below is a simple step-by-step guide that will walk you through the entire process.
Start by gathering your protagonist: ripe chokecherries. Aim for about 5 to 6 pounds, which should yield around 1 gallon of wine. Make sure they are fully ripe; deep purple or near-black berries are your best bet for flavor. Once you have your chokecherries, rinse them off gently to remove any dirt or debris.
Next, mash the chokecherries to extract their juice. You can use a potato masher or a clean hands technique-just get in there and squeeze! After mashing, strain the juice through a fine mesh sieve or cheesecloth into a large, sanitized fermentation vessel. This ensures you get the purest juice possible, free from the fruit pulp.
Now it’s time to sweeten and flavour your mash. Into the juice, stir in about 3 cups of sugar, adjusting to your taste preferences. Sugar is critical not just for sweetness but also as a fermentation fuel. Add one packet of wine yeast, which you can find at your local brewing supply store. Yeast is what will turn your sugary juice into alcohol. If you’re feeling fancy, you can also throw in some yeast nutrient and a splash of lemon juice to balance the flavors.
Seal your fermentation vessel with an airlock, which will allow gases to escape while keeping other contaminants out. Place it in a dark, room-temperature spot. After a few days, you should see bubbling, a sign that fermentation is underway! This bubbling can last anywhere from one to three weeks, depending on your specific conditions.
Once fermentation appears to have slowed down (usually when bubbles have significantly diminished), it’s time to siphon your wine into another clean container for aging. Make sure to leave behind any sediment that has settled at the bottom. At this stage, you can also add any additional flavors, such as herbs or spices, if you’re feeling adventurous.
Age your wine for at least a month, though longer-up to six months or more-can be better as it allows the flavors to mature and mellow. Taste it periodically to check for maturity and adjust sweetness if necessary by adding more sugar or even some additional fruit juices.
When you’re ready, bottle your delightful concoction in clean, sanitized wine bottles, ensuring you leave a little headspace at the top. Cork them securely and store your bottles in a cool, dark place. After a couple of months, your homemade chokecherry wine will be ready to be enjoyed.
Celebrate your bounty! Serve it slightly chilled or at room temperature, and pair it with savory dishes or sweet desserts to complement its vibrant flavors. Homemade chokecherry wine is not just a drink; it’s a celebration of your culinary creativity and a taste of nature’s abundance. Enjoy the process and let your unique spin on this recipe shine through!
Fermentation Basics: What You Need to Know
When it comes to making chokecherry wine, understanding the fermentation process is key to transforming those luscious fruits into a drinkable delight. Fermentation is like a magical transformation where yeast turns your sweetened chokecherry juice into alcohol and flavors. It’s an exciting phase that requires just a few steps and some patience.
First things first, once you’ve mixed your mashed chokecherries with sugar and yeast, it’s time to put everything in a fermentation vessel. This vessel should be clean and sanitized to prevent any unwanted bacteria from ruining your hard work. A glass carboy or food-grade plastic bucket works perfectly. Don’t forget to use an airlock – this allows gases from the fermentation process to escape while keeping out contaminants like dust and insects.
Next, find a warm, dark spot in your home to let the fermentation happen. Room temperature (around 70-75°F or 21-24°C) is ideal – if it’s too cold, your yeast might become sluggish, and if it’s too hot, it could die off. You should start to see bubbling within a couple of days, which is an indication that your yeast is hard at work. Keep an eye on it, as this bubbling can last anywhere from one to three weeks.
Once bubbling subsides, it’s time to move the wine to another container. Use a siphon to carefully transfer the liquid, leaving behind any sediment that has settled at the bottom. This step is crucial for achieving a clearer wine. If you’re looking to be adventurous and enhance the flavors, consider adding herbs or spices at this stage – think about mint for freshness or vanilla for warmth. With every little adjustment you make, you’re crafting a unique bottle of wine that reflects your personal taste!
Remember, patience during fermentation pays off. Allow your wine to age for a month or more to let those flavors mature, but don’t hesitate to taste along the way! This is your creation, and it should be a reflection of your personal touch. So, embrace the process and enjoy each step of the journey!
Tips for Achieving Bold and Unique Flavors
Creating a distinctive chokecherry wine is all about infusing bold and unique flavors that make your homemade creation truly stand out. The sweetness of chokecherries, coupled with their subtle astringency, provides a wonderful base for experimentation. Getting creative with flavoring arises from a balance of ingredient selection and the timing of when you add them during the winemaking process.
One effective way to boost depth in your wine is through the use of additional fruits. Incorporating berries like raspberries or blackberries can enhance the natural sweet-tart profile of your chokecherries. Simply crush them gently and add them into the fermentation vessel along with your chokecherry mixture. This not only elevates the overall flavor but also adds complexity and intrigue to your wine. You could try a combination of chokecherries and blueberries for a refreshing twist, or even a medley of summer fruits for delightful layers.
Herbs and spices are your friends in the pursuit of unique flavors. Consider adding a few sprigs of fresh mint or a small amount of cinnamon or nutmeg during fermentation. Begin with small quantities; you can always add more during the aging process based on your preferences. Just remember, some flavors are stronger than others, so it’s wise to taste frequently and adjust accordingly. For an adventurous spirit, try adding a hint of ginger for warmth or chamomile for a soothing undertone that will delight the palate.
The aging phase is another crucial step where you can further experiment. After primary fermentation, consider transferring your wine to a lightly charred oak barrel or using oak chips to introduce depth and richness. The mild tannins from the oak will not only soften your wine but also impart flavors of vanilla and spice. If a heavier wine is your goal, try blending in some leftover fruit skins from your first batch to deepen the body and complexity.
Finally, don’t underestimate the power of patience and observation. As your wine ages, take notes on the flavor changes and discuss them with fellow winemakers. This shared experience can spark new ideas for future batches. Ultimately, the goal is to enjoy the creative journey of crafting your chokecherry wine, experimenting with flavors that resonate with your personal taste-a wonderful way to make a cocktail of memories in every bottle you produce!
Common Mistakes in Chokecherry Wine Making
Making chokecherry wine can be an exciting journey, but even enthusiastic home winemakers can stumble into a few common pitfalls that can affect their beautiful batches. Being aware of these errors leads to better outcomes and a rewarding experience in the kitchen.
A frequent mistake is underestimating the importance of thoroughly cleaning and sanitizing your equipment. Any lingering microorganisms can spoil your wine or introduce off-flavors. Always start with clean and sanitized fermenters, bottles, and other tools. This step can’t be stressed enough-consider using a sanitizer designed for winemaking or a simple solution of water and bleach, rinsed thoroughly afterward.
Another common error is not closely monitoring fermentation temperatures. Chokecherries, like other fruits, ferment best within a specific temperature range typically between 65°F and 75°F (18°C – 24°C). If the temperature is too low, the yeast can become sluggish, leading to a stuck fermentation. Conversely, high temperatures can produce off-flavors. Using a thermometer and keeping your fermentation area stable helps maintain the ideal environment for your yeast.
Additionally, many novice winemakers may add too much sugar upfront without tasting. While chokecherries can be tart, balance is key. Start with a moderate amount of sugar and adjust during the fermentation process based on taste tests. Using hydrometers can help you measure specific gravity accurately, giving you a clearer idea of your wine’s potential sweetness.
Lastly, patience is vital. Rushing through the aging process can result in a wine that is not as smooth or flavorful as it could be. After fermentation, allow your wine to age for at least a few weeks or, preferably, months. This time allows the flavors to meld and any harsh alcoholic notes to soften.
In summary, by paying attention to sanitation, temperature control, sugar levels, and aging time, you can avoid common mistakes in chokecherry winemaking and elevate your craft. Embrace the learning process-it’s all part of the joy of homemade winemaking!
Aging Your Chokecherry Wine: Techniques and Tips
Aging your chokecherry wine is a crucial step that transforms your initial blend into a complex, refined drink worthy of your efforts. Just like a fine cheese or a high-quality balsamic vinegar, time plays a key role in developing the rich flavors and smoothing out any rough edges. The goal during this stage is to achieve a harmonious balance between the wine’s natural tartness and any sweetness you’ve added, creating an enjoyable tasting experience.
Typically, after fermentation, you’ll want to let your wine rest for at least four to six weeks in a cool, dark place. This resting period is when flavors meld and mature, resulting in a more rounded and enjoyable wine. You can use clean glass carboys or bottles for aging; glass is preferred as it won’t impart any unwanted flavors. Keep in mind the importance of temperature during aging-around 55°F to 65°F (13°C to 18°C) is ideal, as this helps maintain a stable environment to enhance the subtle nuances of your wine.
Monitoring your wine periodically during this aging phase can be beneficial. Consider tasting it every few weeks to assess its development. You might find that interesting flavors emerge over time, from complex herbal notes to hints of spice. If there’s any sediment that settles at the bottom, you might want to transfer your wine to a new container to separate the clear liquid from the sediment, which can taste a bit off and impact the smoothness of your final product.
Lastly, don’t rush the process! Aging time can vary significantly based on personal preference and the specific characteristics of your chokecherries. Some winemakers enjoy the fresh, zesty taste of a younger wine, while others prefer the depth that comes with longer aging. Embrace this exploration as part of your winemaking journey, and don’t hesitate to experiment with aging durations to find what you enjoy the most. Remember, patience in winemaking often leads to the most rewarding outcomes!
Creative Variations: Adding Herbs and Spices
Adding herbs and spices to your chokecherry wine is a delightful way to enhance the flavor profile and create a unique signature drink that stands out. Experimenting with these ingredients not only personalizes your wine but also allows you to explore an exciting range of flavor combinations. Imagine infusing your wine with aromatic hints of rosemary or the warmth of cinnamon-these choices can elevate your homemade wine from standard to spectacular.
When it comes to creativity in winemaking, the possibilities are endless. Start with familiar herbs and spices like:
- Mint: Fresh mint leaves can add a refreshing layer that complements the natural tartness of chokecherries.
- Lavender: A small amount of dried lavender can bring a floral note that softens the wine’s acidity.
- Cinnamon: Ground or stick cinnamon can impart a warm, spicy character perfect for autumn flavors.
- Ginger: A touch of fresh or powdered ginger adds zesty warmth and a pleasant kick.
- Cloves: Use sparingly, as they can be quite potent, but cloves offer a wonderfully warming spice that’ll remind you of holiday cheer.
To incorporate these flavors, consider the timing carefully. Infuse during the primary fermentation for a more integrated flavor or add them during aging for a more pronounced taste. Start small; you can always adjust by tasting along the way. For example, if you decide to add fresh herbs, roughly chop about a quarter cup and add them to your fermenting mixture, allowing their flavors to meld over time.
If you’re unsure where to start, think about pairing your spice choices with food you enjoy. For instance, if you love the combination of roast duck and fruit sauces, try adding herbs that would complement that dish, like thyme or sage. This approach not only guides your decision-making but also makes the final experience more cohesive when pairing your wine with food.
The journey of winemaking is all about personal expression. Don’t be afraid to mix and match or even create your own blends. Remember, making chokecherry wine should be an enjoyable adventure, so embrace the process, trust your palate, and savor the creativity that comes with each batch!
Pairing Chokecherry Wine with Food
Chokecherry wine, with its sweet yet mildly tart character, can beautifully elevate your meals when paired thoughtfully. Its unique flavor profile offers a floral and fruity complexity that can balance both rich and savory dishes as well as lighter fare. Think of it as your culinary partner on the dinner table, sparking conversation and delighting taste buds.
When it comes to savory pairings, chokecherry wine complements grilled meats wonderfully. For example, serve it alongside barbecued ribs or roasted duck; the wine’s sweetness cuts through the richness of the meat, creating a harmonious balance. For a fresh twist, try it with grilled salmon, where the wine’s vibrant fruitiness enhances the fish’s natural flavors.
Side Dishes and Salads
Chokecherry wine also shines alongside vibrant salads or sides. Imagine a mixed greens salad with goat cheese, walnuts, and a vinaigrette-this combo plays on the wine’s acidity while the cheese adds a lovely creaminess. For a heartier option, consider wild rice pilaf or sweet potato dishes; their earthiness and sweetness beautifully complement the wine’s berry notes.
Desserts and Sweet Treats
And don’t forget dessert! Chokecherry wine pairs delightfully with fruit-based desserts. Think of it accompanying a berry tart, a peach cobbler, or even chocolate desserts; the wine enhances the sweet and tart profiles, bringing out the best in both the dish and the wine. If you’re hosting a cheese board night, incorporate some dried fruits and a blue cheese; the strong flavors of the cheese with the fruity wine make for an indulgent pairing.
As you explore these pairings, remember to trust your palate. Cooking and pairing wine is about enjoying the journey, experimenting, and discovering what works for you. So, pour yourself a glass, gather your friends, and start creating delicious memories at your table!
Storing and Serving Chokecherry Wine
When it comes to enjoying the fruits of your labor, effectively storing and serving your chokecherry wine can enhance both its flavor and your experience. After all, the effort you put into creating your own wine deserves to be fully appreciated! To ensure your homemade wine retains its unique character, proper storage is essential. A dark, cool place is ideal-think a temperature between 55°F and 65°F. Keeping your bottles upright will prevent the corks from drying out and letting air in, which can spoil your precious brew.
For serving, a little attention goes a long way. Chill your chokecherry wine in the refrigerator for about an hour before serving; this will accentuate its refreshing taste. When it’s time to pour, opt for elegant wine glasses to showcase its beautiful color while allowing you to appreciate its aromas. Here are a few tips to elevate your serving game:
- Decanting: For older wines, decanting can help aerate the wine, softening any harsh notes and bringing out its flavors. Just pour it carefully into another container and let it sit for about 30 minutes before serving.
- Temperature: Serve lighter styles of chokecherry wine slightly chilled at around 50°F to 55°F, while fuller-bodied versions can at room temperature, around 60°F to 65°F.
- Pairing: Remember the food pairings you’ve crafted! Offering small tastes of cheese, fruit, or nuts can create a wonderful flavor explosion alongside your wine.
Moreover, don’t hesitate to get creative! Experiment with cocktails by mixing your chokecherry wine with a splash of soda or use it as a base for sangria-infusing it with seasonal fruits and a hint of citrus.
should feel less like a chore and more like part of the fun of winemaking! Enjoy the process, and let your wine shine as it complements the joyful gatherings you share with friends and family. Cheers to your homemade wines!
Troubleshooting Your Winemaking Process
Every home winemaker encounters hiccups along the fermentation journey, but don’t fret! Troubleshooting issues can turn potential disasters into valuable learning experiences. Let’s explore some common concerns and straightforward solutions to keep your chokecherry wine on track and ensure it develops the bold and unique flavor you’re aiming for.
One of the most frequent issues is stuck fermentation, which usually arises when yeast stops working prematurely, often due to high sugar levels. If your wine seems sweet but isn’t fermenting, check the temperature. Yeast thrives between 70°F and 75°F. If it’s too cold, gently warm your fermentation vessel by placing it in a warmer spot or using a heating pad. Alternatively, you can re-pitch with fresh yeast to revive the fermentation process. This might feel daunting, but with a little bit of patience, your wine can return to bubbling bliss.
Another concern is off-flavors, which can arise from various factors during winemaking. If you notice a vinegar-like taste, it could be due to exposure to oxygen. Ensure your primary fermenter is sealed properly and consider investing in an airlock to prevent that air from sneaking in. Additionally, sometimes a touch of bitterness can stem from using unripe berries. Taste your chokecherries before you start; aim for ripe, juicy fruit to maximize your winemaking success. Trust your instincts and adjust as needed-great wines often come from experimenting and learning what works for you!
It’s also important to keep an eye on clarity issues. If your wine appears hazy, don’t despair! This can happen due to pectin or yeast residues. A simple solution is to use fining agents, such as bentonite clay or a packet of gelatin, which you can add according to package instructions. Let it settle for a few days, and you’ll find your wine becomes much clearer.
Finally, remember that winemaking is as much an art as it is a science. Embrace the process! If things don’t turn out perfectly the first time, that’s okay. Each batch teaches something new. Celebrate the small victories, whether it’s perfecting your fermentation technique or discovering a new delicious twist to add next time. Happy winemaking!
The Benefits of Homemade Chokecherry Wine
There’s something truly special about making your own chokecherry wine-a feeling of accomplishment that comes from transforming simple fruits into a richly nuanced beverage. Not only is the process rewarding, but the results can be exceptionally flavorful and unique, tailored to your personal palate. Homemade chokecherry wine allows you to explore creativity in flavor profiles, experimenting with different levels of sweetness and alcohol content.
One of the most delightful benefits of crafting your own wine is the quality control you maintain over the ingredients. You get to select the ripest chokecherries, ensuring that each batch reflects the full-bodied flavor these fruits can offer. This hands-on approach means you’re not just a consumer, but a creator-shaping the wine to suit your taste. Furthermore, with each batch you make, you can tweak the recipe, perhaps adding herbs like mint or spices like cinnamon to discover bold new combinations.
Making chokecherry wine at home also offers unique social opportunities. Imagine hosting a tasting event featuring your creations, where friends and family can sample and discuss each one. It’s a wonderful way to share your efforts and spark conversations about flavors, techniques, and future batches.
Beyond the taste and social experiences, there are also substantial economic benefits. Homemade wine can be significantly less expensive than purchasing quality wines from the store, especially when you can source chokecherries locally. Not to mention, the pride you’ll feel in surpassing those store-bought options with your very own handcrafted masterpiece is priceless.
Creating homemade chokecherry wine is not just about the wine itself-it’s about the journey, the experiences shared, and the memories made along the way. So roll up your sleeves, gather your fruits, and get ready to uncover the joys of winemaking in your own kitchen!
Q&A
Q: What are the best chokecherries for winemaking?
A: The best chokecherries for winemaking are those that are fully ripe, typically dark purple to black in color. Look for berries that are plump and free from blemishes. Harvesting when they are at their peak sweetness will yield a richer, more flavorful wine. For varieties and ideal picking times, refer to the section on Choosing the Right Chokecherries for Winemaking in the article.
Q: How long does it take to make chokecherry wine?
A: Making chokecherry wine typically takes about 4-6 weeks for fermentation, plus additional time for aging. After fermentation, allow the wine to age for at least 3-6 months for the best flavor. Be patient, as the aging process is crucial for developing the wine’s complexity.
Q: Can I make chokecherry wine without a press?
A: Yes, you can make chokecherry wine without a press. Simply crush the berries in a sanitized container and use a mesh bag to strain the juice after fermentation. This method is effective and suitable for small batches. Refer to the Step-by-Step Chokecherry Wine Recipe section for details on crushing and straining.
Q: What is the ideal temperature for fermenting chokecherry wine?
A: The ideal temperature for fermenting chokecherry wine is between 70°F to 75°F (21°C to 24°C). This temperature range promotes healthy yeast activity while preventing off-flavors. Use a fermentation vessel with a temperature gauge for best results.
Q: How can I enhance the flavors of my chokecherry wine?
A: You can enhance the flavors of chokecherry wine by adding spices, herbs, or even other fruits. Consider experimenting with cinnamon, vanilla, or mint during the fermentation process. Visit the Creative Variations: Adding Herbs and Spices section for more ideas to develop bold flavors.
Q: What type of yeast is best for chokecherry wine?
A: A versatile wine yeast like Montrachet or Cotes des Blancs is best for chokecherry wine. These yeasts can complement the bold flavors of chokecherries and promote a clean fermentation. You can explore the Fermentation Basics: What You Need to Know section for more yeast options.
Q: How do I troubleshoot common issues during chokecherry wine fermentation?
A: To troubleshoot common issues like stuck fermentation or off-flavors, check the temperature and sugar levels. If fermentation stalls, try gently stirring to re-suspend the yeast. For off-flavors, consider adjusting the ingredients next batch. The Troubleshooting Your Winemaking Process section covers solutions in detail.
Q: What should I pair with chokecherry wine for a meal?
A: Chokecherry wine pairs well with rich meats, cheeses, and desserts. Consider serving it alongside gamey dishes, sharp cheeses, or dark chocolate desserts. For more pairing recommendations, check the Pairing Chokecherry Wine with Food section of the article.
Concluding Remarks
Now that you’ve learned how to make chokecherry wine with its bold and unique flavor, why not take the next step? Experimenting with different fruits or blending techniques can lead to even more delightful results. Don’t forget to check out our related guides on “Fruit Wine Basics” and “Creative Wine Blending Ideas” to expand your winemaking skills.
We’d love to hear about your experiences making chokecherry wine! Share your comments below or tag us on social media with your creations. If you enjoyed this video, consider subscribing to our newsletter for more delightful recipes and tips right to your inbox.
Remember, winemaking is all about creativity and fun-there’s no pro equipment needed! Enjoy your homemade adventure, and dive into learning more about the world of crafting unique flavors and gourmet experiences. Your next delicious discovery is just a click away!


