

Did you know that homemade hazelnut butter can rival any store-bought jar, both in taste and health benefits? Making your own nut butter not only allows you to control the ingredients-avoiding unwanted preservatives and additives-but it also opens up a world of flavor you can customize to your liking. Whether you enjoy it spread on toast, drizzled over pancakes, or straight from the jar, this easy recipe is perfect for all skill levels. In just a few simple steps, you’ll create a creamy, delicious spread that celebrates the rich, nutty goodness of hazelnuts. So roll up your sleeves, and let’s transform a handful of nuts into a gourmet treat that’s sure to impress!
Choosing the Right Hazelnuts for Butter Perfection
When it comes to making hazelnut butter at home, choosing the right hazelnuts can make all the difference in achieving that rich, nutty flavor and creamy texture. The best hazelnuts for butter are often roasted, as roasting enhances their natural sweetness and brings out deeper flavors. Look for hazelnuts that are plump and firm, with a rich brown color. Avoid nuts that appear shriveled or have dark spots, as these can indicate spoilage or poor quality.
There are generally two types of hazelnuts you can consider: raw hazelnuts and roasted hazelnuts. While raw hazelnuts can be used, roasting them at home can elevate your butter, adding a toastiness that’s hard to replicate. If you buy pre-roasted nuts, check the label for added oils or salt-simple, raw ingredients will yield the cleanest flavor in your butter.
Buying from Reliable Sources
When purchasing hazelnuts, consider local or specialty stores that focus on nuts and grains, as they often have fresher selections. Online retailers can also be a great option, especially for bulk purchases, but make sure to choose a seller with good reviews to ensure quality. If possible, buy from suppliers that provide details on the sourcing of their hazelnuts; sourcing from reputable farms can also assure you of their freshness.
In short, investing a little time in selecting high-quality hazelnuts will reward you with a hazelnut butter that’s better than any store-bought jar-creamy, flavorful, and truly homemade. Your taste buds will thank you!
Essential Tools for Making Hazelnut Butter
Creating your own hazelnut butter is a rewarding experience that allows you to enjoy a fresh, rich flavor that store-bought versions often lack. To get started, you’ll need a few essential tools that will streamline the process and ensure your butter turns out creamy and delicious, without any fancy equipment.
First and foremost, a high-quality food processor is key. This tool will do most of the heavy lifting, breaking down the hazelnuts into a smooth paste. If you don’t have a food processor, a powerful blender can also work, though you may need to stop and scrape down the sides more often. For optimal results, choose a processor with a strong motor-this will make the process quicker and minimize the risk of overheating your nuts.
Next, consider having a roasting pan or a baking sheet lined with parchment paper. Roasting your hazelnuts enhances their flavor, bringing out that delightful nuttiness. If you choose raw hazelnuts, spreading them out on the pan and roasting them for about 10-12 minutes at 350°F will create a beautiful golden hue and deepen the taste.
Another handy tool is a spatula. This simple implement is invaluable for scraping the creamy goodness from the sides of your processor, ensuring nothing goes to waste. You might also find a measuring cup helpful if you’re planning to make larger batches or want to keep track of your ingredients precisely.
Lastly, a good-quality storage container is essential for keeping your homemade hazelnut butter fresh. Look for a glass jar with a tight-sealing lid; this will help preserve the flavor and texture for up to two weeks in the fridge. If you’re feeling creative, label your jar with the date you made it to keep track of its freshness.
With these tools in hand, you’re ready to embark on your hazelnut butter-making journey. The process is straightforward, fun, and lets you indulge in the rich, nutty flavors of fresh hazelnut butter that is entirely tailored to your taste!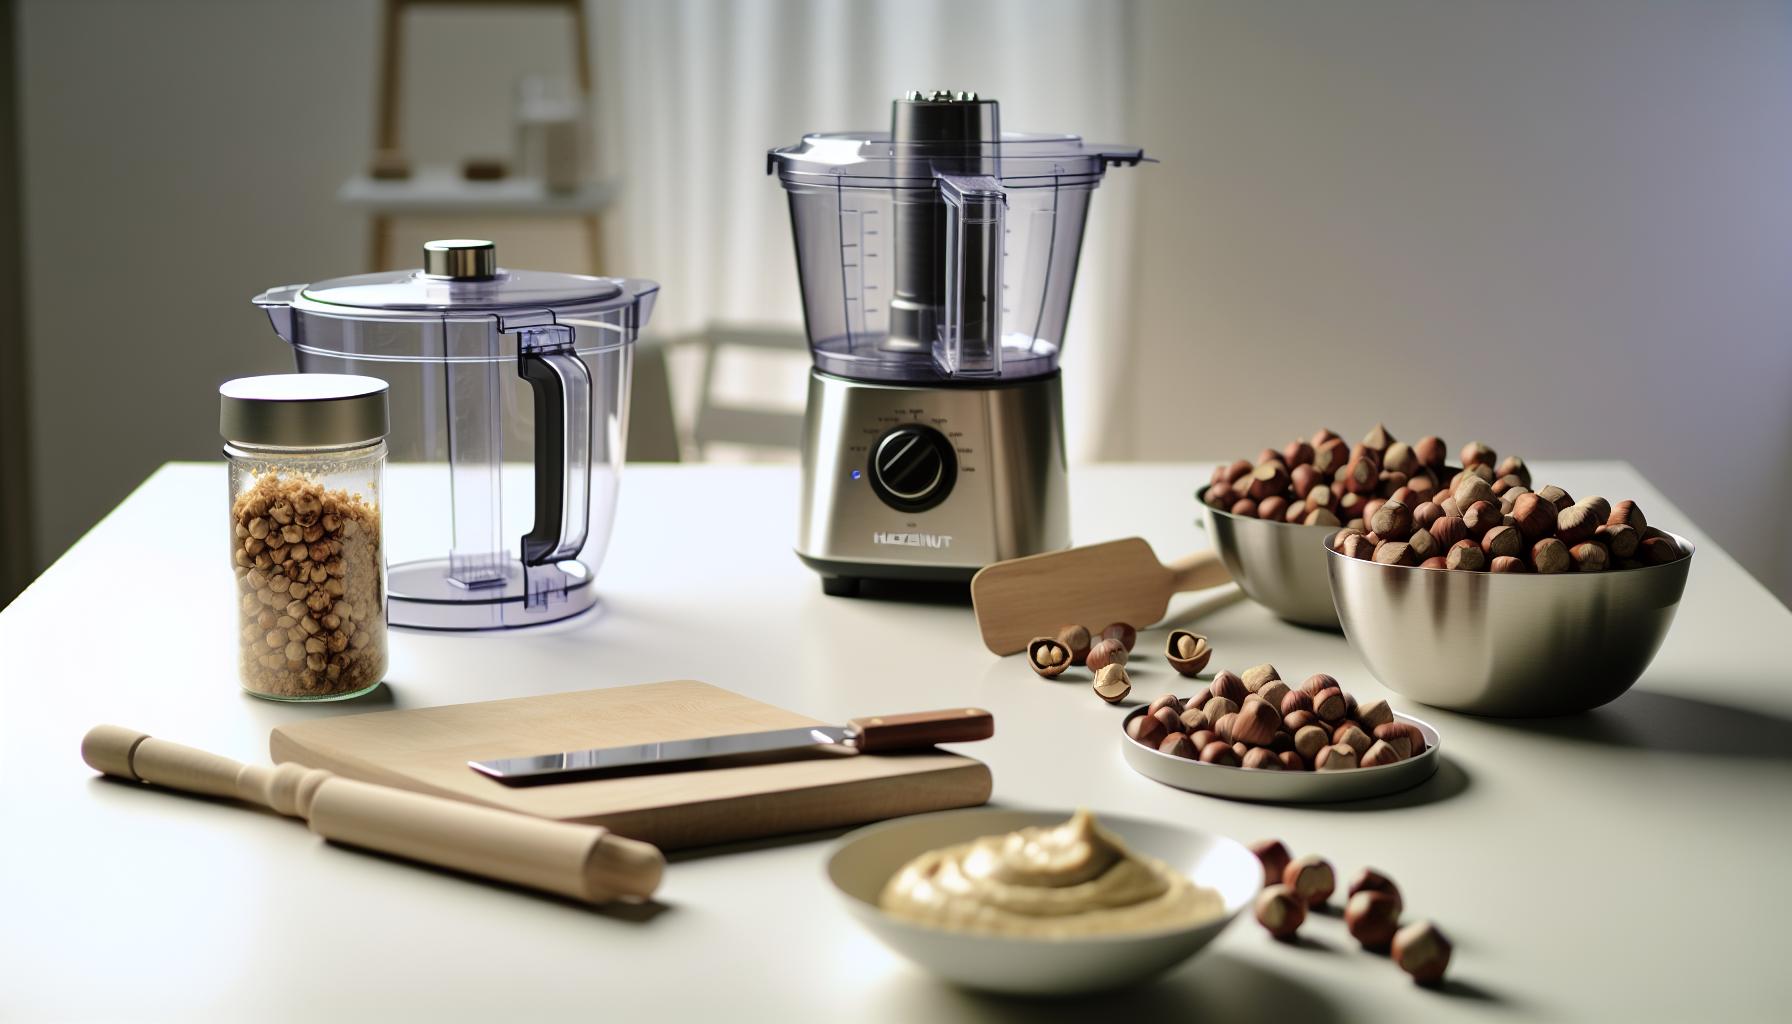
Step-by-Step Guide to Crafting Hazelnut Butter
Crafting your own hazelnut butter is not only simple but also incredibly satisfying. You’ll be amazed by how the essence of roasted hazelnuts transforms into a luscious spread that benefits from the freshest ingredients-making it infinitely better than anything off the shelf. In just a few easy steps, you’ll create a creamy, rich hazelnut butter that’s bursting with flavor, perfect for spreading, baking, or just enjoying by the spoonful.
Start by preheating your oven to 350°F (175°C). If you have raw hazelnuts, spread them evenly on a baking sheet lined with parchment paper. Roast them for about 10-12 minutes, or until they’re golden brown and fragrant. This step is crucial since roasting enhances the flavor and brings out that characteristic nuttiness that makes hazelnut butter so delightful. Keep an eye on them to avoid burning-once they start to turn golden, they can go from perfect to burnt very quickly!
Once roasted, allow the hazelnuts to cool slightly, then rub them between your hands or in a clean kitchen towel to remove the skins. It’s okay if some skins remain; it adds to the rustic charm of your butter! Now, transfer the hazelnuts to your food processor. Begin processing on high speed, stopping occasionally to scrape down the sides. The nuts will first turn into a gritty meal, then they’ll start releasing their oils and form a paste. This process usually takes about 5-10 minutes. Make sure your processor is powerful enough to handle this task; if it seems to be struggling, take a short break to let it rest.
As your mixture reaches a creamy consistency, you can customize your hazelnut butter to suit your taste. If you like a little sweetness, blend in a tablespoon or two of honey or maple syrup. Want a touch of salt? Add a pinch to enhance the flavor further. For a gourmet twist, try adding a splash of vanilla extract or cocoa powder for a nutty chocolatey spread. Continue processing until everything is combined well and adjusted to your liking.
Finally, when your hazelnut butter is silky smooth, transfer it into a clean glass jar with a tight-sealing lid. Let it cool completely before sealing and storing it in the fridge. Homemade hazelnut butter can last up to two weeks, but believe me, it will rarely last that long!
This delightful kitchen project is straightforward and allows you to experiment with flavors, making your homemade hazelnut butter uniquely your own. So roll up your sleeves and get ready to enjoy the delicious results!
Flavor Variations to Elevate Your Butter
Elevating your hazelnut butter with creative flavor variations is a fantastic way to personalize this delightful spread and make it truly your own. With just a few simple additions, you can transform basic hazelnut butter into something extraordinary-a gourmet treat that competes with the finest store-bought versions. Let’s dive into some fun and delicious ideas to inspire your next batch!
Start with sweetness. If you want to create a hazelnut butter that dances on your taste buds, consider swirling in a couple of tablespoons of honey or maple syrup. These natural sweeteners not only add flavor but also bring a lovely richness that complements the nuttiness of hazelnuts beautifully. For a spiced-up version, try adding a pinch of cinnamon or nutmeg to give your butter a warm, cozy vibe that’s perfect for spreading on toast or drizzling over pancakes.
Next, think about texture and richness. To achieve that creamy, indulgent feel, incorporate a spoonful of coconut oil or a drizzle of melted chocolate. The coconut oil lends a tropical flair while also keeping the butter silky smooth. If you’re feeling adventurous, white chocolate pieces can be blended in for a sweet, creamy finish. Another option is to fold in finely chopped roasted hazelnuts for an added crunch, making for a delightful contrast in texture.
Don’t forget about the savory side! For those who enjoy a more sophisticated palate, a touch of sea salt enhances the buttery flavor and balances the sweetness. Experimenting with gourmet flavors like vanilla extract or espresso powder can also elevate your hazelnut butter to a whole new level, giving it an intriguing depth that pairs well with many desserts and breakfast dishes.
Finally, you can create seasonal variations by adding ingredients that reflect the time of year. Try incorporating pumpkin spice in the fall for that perfect autumn touch, or some fresh zest from citrus fruit in the summer to brighten up the flavors. The possibilities are endless, so feel free to experiment and adjust the ingredients to suit your personal taste. Remember, this is all about finding joy in the kitchen and crafting something delicious that makes your heart happy!
Storing Your Homemade Hazelnut Butter
properly is crucial to preserving its delicious flavor and creamy texture. One of the best parts about making your own nut butter is knowing exactly what’s in it and the joy of enjoying it fresh. To keep that freshness, follow a few straightforward tips.
Transfer your hazelnut butter into a clean, airtight container right after you’ve made it. Glass jars with tight-fitting lids work beautifully, but you can also use food-safe plastic containers. Make sure to leave a little room at the top as the nut butter can expand slightly if it’s warm from the processing. Always use a clean utensil to scoop out your butter; this prevents bacteria from contaminating your precious spread.
For optimal longevity, store your hazelnut butter in the refrigerator. Chilling it not only extends its shelf life-typically up to a month-but also keeps the fats from separating, which can happen at room temperature. If you find your butter thickens too much when chilled, simply let it sit out for a few minutes to soften before enjoying it. You could also consider adding a splash of oil (such as hazelnut or coconut oil) to achieve a smoother consistency.
If you want to keep it even longer, consider freezing your hazelnut butter. Spoon it into ice cube trays or muffin tins to create single-serving portions. Once frozen, transfer the portions to a labeled freezer bag, and they’ll last for several months. This way, you can enjoy fresh hazelnut butter even months after making it-just thaw what you need before using it in your favorite recipes.
By properly , you not only maintain its wonderful taste but also ensure you can delight in it whenever the craving strikes! Happy spreading!
Health Benefits of Hazelnut Butter You Should Know
When you whip up a batch of homemade hazelnut butter, you’re not just indulging in a delicious treat; you’re also unlocking a treasure trove of health benefits. Hazelnuts are packed with nutrients that can significantly enhance your diet, making your homemade spread not just better in taste but also a powerhouse of nutrition.
One of the standout features of hazelnuts is their heart-healthy fats. Rich in monounsaturated fats, which are the good kind, hazelnut butter can help lower bad cholesterol levels while boosting the good. This can lead to a healthier heart and potentially reduce the risk of heart disease. Moreover, hazelnuts are loaded with antioxidants, particularly vitamin E, which is crucial for combating oxidative stress in the body. This vitamin not only supports skin health but also plays a role in maintaining eye health and reducing inflammation.
Furthermore, hazelnut butter is a great source of plant-based protein, making it an excellent addition to your meals if you’re looking to boost your protein intake. This is particularly beneficial for vegetarians or those cutting back on meat. Additionally, it’s rich in essential minerals such as magnesium, calcium, and phosphorus, which contribute to bone health, energy production, and overall metabolic function.
Incorporating hazelnut butter into your diet is simple and can add more than just flavor; it can enhance the nutritional value of your meals. Spread it on whole-grain toast, mix it into smoothies, or use it as a base for delicious salad dressings. The versatility combined with its health advantages makes hazelnut butter a worthwhile addition to your kitchen repertoire, encouraging not just a healthier lifestyle but also delighting your taste buds!
So, as you experiment with your homemade hazelnut butter, remember that every scoop is packed with nourishing goodness that’s almost impossible to find in mass-produced varieties. Enjoy the process and the health perks that come with your culinary adventure!
Comparing Homemade and Store-Bought Hazelnut Butter
When it comes to hazelnut butter, you might be torn between the convenience of store-bought options and the allure of making your own at home. Here’s a delightful comparison that highlights why whipping up your own hazelnut butter is a choice worth considering.
Firstly, freshness and flavor play a huge role in the homemade versus store-bought debate. When you prepare hazelnut butter yourself, you control the roasting process, which can profoundly impact the flavor profile. Freshly roasted hazelnuts release oils that give your butter a rich, nutty taste that often can’t be matched by commercial varieties. Plus, you can tweak the roast to your liking-go for a short roast for a milder taste, or roast longer for a deeper, more robust flavor.
Another significant factor is ingredient quality. Store-bought hazelnut butter can sometimes include additives, sugars, or stabilizers that you may not want. In contrast, when you make it at home, the ingredient list is simple and clean-just hazelnuts and perhaps a pinch of salt. This transparency allows you to control what goes into your body, ensuring that you’re getting all the health benefits without any unwanted extras.
Practical Tips for Comparison
- Cost: Making hazelnut butter at home can also be more economical, particularly if you buy nuts in bulk. Store-bought versions can come with a hefty price tag for just a small jar.
- Customizability: Homemade hazelnut butter allows for creative freedom. Want to add a touch of chocolate or swirl in some maple syrup? Go for it! This level of customization is typically not available with mass-produced options.
In summary, whether it’s about enjoying superior taste, selecting quality ingredients, or experimenting with flavors, crafting your own hazelnut butter is both rewarding and delicious. Embrace the process and enjoy the personalized touch that only homemade can offer!
Creative Ways to Use Hazelnut Butter in Recipes
There’s something magical about hazelnut butter that makes it perfect for a variety of delicious creations in the kitchen. Its creamy, nutty flavor can enhance both sweet and savory dishes, making it a versatile ingredient worth exploring. Here are some creative ways to incorporate hazelnut butter into your everyday recipes that will leave your taste buds dancing with joy.
Start your morning off right by spreading hazelnut butter on whole-grain toast or pancakes. For a delightful twist, add sliced bananas and a sprinkle of cinnamon or drizzle some honey on top. This combination not only packs a nutritious punch but also fuels your day with rich flavors. If you’re in a rush, mix a tablespoon of hazelnut butter into your smoothie for a boost of creaminess and nutrients-try pairing it with banana, spinach, and almond milk.
For a snack or light dessert, consider creating a simple fruit dip. Combine hazelnut butter with a splash of maple syrup and a touch of vanilla extract. This dip is fantastic with apple slices, strawberries, or even celery sticks for a crunchy contrast. If you’re feeling adventurous, use hazelnut butter as a filling for energy balls; mix it with oats, dark chocolate chips, and a touch of honey, roll into bite-sized balls, and refrigerate for an on-the-go treat.
Moving to the savory side, hazelnut butter can elevate dressings and sauces. Try whisking it with olive oil, balsamic vinegar, and a touch of garlic for a creamy salad dressing that adds depth to any greens. You can also stir it into your favorite stir-fry sauce for a unique flavor profile that pairs beautifully with chicken or tofu. The possibilities are truly endless, so feel free to get creative and explore how hazelnut butter can enhance your meals in ways you never imagined!
Troubleshooting Common Hazelnut Butter Issues
Creating hazelnut butter can feel like a delightful adventure in the kitchen, but sometimes, you might encounter a few bumps along the way. Whether it’s graininess or difficulty achieving that creamy consistency, troubleshooting these common issues can help you craft a perfect batch that rivals store-bought options.
One of the most frequent problems is ending up with a grainy texture. This often occurs when the hazelnuts aren’t processed long enough or if they’re too dry. To fix this, simply keep your food processor running for a bit longer. As the nuts break down, they will first turn into a flour-like consistency, and then you’ll notice it gradually smoothening out. If your nuts are particularly dry, consider roasting them slightly before blending. Heat enhances the oils, helping to achieve that silky finish you desire.
Another common hurdle can be achieving the right flavor. If your homemade hazelnut butter tastes a bit bland, adding a pinch of salt can make a world of difference! Alternatively, incorporating sweeteners such as honey or maple syrup can enhance the overall taste without overwhelming the natural nuttiness. If you want to step it up even further, try adding a splash of vanilla extract or a hint of cinnamon for warmth and depth.
Sometimes, separation occurs, causing the oil to rise to the top. Don’t fret-this is natural! Simply stir your hazelnut butter before serving, and it should blend back together nicely. If you prefer a smoother blend from the get-go, consider stirring in a small amount of neutral oil (like avocado or grapeseed oil) during processing. This can help stabilize the texture and prevent future separation.
Finally, if you find your hazelnut butter is too runny, it might be a sign you’ve over-processed it. To remedy this, simply try adding a small amount of additional nuts and pulse again until you reach your desired consistency. With these tips in hand, you’ll be well on your way to making an irresistible hazelnut butter that outshines anything from the store!
Tips for Experimenting with Nut Butters
Experimenting with nut butters can turn an ordinary cooking session into a creative culinary adventure! When it comes to hazelnut butter, the possibilities extend far beyond the classic recipe. Let’s dive into some tips that will make your nut butter experience both fun and fulfilling.
Start by playing with the texture of your hazelnut butter. If you prefer a creamy spread, blend your nuts until they’re completely smooth. For a chunky variation, reserve a handful of roasted hazelnuts, chop them coarsely, and fold them into your butter after the initial blending. This adds a delightful crunch that elevates every bite. Remember, roasting your nuts enhances the flavor, so don’t skip this step. Lightly roasting not only brings out the oils but also adds a richer taste, turning your butter into a gourmet treat.
Incorporating different flavors is another fantastic way to customize your hazelnut butter. Consider adding spices like cinnamon or nutmeg for warmth, or a dash of sea salt to enhance sweetness. For a sweet twist, mix in honey or maple syrup, or try adding dark chocolate melted into your butter for an indulgent spread. Even a touch of espresso can give your nut butter a bold kick, perfect for coffee lovers. Be sure to taste as you go-this will help you land on the perfect balance of flavors.
Exploring oil options can also impact the final product. While hazelnuts have their own natural oil, experimenting with other oils can modify the texture. A splash of coconut oil or a neutral option like grapeseed oil can create an even silkier consistency, especially if you wish to keep your butter from hardening in the fridge. This is particularly handy if you enjoy spreading it on toast or pancakes!
Lastly, don’t hesitate to merge your hazelnut butter with other nut butters for a unique blend. Mixing with almond butter can provide a delightful contrast and extra creaminess. Just make sure to keep the flavors balanced and adjusted to your taste preferences. Making nut butter should be a joyous process, so embrace the flexibility and let your kitchen be a space of creativity!
Why Homemade Nut Butter is Worth It
Making your own nut butter is not just a fun kitchen project; it opens up a world of flavor and health benefits that store-bought jars simply can’t match. Homemade hazelnut butter allows you to control every ingredient, ensuring that what you spread on your toast is as nutritious as it is delicious. Have you ever wondered what’s actually in those glossy jars lining the supermarket shelves? Many contain additives and preservatives, which can disrupt the pure, nutty taste and health properties you get from making it yourself.
One of the most exciting aspects of crafting your own hazelnut butter is the sheer level of customization. You can play with the richness-lightly roast your nuts for a deeper flavor or blend in a hint of vanilla or cocoa powder for a gourmet twist. Imagine a creamy spread that perfectly suits your taste buds, with no compromise on quality. For example, if you adore a sweeter profile, you can easily stir in honey, maple syrup, or even a pinch of sea salt to enhance the natural flavors, creating a product uniquely yours.
Beyond flavor, homemade nut butter offers superior freshness. There’s nothing quite like the aroma of freshly blended hazelnuts wafting through your kitchen. Store-bought options often sit on shelves for months, losing their vibrant taste and nutritional value. By making your own, you ensure maximum freshness and the highest quality, giving you a product that not only tastes better but is also better for you.
The process is simple and accessible. All you need is a good food processor, some fresh hazelnuts, and a touch of creativity. There’s an empowering satisfaction that comes from crafting your own food that can turn an ordinary day into an extraordinary one. Plus, once you’ve mastered hazelnut butter, you can explore a whole range of nut butters, expanding your culinary repertoire while enjoying all the health benefits and deliciousness that come with it. So why settle for store-bought when you can make something that’s truly tailored to your tastes? Embrace the homemade lifestyle-it’s a rewarding journey that makes every spread a celebration!
Nut Butter Safety and Best Practices
Creating your own hazelnut butter is not only a culinary delight but also requires some essential safety practices to ensure your homemade treat is delicious and safe to eat. Understanding how to manage ingredients and maintain cleanliness will help you enjoy your creations without worry.
First and foremost, always start with clean tools. Before you begin making your hazelnut butter, wash your hands thoroughly and ensure that all your equipment-such as the food processor, measuring cups, and spatula-is spotless. This simple step helps prevent any contamination. It’s also a good idea to use fresh, high-quality hazelnuts, as this impacts both safety and flavor. Always check for signs of spoilage, like off smells or discoloration, as rancid nuts can ruin your butter and pose health risks.
When you blend your hazelnuts, be aware of temperature control. If you’re roasting your nuts, don’t leave them unattended, as they can go from perfectly roasted to burnt in a matter of seconds. A quick way to ensure they roast evenly is to shake or stir them occasionally. Once roasted, allow them to cool before processing; this prevents overheating the food processor and the nuts, which could affect the flavor and texture of your hazelnut butter.
After crafting your butter, proper storage is key to maintaining freshness and safety. Transfer your hazelnut butter to a clean, airtight container and refrigerate it. Homemade nut butters can be stored for about 2 to 3 weeks. To further prolong shelf life, consider adding a small amount of vitamin E oil; it’s a natural preservative that helps keep your butter fresh longer.
Also, label your jars with the date they were made, so you’ll always know when it’s time to enjoy or replace. With these safety practices in mind, you can confidently dive into making your own hazelnut butter, knowing you’re taking the necessary steps to keep your delicious creation safe and scrumptious!
FAQ
markdown
Q: How do I make hazelnut butter creamier?
A: To achieve a creamier texture in your hazelnut butter, blend the nuts for a longer period, pausing to scrape down the sides as needed. You can also add a small amount of neutral oil, such as coconut or canola oil, to enhance creaminess without altering flavor.

Q: What can I use instead of sugar in my hazelnut butter?
A: Instead of sugar, try natural sweeteners like honey, maple syrup, or agave nectar. Start with a small amount, blending it into the hazelnut butter, and adjust to your taste for a healthier, sweetened version.

Q: Can I roast hazelnuts for butter without a blender?
A: Yes, you can roast hazelnuts and mash them using a mortar and pestle or a food processor for homemade hazelnut butter. Just be patient, as achieving a smooth consistency may take longer without a high-powered blender.

Q: How long does homemade hazelnut butter last?
A: Homemade hazelnut butter can last up to two weeks when stored in an airtight container in the refrigerator. For longer shelf life, consider freezing it; it can last up to three months in the freezer.

Q: What is the best way to incorporate chocolate into hazelnut butter?
A: To incorporate chocolate into your hazelnut butter, melt some high-quality dark chocolate and blend it with your hazelnut butter until smooth. Start with a small amount of melted chocolate and adjust based on your personal preference.

Q: Can I add spices to my hazelnut butter for flavor?
A: Absolutely! Adding spices like cinnamon, nutmeg, or even a pinch of sea salt can enhance the flavor of your hazelnut butter. Start with a pinch and blend well before tasting to achieve your desired flavor profile.

Q: What is the nutritional difference between homemade and store-bought hazelnut butter?
A: Homemade hazelnut butter is typically more nutritious than store-bought versions, often lacking added sugars, preservatives, or unhealthy oils. You control the ingredients and can customize it to your dietary needs, making it fresher and healthier.

Q: How can I make my hazelnut butter less gritty?
A: To reduce grittiness in hazelnut butter, ensure you blend the nuts until completely smooth. If it's still gritty, continue blending and consider adding a small amount of oil to help achieve a creamy consistency. For more tips, check the Troubleshooting Common Hazelnut Butter Issues section of our article.
In Conclusion
You’ve now unlocked the secret to making homemade hazelnut butter that’s not only healthier but also far more delicious than anything you can buy in stores! With just one simple ingredient, you can elevate your kitchen game and enjoy this versatile spread in countless ways. Don’t wait-gather your hazelnuts and get started on your homemade adventure today!
If you loved this recipe, why not explore more tasty delights? Check out our guides on how to make almond butter and creative uses for nut butters to keep the flavor coming. And if you have questions or want to share your own tips, drop a comment below-we’d love to hear from you!
For more innovative recipes and kitchen hacks, consider subscribing to our newsletter. It’s your front-row seat to new recipes, exclusive tips, and culinary inspiration. Your homemade culinary journey begins here, so get creative and experiment with flavors that excite your taste buds!
Get our latest guides, news, and insights highlighted in your Google Search & AI Overviews.










