

No Bake Cheesecake Bars are the ultimate treat for anyone craving creamy goodness without the hassle of an oven. Perfect for busy lifestyles, these bars blend the rich flavors of cheesecake with a buttery graham cracker crust, creating an easy-to-make dessert that’s ready in no time. Whether you need a quick snack for a gathering or a sweet indulgence for yourself, these no-bake delights are your answer. They’re not only simple to prepare but also wonderfully versatile-feel free to top them with your favorite fruits or sauces to match any occasion. Get ready to impress your friends and family with these delightful bars that bring joy to every bite! Dive in and discover how you can transform a few simple ingredients into a luxurious dessert.
Classic No Bake Cheesecake Bar Recipe You’ll Love
When you’re in the mood for something sweet but want to avoid the fuss of baking, no-bake cheesecake bars offer a perfect solution. With their creamy texture and lightness, they’re as easy to prepare as they are delicious to eat. This classic no-bake cheesecake bar recipe is a go-to for any gathering or simply when you crave a dessert that feels indulgent without requiring hours in the kitchen.
To whip up these delightful bars, you’ll need only a handful of simple ingredients. The base consists of a buttery graham cracker crust, while the filling is a delightful blend of cream cheese, sugar, and a splash of vanilla. The key to achieving that smooth, creamy texture lies in using softened cream cheese and beating it well until fluffy. For an extra hint of brightness and tang, you can also fold in some sour cream or Greek yogurt.
Here’s a straightforward recipe you can follow:
Classic No Bake Cheesecake Bars Recipe
Ingredients:
- For the crust:
- 1 ½ cups graham cracker crumbs
- ½ cup unsalted butter, melted
- ¼ cup granulated sugar
- For the cheesecake filling:
- 16 oz cream cheese, softened
- 1 cup powdered sugar
- 1 tsp vanilla extract
- 1 cup heavy cream, whipped to stiff peaks
Instructions:
- In a medium bowl, combine graham cracker crumbs, melted butter, and granulated sugar. Mix until the crumbs are evenly coated.
- Press the mixture firmly into a lined 9×9 inch baking pan to form the crust.
- In a separate bowl, beat the softened cream cheese until smooth. Gradually add the powdered sugar and vanilla, mixing until well combined.
- Gently fold in the whipped cream until fully incorporated, ensuring not to deflate the mixture.
- Spread the cheesecake filling over the prepared crust and smooth the top with a spatula.
- Chill in the refrigerator for at least 4 hours or until set. Cut into squares and serve.
With this no-bake cheesecake bar recipe, you’ve got a winning dessert that not only pleases the palate but also keeps things easy and stress-free. The combination of the buttery crust and the silky filling creates a harmony of flavors that everyone will love! Plus, these bars are perfect for customizing with your favorite toppings, whether that’s fresh fruit, chocolate drizzle, or a sprinkle of nuts. Enjoy making them and watch them disappear in no time!
Essential Ingredients for Creamy Cheesecake Delight
To create the perfect creamy no-bake cheesecake bars, it all begins with the right ingredients. Each component plays a vital role in ensuring your bars are not just tasty, but also smooth and delightful in texture. The main ingredients come together seamlessly, creating a dessert that’s as enjoyable to make as it is to eat.
Start with the crust. A classic graham cracker base adds that satisfying crunch and a hint of sweetness. The key to a great crust is combining graham cracker crumbs with melted unsalted butter and granulated sugar. This blend should be pressed firmly into your pan to form a sturdy base that holds up to the luscious filling. If you want to switch things up, consider using crushed cookies like Oreos or gingersnaps for a different flavor profile.
Moving to the filling, softened cream cheese is essential. It should be at room temperature to mix smoothly; otherwise, you might end up with lumps. Pair it with powdered sugar for sweetness and a splash of vanilla extract for depth. The real magic happens when you fold in whipped cream. This not only lightens the mixture but also gives it that signature creamy texture. For an additional kick, you can mix in some sour cream or Greek yogurt. This not only enhances the flavor but also adds a tangy note that balances the sweetness.
Here’s a quick breakdown of the essential ingredients:
- For the crust:
- 1 ½ cups graham cracker crumbs
- ½ cup unsalted butter, melted
- ¼ cup granulated sugar
- For the cheesecake filling:
- 16 oz cream cheese, softened
- 1 cup powdered sugar
- 1 tsp vanilla extract
- 1 cup heavy cream, whipped to stiff peaks
With these essentials on hand, you’re well on your way to whipping up a dessert that’s sure to impress without any baking fuss. Embrace the joy of creating these bars, and don’t hesitate to experiment with mix-ins or toppings to make them uniquely yours!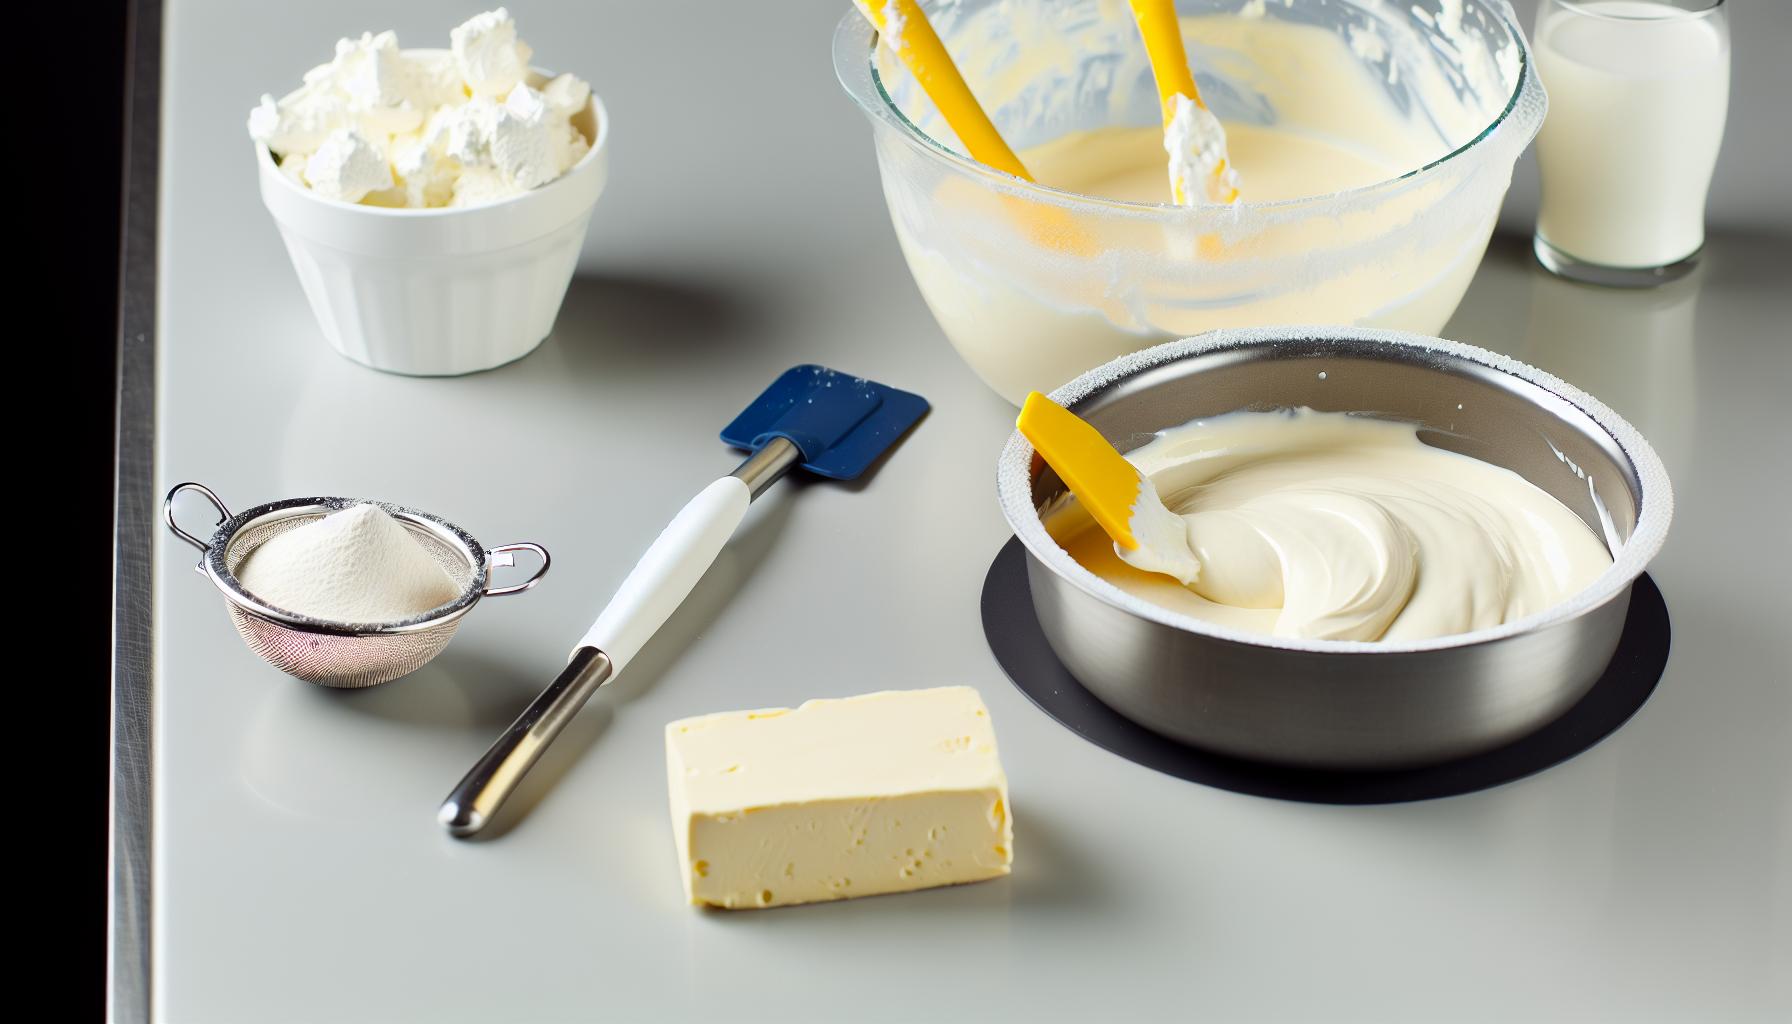
Tips for Perfect No Bake Cheesecake Texture
To achieve that wonderfully creamy texture in your no-bake cheesecake bars, attention to detail during preparation is key. One crucial factor is ensuring your cream cheese is at room temperature; this prevents lumps and allows for a smooth, cohesive filling. No one wants a cheesecake with a bumpy texture, so take a little time to let it warm up before mixing.
When incorporating your whipped cream into the filling, gently fold it in rather than stirring vigorously. This technique retains the airiness that whipped cream provides, creating a light and fluffy consistency. Think of it like embracing a soft cloud-your cheesecake should have that delightful fluffy feel instead of being dense.
Using powdered sugar instead of granulated sugar helps dissolve quickly, ensuring your filling is silky smooth. Additionally, a splash of vanilla extract elevates the flavor; just be cautious with the quantity if you’re also adding other flavorings later. For the best results, consider chilling your mixing bowl and beaters before whipping the cream. A cold environment helps the cream whip up faster and increases its volume, providing that perfect texture for your bars.
Lastly, don’t skip on the chilling time after assembling your cheesecake bars. Allow them to set in the refrigerator for at least four hours, or even overnight if you can wait. This time isn’t just about getting cold; it’s essential for allowing flavors to meld and stabilizing the texture. The result will be perfectly creamy cheesecake bars ready to impress with each bite!
Creative Flavor Variations to Try Today
When it comes to no-bake cheesecake bars, the possibilities for flavors are virtually endless, making every batch a delightful new adventure. Whether you’re in the mood for something fruity, chocolaty, or uniquely spiced, incorporating creative flavor variations can transform your cheesecake bars and wow your family and friends!
One simple way to switch things up is by adding fruit. You can fold in pureed fruits like strawberries, raspberries, or mango into the cheesecake mixture for a refreshing burst of flavor. Alternatively, top your bars with a layer of fruit preserves or a homemade fruit compote after chilling. For an extra touch, consider adding a dash of lemon or lime juice to brighten up the filling. The citrus contrast will not only elevate the flavor but also balance out the richness of the cream cheese beautifully.
Chocolate lovers will be thrilled to know that adding melted chocolate to your cheesecake filling creates a creamy chocolate dream. Try using semi-sweet, dark, or even white chocolate for varied flavor profiles-just make sure to adjust the sweetness accordingly. You might also consider incorporating cocoa powder into the base before chilling for a rich cocoa flavor, or swirling in some chocolate ganache on top just before serving for that extra wow factor.
And don’t overlook spices and extracts! Adding a teaspoon of almond extract can bring a lovely depth of flavor, or try incorporating spices like cinnamon, nutmeg, or even pumpkin spice for a seasonal twist. If you’re feeling adventurous, experiment with matcha green tea powder for a unique and vibrant flavor.
In summary, experimenting with creative flavor variations is a fun way to personalize your no-bake cheesecake bars. From luscious fruits to decadent chocolates and exciting spices, your next batch can be an imaginative reflection of your taste-encouraging you to enjoy the process of baking as much as the delicious dessert that awaits. So, gather your ingredients, unleash your inner chef, and prepare to impress with flavors that are as bold as your creativity!
Make-Ahead Tips: Preparing Your Cheesecake Bars
Preparing cheesecake bars ahead of time not only saves you stress during busy moments but also enhances the flavors as they chill. No-bake cheesecake bars can be prepped days in advance, making them perfect for gatherings and last-minute get-togethers. To ensure they’re nothing short of fantastic when it’s time to serve, follow these simple yet effective make-ahead tips.
First, always start by thoroughly reading through your recipe. Gather all necessary ingredients and ensure they are at room temperature – this makes for a smoother mixture. Preparing the crust ahead of time is a great idea. You can make the crust a day or two in advance, let it set in the fridge, and then add the cheesecake filling just before serving. This way, the crust has time to firm up properly.
When you’re ready to mix the filling, take your time. Beat the cream cheese until it’s completely smooth before adding any other ingredients. This step is crucial for achieving that dreamy texture we love in cheesecake bars. Once combined, pour the filling over your prepared crust and smooth it out. Cover the dish tightly with plastic wrap or foil and place it in the fridge. The bars benefit from at least four hours of chilling, but overnight is even better. This allows the flavors to meld beautifully and the filling to set up nicely.
If you want to add toppings, consider doing that right before serving. Fresh fruits, whipped cream, or a drizzle of chocolate ganache not only add visual appeal but taste great when freshly added. This way, your cheesecake bars look their best and provide a delightful contrast in texture when served.
Here’s a quick recap of the steps:
- Prepare the crust: Make ahead and refrigerate until firm.
- Make the filling: Beat cream cheese until smooth for the best texture.
- Chill: Allow to set in the fridge for at least 4 hours; overnight is best.
- Add toppings: Fresh toppings should be added just before serving for maximum freshness.
By following these tips, you can enjoy a stress-free cheesecake experience, confident that your delicious treats are ready to impress at any moment!
Serving Suggestions for the Ultimate Experience
When it comes to serving no-bake cheesecake bars, presentation and pairing are key to elevating this delicious dessert experience. These creamy bites of heaven can be dressed up for special occasions or enjoyed simply for a cozy night in. Here’s how to serve them for ultimate enjoyment.
Start with a clean and elegant setup. Use a sharp knife to cut your cheesecake bars into neat squares or rectangles for a professional look. For garnish, a dollop of freshly whipped cream adds a touch of luxury and a soft texture that perfectly contrasts the smooth cheesecake. You can also dust the top with a sprinkle of cocoa powder or powdered sugar just before serving to create a polished finish.
### Toppings and Pairings
Consider enhancing your cheesecake bars with various toppings that not only complement their creamy richness but also add visual appeal. Here are some ideas to experiment with:
- Fresh Fruits: Strawberries, blueberries, or raspberries provide a burst of color and acidity that balances the sweetness of the cheesecake.
- Fruit Sauces: Drizzle raspberry or caramel sauce around the plate or on top of the cheesecake for an eye-catching presentation.
- Chocolate Ganache: A warm drizzle of ganache can transform your bars into an indulgent treat, perfect for chocolate lovers.
- Nuts and Crunch: Chopped nuts or crushed graham crackers sprinkled on top add a delightful crunch and texture contrast.
### Creative Serving Ideas
You could also make it interactive by offering a “build-your-own cheesecake bar” station where guests add their favorite toppings. Just lay out several options like various fruit toppings, whipped cream, and syrups. This engages everyone and allows for customization, making it fun for kids and adults alike!
For a more formal event, serve cheesecake bars on a decorative platter, garnished with mint leaves or edible flowers for a pop of color. Provide small dessert forks or skewers for easy grabbing-perfect for cocktail parties or picnics where guests might prefer bite-sized portions.
Incorporating these serving suggestions will not only enhance the visual appeal of your no-bake cheesecake bars but also create a delightful experience for you and your guests. Enjoy being creative and remember, these bars are already a treat, so make the most of that creamy goodness!
Storing and Freezing Your Cheesecake Bars
No-bake cheesecake bars are a dream dessert-easy to prepare and deliciously creamy. But what happens when you have leftovers or want to make them ahead for a special occasion? Storing and freezing these treats correctly ensures that every bite remains just as delightful as the first.
To store your cheesecake bars, place them in an airtight container. If you’ve already sliced them, consider separating the layers with parchment paper to prevent sticking. They can be stored in the refrigerator for up to five days. This is a great option if you want to enjoy a sweet treat throughout the week without compromising quality.
If you’re looking to keep your cheesecake bars for a longer time, freezing is a fantastic solution. Start by ensuring the bars are fully set and chilled. Slice them into portions, and wrap each piece tightly in plastic wrap. For added protection against freezer burn, place the wrapped bars in a freezer-safe bag or container. They can be stored in the freezer for about two to three months. When you’re ready to enjoy them, simply transfer the desired amount to the refrigerator and let them defrost overnight.
- Refrigerator Storage: Up to 5 days in an airtight container.
- Freezer Storage: Wrapped tightly, up to 2-3 months.
Having these bars ready to go means you can indulge in a moment of sweetness anytime. Plus, they’ll maintain their creamy texture and flavor, making them a convenient and enjoyable treat to share with family and friends!
Common Mistakes to Avoid for Success
Creating no-bake cheesecake bars can be a delightful experience, but even the best intentions can lead to hiccups if you’re not careful. Here are some common pitfalls to watch out for to ensure your dessert turns out perfectly every time.
One major mistake is not letting the cream cheese soften to room temperature before using it. This can lead to a lumpy filling, making your cheesecake bars far from smooth and creamy. To achieve that velvety texture you crave, set out your cream cheese for about an hour before you start. Another tip is to avoid overmixing your filling once you’ve added in the whipped cream or any other light components. Overmixing can deflate the air you’ve incorporated, leaving you with a denser texture instead of the airy lightness that makes no-bake cheesecakes such a treat.
Using the wrong ratio of ingredients can also derail your plans. Be mindful of what you’re measuring-especially when it comes to the crust. Too much butter can lead to a greasy base, while too little may result in a crust that crumbles rather than holds together nicely. Aim for the consistency of wet sand; it should hold together when pressed. Testing your bars’ set time is crucial too. If you cut into your cheesecake bars before they’ve had enough time to chill in the refrigerator, you’ll risk a gooey mess instead of perfectly layered slices. Generally, allow at least four hours of chilling time; overnight is even better!
Lastly, don’t skip the parchment paper lining in your dish. This simple step makes for easy removal of your cheesecake bars, preventing any potential disasters or ruined edges. By keeping these tips in mind, you can navigate around common mistakes and serve up a batch of no-bake cheesecake bars that are not only visually stunning but a creamy dream to eat!
No Bake Cheesecake Bar Pairings and Complements
Pairing your no-bake cheesecake bars with the right complements can elevate your dessert experience to a whole new level. Think about adding contrasting flavors and textures that will balance out the creamy richness of the cheesecake while enhancing its overall appeal. For instance, a drizzle of homemade berry sauce can introduce a tart and fruity note that cuts through the richness, while a light dusting of cocoa powder or chocolate shavings adds a sweet touch.
Flavor Pairings That Shine
When planning your pairings, it’s fun to get creative with flavor combinations. Here are a few ideas to inspire you:
- Citrus Zest: Grated lemon or lime zest sprinkled on top adds a fresh burst that brightens the flavor.
- Nut Crust Crumble: Add a sprinkle of crushed nuts, such as pistachios or almonds, for a satisfying crunch.
- Caramel Drizzle: A warm caramel sauce can bring a delightful sweetness that contrasts beautifully with rich chocolate or vanilla varieties.
- Whipped Cream: A swirl of freshly whipped cream on top not only makes it look stunning but adds a light and airy element.
Textural Complements
To enhance the textural experience of your cheesecake bars, consider incorporating elements that provide both crunch and chew. Adding a layer of cookie crumbs or graham cracker crumble on top creates a delightful bite. You can also serve your cheesecake bars alongside a scoop of ice cream or a dollop of yogurt, which adds a creamy contrast while keeping things fun and indulgent.
Perfect Beverage Pairings
Don’t forget about drinks! The right beverage can complement your cheesecake bars perfectly:
- Tea: A cup of chamomile or green tea offers a calming contrast to the sweetness.
- Coffee: The rich flavors of coffee, whether hot or iced, pairs beautifully with cheesecake’s creamy texture.
- Bubbly: A glass of sparkling water or champagne can bring a celebratory feel to your dessert setting.
These ideas will help you create a deliciously rounded experience with your no-bake cheesecake bars. Embrace your inner creator and don’t hesitate to experiment with different flavors, textures, and pairings until you find your perfect combo!
Healthier Alternatives for Guilt-Free Enjoyment
When it comes to enjoying desserts, it’s always exciting to find ways to indulge without the guilt. No-bake cheesecake bars are naturally versatile, allowing you to swap in healthier options without sacrificing that creamy goodness you crave. One simple way to lighten up your bars is by using Greek yogurt instead of cream cheese. Greek yogurt not only cuts down on calories and fat but also adds a protein boost, making your treat a bit more satisfying.
If you’re mindful of sugars, consider substituting refined sugars with natural sweeteners like honey, agave nectar, or stevia. These alternatives provide sweetness without the blood sugar spike, giving you a guilt-free experience. Additionally, you can use a blend of nut butter and oats for the crust instead of traditional graham crackers. Not only does this add fiber, but it also brings healthy fats into the mix.
Another tip is to incorporate fruit, either in the filling or as a topping. Fresh berries or banana slices can enhance flavor and texture while adding vitamins and minerals to your dessert. For example, blending ripe bananas into the filling can create a naturally sweet and creamy base with a hint of tropical flavor.
Lastly, portion control can be your best friend. Instead of cutting large squares, consider making mini bars or using silicone molds for single serving sizes. This way, you satisfy your sweet tooth without overindulging. Enjoy experimenting with these healthier alternatives; you’ll find that a little creativity in the kitchen can lead to delicious and guilt-free results!
How to Decorate Your Cheesecake Bars Beautifully
Decorating your no-bake cheesecake bars is a wonderful way to showcase your creativity and elevate a simple dessert into something truly special. With just a few thoughtful touches, you can turn these creamy delights into visually stunning treats that are as pleasing to the eyes as they are to the taste buds.
Start by considering a color contrast. Fresh fruits like strawberries, blueberries, and kiwi add vibrant colors that not only look beautiful but also enhance the flavor profile of your cheesecake. A sprinkle of zest from lemons or limes can brighten both the appearance and taste, making your bars pop with freshness.
Next, think about textural elements. A drizzle of chocolate ganache or a caramel sauce can create a gorgeous finish while adding a rich flavor dimension. Simply melt some chocolate or caramel and let it cool slightly before drizzling it over your bars. For an extra crunch, consider topping them with crushed nuts or graham cracker crumbs. Shredded coconut can also make for a fun, tropical touch.
For an elegant presentation, use piping bags to add dollops of whipped cream or Greek yogurt on top of each bar. Not only does this look professional, but it also allows for portion control. If you want to get fancy, try different piping tips to create unique designs! Finally, don’t forget to garnish with mint leaves or edible flowers to add an extra flair of sophistication.
With these simple decorating ideas, your no-bake cheesecake bars will not only taste fantastic but also look like they belong at a gourmet dessert table. It’s all about having fun and experimenting-there’s no right or wrong way to make them beautiful!
Frequently asked questions
Q: What is the best way to serve no bake cheesecake bars?
A: The best way to serve no bake cheesecake bars is chilled, straight from the refrigerator. For extra flair, top them with fresh fruit, chocolate drizzle, or whipped cream. Cut them into squares for easy, grab-and-go portions. For ideal presentation, use a sharp knife to ensure clean cuts.
Q: Can you make no bake cheesecake bars without cream cheese?
A: Yes! You can make no bake cheesecake bars without cream cheese by substituting it with Greek yogurt or cashew cream for a lighter, healthier option. This will still provide a creamy texture while keeping it simple and delicious. You might want to check the Healthier Alternatives for Guilt-Free Enjoyment section of the full article for more ideas.
Q: How long do no bake cheesecake bars last in the fridge?
A: No bake cheesecake bars typically last about 5 to 7 days in the fridge when stored in an airtight container. For longer storage, keep them in the freezer for up to 2 months. Just make sure to thaw them in the fridge before serving for the best texture.
Q: Can no bake cheesecake bars be made vegan?
A: Yes, no bake cheesecake bars can easily be made vegan by using ingredients like cashew cream or coconut cream instead of dairy, and a non-dairy yogurt alternative. Sweeteners like maple syrup can replace granulated sugar. Check the Creative Flavor Variations to Try Today section for more tips on achieving delicious flavors.
Q: What are some popular toppings for no bake cheesecake bars?
A: Popular toppings for no bake cheesecake bars include fresh berries, caramel or chocolate sauce, crushed nuts, and shredded coconut. For a more indulgent touch, consider adding whipped cream or even a drizzle of lemon glaze. These complement the creamy texture perfectly!
Q: How can I tell if my no bake cheesecake bars are set properly?
A: Your no bake cheesecake bars are set properly when they are firm to the touch and have a slight jiggle when you move the pan. If they feel overly soft, they may need more time in the fridge. For best results, allow them to chill for at least 4 hours or overnight.
Q: What should I do if my cheesecake bars are too soft?
A: If your cheesecake bars are too soft, ensure they’re chilled overnight for proper setting. If you’re still facing issues, consider adding a thickener like gelatin or cornstarch in future recipes. This will help achieve a firmer consistency. You can find troubleshooting tips in the Common Mistakes to Avoid for Success section.
Q: Can no bake cheesecake bars be frozen?
A: Yes, no bake cheesecake bars can be frozen. Wrap them tightly in plastic wrap and then place them in an airtight container. They can be frozen for up to 2 months. Thaw them in the refrigerator for a few hours before serving for the best taste and texture.
Final Thoughts
Ready to indulge in the creamy goodness of No-Bake Cheesecake Bars? These bars are the perfect grab-and-go treat for any occasion, combining simplicity with deliciousness! Whether you’re short on time or simply want a stress-free dessert, these delightful squares require no baking and can be whipped up in just minutes. Plus, they’re easily customizable-try adding fresh fruits or a drizzle of chocolate for an extra touch!
Don’t wait any longer-get in the kitchen and start making your own batch today! For more easy, delicious recipes, check out our guides on classic no-bake desserts and perfecting your cheesecake skills. If you love these cheesecake bars, consider signing up for our newsletter for more delightful recipes and kitchen tips! We’d love to hear your thoughts, so feel free to share your experience in the comments below. Enjoy your kitchen adventures and keep exploring new flavors!
Get our latest guides, news, and insights highlighted in your Google Search & AI Overviews.










