

If you’re a fan of chocolate and peanut butter, you’re in for a treat! These No Bake Reese’s Bars combine the best of both worlds in a chewy, chocolatey delight that can be whipped up quickly without the need for an oven. Perfect for those busy days when you crave something sweet but don’t have the time or energy to bake, this recipe is not only simple but also incredibly satisfying. With just a handful of ingredients, you can create a decadent dessert that will impress family and friends. Plus, these bars are easily customizable, allowing you to experiment and make them your own. So, grab your mixing bowl and let’s dive into this deliciously easy recipe that’s sure to become a household favorite!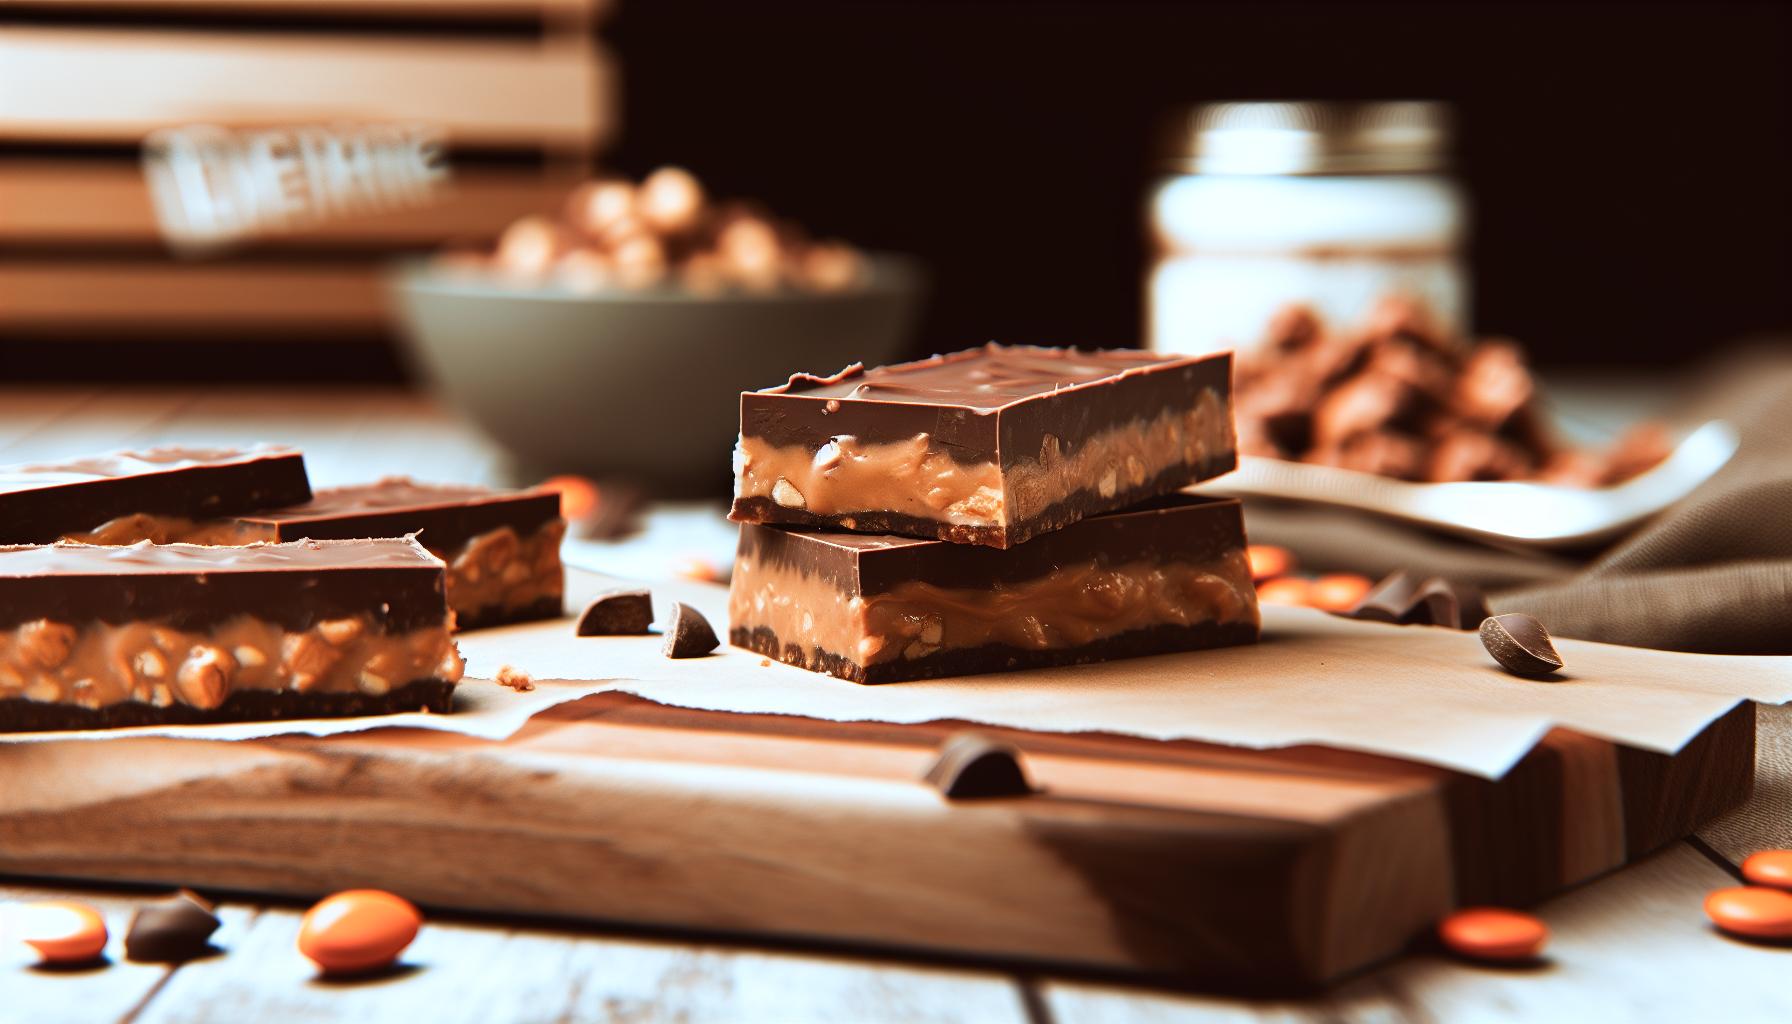
No-Bake Reese’s Bars: Culinary Simplicity Unleashed
There’s something undeniably magical about desserts that require no baking, especially when they combine creamy peanut butter and rich chocolate. No-bake Reese’s bars encapsulate this charm, transforming simple ingredients into a delightful treat that requires minimal effort and equipment. In just about 15 minutes of prep time, you can create a luscious, chewy dessert that’s sure to impress family and friends.
To start, you’ll need a handful of basic ingredients that you likely already have in your pantry: peanut butter, graham cracker crumbs, powdered sugar, and chocolate. These accessible items allow anyone, from novice cooks to seasoned bakers, to dive into this indulgent recipe without the intimidation of an oven. The beauty of no-bake bars lies in their flexibility; you can easily adjust the sweetness or add in extra ingredients like chopped nuts or even a sprinkle of sea salt on top for a sophisticated touch.
Once you’ve mixed your ingredients and pressed them into a pan, the hardest part of the process is the waiting. Letting the bars chill in the refrigerator allows the flavors to meld and the texture to set perfectly. With just a little patience, you’ll end up with a decadent dessert that showcases your creativity in the kitchen. This simple yet satisfying treat not only fills your sweet tooth craving but also brings a smile to everyone who shares in its enjoyment. Whether you’re making them for a special occasion, a casual get-together, or just to indulge yourself, no-bake Reese’s bars are a testament to the joy of easy, homemade deliciousness.
Key Ingredients for Irresistible Chocolatey Bars
The secret to the delectable charm of no-bake Reese’s bars lies in a handful of carefully chosen ingredients that come together to create a chewy, chocolatey masterpiece. Each element plays a vital role in delivering that irresistible flavor and texture that keeps everyone coming back for seconds.
Essential Ingredients
To craft these delightful bars, you will need:
- Peanut Butter: The star of the show! Creamy peanut butter brings a rich, nutty flavor and helps bind the bars together. Use a well-blended, smooth variety for the best results.
- Graham Cracker Crumbs: These provide a sweet crunch and act as the base of your bars. You’ll want to crush them finely for an even texture.
- Powdered Sugar: This ingredient adds sweetness and helps create that chewy consistency. It also contributes to the overall structure of the bars.
- Chocolate Chips: For the topping (or mixed in), chocolate chips are essential. You can choose semi-sweet for a classic flavor or dark chocolate for a richer taste. Melt them down for a smooth layer on top.
Variations and Enhancements
The beauty of these no-bake bars is their flexibility. Feel free to experiment with:
- Nut Butters: Try swapping out peanut butter for almond or cashew butter for a different flavor profile.
- Add-ins: Mix in some chopped nuts, mini marshmallows, or even crushed candy for texture and extra flavor.
- Flavor Enhancements: A pinch of salt or a splash of vanilla extract can elevate the flavors and create a more sophisticated taste.
By using these simple yet crucial ingredients, anyone can whip up a batch of no-bake Reese’s bars that are sure to impress. Enjoy the process of mixing and matching flavors to create a personalized treat that’s perfect for sharing-or indulging all by yourself! Remember, the charm of these bars is in their simplicity, so have fun and let your creativity shine in the kitchen.
Step-by-Step Guide to Crafting Your Bars
Creating no-bake Reese’s bars is not just a fun activity; it’s a delightful experience that fills your kitchen with mouthwatering aromas and leaves you with a sweet treat to enjoy. In just about 20 minutes, you can prepare these chewy, chocolatey bars that are sure to become a favorite. Let’s dive into the straightforward steps to craft this delicious dessert with ease.
Begin by gathering your ingredients: creamy peanut butter, graham cracker crumbs, powdered sugar, and chocolate chips. Once you have everything ready, it’s time to mix. In a large mixing bowl, combine 1 cup of peanut butter with 1 cup of powdered sugar. Stir until the mixture becomes smooth and well-combined. Next, add in 2 cups of finely crushed graham crackers and mix until the crumbs are fully incorporated. The blend will be thick and slightly crumbly, but should hold together when pressed.
After achieving the perfect mixture, grab a lined 9×9-inch baking pan. Press the mixture firmly into the pan, spreading it out evenly. Using a spatula or the back of a spoon can help create a smooth surface. The more compact it is, the better it will hold together once set.
Now, let’s prepare the chocolate topping. In a microwave-safe bowl, melt about 1 cup of chocolate chips. Heat them in the microwave in 30-second increments, stirring in between, until the chocolate is fully melted and glossy. Pour the melted chocolate over the pressed mixture in the pan, spreading it evenly with a spatula for a perfect layer.
Finally, refrigerate the pan for at least 1 hour or until the bars are firm. Once set, lift the bars out using the parchment paper, cut them into squares, and get ready to enjoy! Whether you keep them for yourself or share with friends, these luscious no-bake Reese’s bars are sure to impress everyone with their rich flavor and deliciously chewy texture. Happy baking!
Perfecting the Chewy Texture Every Time
Creating the perfect chewy texture in your no-bake Reese’s bars can make all the difference between a satisfying treat and a dry crunch. Achieving that delightful chewiness is all about balancing your ingredients and the amount of mixing you do. Here are some simple tips to ensure each bite is irresistibly soft and oh-so-delicious.
The key element here is the ratio of creamy peanut butter to graham cracker crumbs. A good rule of thumb is to maintain a balance where the peanut butter binds the crumbs without overpowering them. Typically, using 1 cup of peanut butter to 2 cups of graham cracker crumbs works well. This ratio allows the bars to hold together nicely while keeping them creamy inside. If you prefer a softer bar, consider adjusting the ratio to include a little more peanut butter, but avoid going overboard-too much can make your bars too oily.
Another crucial factor is how you mix the ingredients. You want to combine the peanut butter and powdered sugar until smooth before adding the graham cracker crumbs. Mixing well but not excessively helps maintain that chewy texture without turning the mixture into a paste. Once the crumbs are added, fold them gently into the mixture. Use a spatula or your clean hands to avoid overworking the dough, which can lead to a denser outcome.
Finally, the pressing step is vital. Make sure to pack the mixture firmly into your baking pan, but don’t mash it too hard. A gentle yet firm pressure will help the bars set properly while retaining that desirable chewiness. Leave them to chill in the refrigerator for at least an hour to help them set up. The result will be bars that are not just chocolatey and rich, but also wonderfully chewy, making each bite an experience to savor. Enjoy your sweet creation, knowing you’ve mastered the art of chewy no-bake bars!
Delicious Variations to Elevate Your Treats
To make your no-bake Reese’s bars truly stand out, consider exploring a variety of delicious twists that add new flavors and textures. You don’t need to stick to the classic recipe. Let your creativity shine with these simple yet tasty variations that can elevate your treats to new heights.
One delightful option is to incorporate chopped nuts, such as pecans or walnuts, into the mixture. This not only adds a satisfying crunch but enhances the overall flavor profile. Simply fold in about ½ cup of finely chopped nuts after mixing in your graham cracker crumbs. For a chocolatey twist, try using crushed Oreos instead of graham crackers. This will give your bars a rich, cookie-like texture that pairs wonderfully with the peanut butter.
Another fun variation includes additional flavorings. A splash of vanilla extract can deepen the overall taste, while a pinch of sea salt can intensify the sweetness of the chocolate layer. You can also finish your bars with a drizzle of melted white chocolate or caramel to make them extra indulgent. Just melt the chocolate or caramel in a microwave-safe bowl and use a fork to drizzle it over the top before chilling the bars.
If you’re looking for a healthier angle, consider substituting some of the ingredients to cater to specific diets. For example, you can use almond butter instead of peanut butter for a nutty twist, or opt for gluten-free graham crackers to accommodate gluten-sensitive friends. You could even add a scoop of protein powder to boost the nutritional value, making these bars a great post-workout snack.
Remember, the key to successful variations is maintaining the right balance of flavors and textures. Feel free to experiment and find the combination that you love the most. With a little imagination and these tips, you can create a no-bake Reese’s bar that not only satisfies your cravings but impresses everyone who tries them!
Expert Tips for Making No-Bake Bars
To ensure your no-bake Reese’s bars come out perfectly every time, keep a few key strategies in mind. These bars are all about achieving the right texture and flavor balance, and with some expert tips, you’ll be a pro in no time!
First, measure your ingredients accurately. While no-bake recipes allow for a bit of flexibility, using precise amounts of graham cracker crumbs, peanut butter, and chocolate will help maintain the desired chewiness. A kitchen scale can be your best friend here, especially for sticky ingredients like peanut butter. It might seem like a small detail, but the right ratios can significantly affect the final product’s texture.
When it comes to the melting process, slow and steady wins the race. If you’re melting chocolate for the topping, use a double boiler, or melt it in short bursts in the microwave (about 20-30 seconds at a time) to avoid scorching. If the chocolate becomes too hot, it could lose its smooth, creamy texture. Once melted, let it cool slightly before spreading it over the bars for a glossy finish.
For that ultimate chewy center, consider using different types of peanut butter. Natural peanut butter provides a lovely flavor but can sometimes lead to a drier texture. For a richer taste, opt for creamy, processed peanut butter, which has added oils that enhance the overall consistency. If you prefer a healthier option, try reducing the amount of peanut butter and substituting with a bit of Greek yogurt instead to keep that velvety mouthfeel.
Finally, don’t rush the chilling process. After assembling your bars, refrigerate them for at least one to two hours to allow them to set beautifully. If you’re in a hurry, pop them in the freezer for about 30 minutes, but be careful not to leave them too long, or they might freeze solid. Once set, cut them into squares with a sharp knife dipped in hot water for clean edges.
With these tips in your back pocket, you’ll not only create delicious no-bake Reese’s bars but also have fun experimenting in the kitchen. Remember, homemade treats reflect your personality, so feel free to enjoy the process and make it your own!
Storing and Freezing Your Reese’s Bars
To keep your delightful no-bake Reese’s bars fresh and ready to enjoy, proper storing and freezing techniques are essential. Once your bars have set in the refrigerator, you may find it challenging to resist diving right in! However, to maximize their shelf life and maintain their delicious flavor and texture, consider these tips.
When storing your bars in the fridge, wrap them tightly in plastic wrap or aluminum foil to prevent them from drying out or absorbing odors from other foods. They can last in the refrigerator for up to a week, making them a perfect make-ahead treat for gatherings or a sweet snack throughout the week. If you prefer, you can also cut them into individual squares before wrapping to make portion control easier. Just remember to place a layer of parchment paper between the bars to keep them from sticking together.
If you want to enjoy your bars beyond a week, freezing is the way to go! Place the wrapped bars into an airtight container or a freezer bag to protect them from freezer burn. Properly frozen, they can last for up to three months! When you’re ready to indulge, simply remove the desired portion from the freezer and let them thaw in the refrigerator for a few hours, or enjoy them straight away if you love a chilled treat.
Whether you’re storing them for a special occasion or just for daily snacking, these tips ensure that your no-bake Reese’s bars remain as tempting as the day you made them!
Serving Suggestions: Creative Ways to Enjoy
There’s something irresistibly appealing about no-bake Reese’s bars that makes them a favorite snack for all ages. Their combination of buttery graham crackers, creamy peanut butter, and rich chocolate can easily be dressed up for a delightful treat any day of the week. Whether you’re preparing for a gathering or simply want to satisfy a sweet tooth, here are some creative serving suggestions to make the most of these chocolatey delights.
Decadent Dessert Platter
Transform your no-bake bars into the centerpiece of a dessert platter. Arrange the bars alongside fresh fruit like strawberries and banana slices, and sprinkle some crushed nuts for added crunch. Drizzle some caramel or chocolate sauce over the platter for a visually stunning and delicious addition. This combination not only enhances the presentation but also complements the flavors beautifully, making it a perfect treat for parties or family gatherings.
Ice Cream Sandwiches
For an exciting twist, consider creating ice cream sandwiches with your no-bake bars. Simply cut the bars into larger squares, then add a scoop of your favorite ice cream between two pieces. Roll the edges in crushed peanuts or mini chocolate chips for an extra indulgent touch. This approach is a fun way to enjoy your bars on hot days, turning them into a refreshing dessert that’s sure to impress.
Chocolate Swirl Sundaes
If you’re feeling adventurous, chop your no-bake Reese’s bars into bite-sized pieces and fold them into a bowl of creamy vanilla yogurt. Top with a swirl of chocolate syrup and a sprinkle of crushed graham crackers for an easy, delightful sundae that balances sweetness with a touch of protein. It’s a quick and delightful way to elevate your everyday snack while keeping it simple enough for any skill level.
Gifts in a Jar
For a thoughtful homemade gift, layer crumbled no-bake bars in a mason jar with some chocolate chips and crushed graham crackers. Decorate the jar with a ribbon and a cute tag for a personal touch. This makes a lovely gift for friends and family, allowing them to enjoy your delicious creation while you share the joy of homemade treats.
By presenting no-bake Reese’s bars in these fun and creative ways, you not only enhance their appeal but also invite others to enjoy these treats with you. Celebrate your homemade culinary adventures while keeping it uncomplicated and delicious!
Common Mistakes to Avoid for Success
Getting your no-bake Reese’s bars just right can sometimes feel like an art form. To achieve that perfect, chewy, and chocolatey goodness, there are a few common pitfalls you’ll want to avoid. Let’s dive in and ensure your next batch turns out deliciously!
One major mistake is skimping on the peanut butter. It’s the glue that holds your bars together and provides that irresistible creaminess. If you use a low-quality or too little peanut butter, your bars may end up crumbly and dry. Aim for a creamy, natural peanut butter without added sugar or hydrogenated oils for the best flavor and texture.
Another common issue is not properly measuring the graham cracker crumbs. If you pack them too tightly or don’t use enough, you’ll alter the bars’ consistency. A light and fluffy texture is key! Use a spoon to scoop the crumbs gently into your measuring cup and level it off with a knife for accuracy. Remember, the right amount of graham crackers contributes to the overall structure and chewiness.
Let’s not forget about the chocolate layer. When melting chocolate for the topping, the key is to do it slowly and over low heat or in short bursts in the microwave to prevent burning. Burnt chocolate not only tastes bad but can also ruin the appearance of your bars. If you’re feeling adventurous, add a splash of coconut oil to the chocolate; it helps create a shiny finish and adds to the smooth texture.
Lastly, don’t rush the chilling process. For the bars to set properly and hold their shape, they need ample time in the refrigerator-at least two hours or until fully firm. If they’re too soft, they’ll crumble when you cut them. Consider using a sharp knife dipped in warm water to slice your bars neatly without making a mess.
By steering clear of these common mistakes, you’ll create no-bake Reese’s bars that are not only delicious but also the envy of your friends and family! Enjoy the process, and don’t be afraid to experiment a little along the way. Happy baking!
Nutritional Information and Healthier Swaps
Transforming your no-bake Reese’s bars into a more nutritious treat is easier than you might think! With a few clever swaps and additions, you can enjoy that creamy, chocolatey goodness without the guilt. For instance, consider using natural sweeteners like maple syrup or honey in place of granulated sugar or sweetened condensed milk. These alternatives not only add a hint of flavor but also come with some nutritional benefits over processed sugars.
Switching from traditional graham crackers to whole grain options can enhance the fiber content of your bars. This makes for a more satisfying treat that can help keep you full longer. If you want to add an extra crunch, try incorporating crushed nuts or seeds into your base mixture. Almonds, walnuts, or chia seeds can boost the nutritional profile and add healthy fats while complementing the peanut butter flavor beautifully.
### Healthier Ingredient Swaps
- Peanut Butter: Opt for natural, unsweetened peanut butter to reduce sugar content.
- Chocolate: Use dark chocolate with at least 70% cocoa for a richer flavor and more antioxidants.
- Graham Crackers: Choose whole grain or gluten-free graham crackers to enhance fiber intake.
- Syrup: Replace refined sugar with honey or agave syrup for sweetness without added chemicals.
### Portion Control
While these swaps make your bars healthier, keep in mind that portion control is key. No-bake bars can be rich, so consider cutting them into smaller squares to help manage servings and satisfy your sweet tooth without overindulging. This way, you can enjoy a little piece of heaven without feeling like you’ve strayed from your nutritional goals.
### Conclusion
By implementing these substitutions and mindful serving sizes, you can whip up indulgent no-bake Reese’s bars that are both delicious and nourishing. Remember, the joy of cooking lies in experimentation-don’t hesitate to tweak the ingredients to suit your taste preferences and health goals. Enjoy your journey in the kitchen, and happy no-baking!
Inspiring Ideas for Customization and Add-Ins
Adding creativity to your no-bake Reese’s bars can turn a simple treat into a personalized masterpiece. Here are some fun and inspiring ideas to make your bars uniquely yours!
Start by experimenting with different types of nut butters. If you’re feeling adventurous, try almond butter or cashew butter instead of peanut butter for a subtly different flavor profile. You can even blend two kinds for a richer taste. If you want a little kick of flavor, consider adding a pinch of cinnamon or vanilla extract to your mixture, which can elevate the taste and aroma of your bars.
Mix-Ins for Extra Texture and Flavor
Incorporating mix-ins is a fantastic way to customize your bars. Here are some delicious suggestions:
- Chopped Nuts: Walnuts, pecans, or hazelnuts add a satisfying crunch and healthy fats. Roast them lightly for enhanced flavor.
- Chocolate Chips: Fold in semi-sweet, dark, or even white chocolate chips for an extra chocolatey experience.
- Fruit: Dried cranberries, raisins, or chopped dates can introduce a chewy sweetness that complements the rich chocolate and peanut butter.
- Seeds: Flaxseeds or chia seeds can add nutrients and a slight crunch, making your bars more satisfying.
Different Toppings to Indulge Your Imagination
Don’t forget about the topping possibilities! A drizzle of melted chocolate can not only make your bars look irresistible but also add a rich layer of chocolate flavor. For a fun twist, sprinkle sea salt on top before chilling for that delightful sweet-and-salty combo that everyone loves. If you’re a fan of coconut, shredded coconut can be an exciting addition, bringing a tropical flair to your dessert.
Feel free to mix and match these ideas to create bars that reflect your personal taste. The beauty of no-bake recipes is their flexibility and ease, so don’t hesitate to get creative. Making your bars unique not only enhances their flavor but also makes the baking experience more enjoyable. Happy no-baking!
Why No-Bake Recipes Are a Must-Try
No-bake recipes bring joy to the kitchen with their simplicity and speed, allowing you to whip up delicious treats without the need for an oven. For instance, the delightful No-Bake Reese’s Bars are not only quick to prepare but also provide that irresistible combination of chocolate and peanut butter in a chewy, satisfying form. Imagine impressing your friends and family with homemade treats that require minimal effort and ingredients; the excitement of no-bake treats lies in their accessibility.
One of the best things about no-bake recipes is that they often require no special equipment. You can create your delectable bars using just a mixing bowl and a spatula. This makes them perfect for anyone, whether you’re a seasoned baker or just starting out in the kitchen. In fact, the straightforward process often allows for creativity, giving you the freedom to mix and match ingredients to suit your taste preferences. Want to add a crunchy texture? Toss in some chopped nuts. Prefer an extra chocolatey flavor? Go ahead and fold in chocolate chips. The only limit is your imagination!
Moreover, no-bake recipes can be a lifesaver during warm months or when you’re short on time. Nobody wants to turn on the oven when the temperature is soaring. With recipes like these, you can enjoy decadent treats without overheating your kitchen. Plus, these bars are perfect for meal prep: make a batch, store them in the fridge, and have a quick, sweet snack ready to go whenever the craving hits.
Embracing no-bake recipes not only helps you save time and effort but can also inspire culinary confidence. They encourage experimentation and personal touches, making the whole process more enjoyable. So grab your ingredients, channel your inner creativity, and dive into a world where deliciousness meets ease!
Faq
Q: How can I make my No Bake Reese’s Bars firmer?
A: To make your No Bake Reese’s Bars firmer, you can reduce the amount of butter or peanut butter used in the recipe. Additionally, chilling them for a longer period can help achieve a better texture. Try cooling them for at least 3-4 hours before cutting. For more tips, check out our section on *Perfecting the Chewy Texture Every Time*.
Q: What are some common mistakes when making No Bake Reese’s Bars?
A: Common mistakes include not measuring ingredients accurately, using old or microwaved chocolate, and skimping on refrigeration time. Ensure you are using fresh ingredients and chill your bars for at least 2 hours for optimal results. For a detailed guide, see *Common Mistakes to Avoid for Success*.
Q: Can I use alternatives to peanut butter in my No Bake Bars?
A: Yes, alternatives like almond butter, cashew butter, or sunflower seed butter work well in No Bake Reese’s Bars. Each will impart a slightly different flavor, so feel free to experiment. Check out our section on *Delicious Variations to Elevate Your Treats* for more ideas.
Q: How long do No Bake Reese’s Bars last in the fridge?
A: No Bake Reese’s Bars can last up to one week in the refrigerator when stored properly in an airtight container. For longer storage, consider freezing them. Refer to our *Storing and Freezing Your Reese’s Bars* section for tips on freezing effectively.
Q: Can I make No Bake Reese’s Bars ahead of time?
A: Absolutely! You can make No Bake Reese’s Bars a few days in advance and store them in the fridge. Just ensure they are well-wrapped to prevent any odors from affecting their flavor. For more storing tips, take a look at the *Storing and Freezing Your Reese’s Bars* section.
Q: What toppings can I add to No Bake Reese’s Bars?
A: You can top your No Bake Reese’s Bars with crushed nuts, mini chocolate chips, or a drizzle of melted chocolate. These toppings add extra texture and flavor. Explore more customization options in our *Inspiring Ideas for Customization and Add-Ins* section.
Q: Is it necessary to use a food processor for No Bake Bars?
A: While a food processor makes blending the ingredients easier, it’s not necessary. You can achieve the same results by mixing ingredients by hand in a bowl. Just be sure all ingredients are well combined. For tips on preparation, refer to our *Step-by-Step Guide to Crafting Your Bars*.
Insights and Conclusions
Now that you’ve whipped up your No Bake Reese’s Bars, take a moment to savor the chewy, chocolatey goodness you’ve created! Remember, the best part about this recipe is its simplicity-no baking skills are required! Whether you’re a beginner or a seasoned home cook, this treat is perfect for satisfying your sweet tooth without the fuss.
If you loved making these bars, you’ll want to check out our Delicious No-Bake Desserts collection for more easy and delicious recipes! And don’t forget to sign up for our newsletter to stay updated on the latest tasty creations we share each week. Got questions or variations of your own? We’d love to hear from you in the comments below!
Lastly, keep exploring our kitchen hacks and tips to enhance your baking game. Satisfy your cravings and unleash your creativity-your next delicious adventure awaits!
Get our latest guides, news, and insights highlighted in your Google Search & AI Overviews.










