
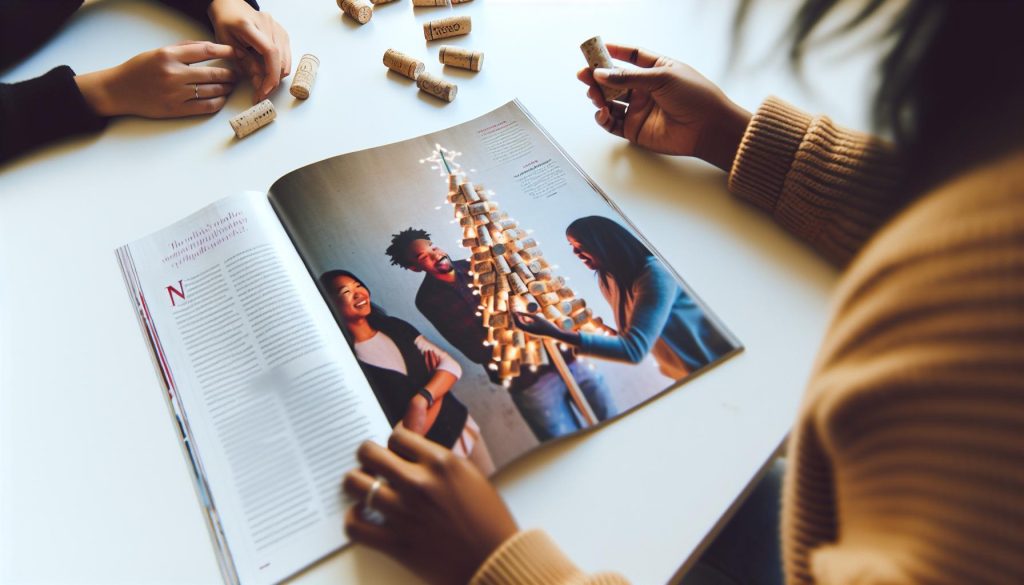
If you’re looking for a charming holiday DIY project that combines creativity and recycling, making a wine cork Christmas tree is the perfect solution! Not only can this festive decoration add a personal touch to your holiday decor, but it also serves as a great conversation starter. Plus, it’s an excellent way to use up those corks you’ve been saving! In this guide, we’ll walk you through the simple steps to create your own sparkling wine cork tree adorned with twinkling lights. Whether you’re an experienced crafter or trying your hand at DIY for the first time, this project is easy and fun, taking only about an hour to complete. So grab your corks and let’s get crafting!
How to Gather Materials for Your Wine Cork Tree
Gathering the right materials for your wine cork Christmas tree doesn’t have to feel overwhelming; in fact, it can be a delightful part of your crafting experience. To get started, the main item you’ll need is, of course, wine corks. Aim for around 30 to 40 corks, depending on the size of your tree. If you’re a wine enthusiast, you likely have some saved already, but if not, check with friends or visit local restaurants and wine shops-many are more than happy to share their used corks. You can also explore thrift stores or online marketplaces for additional supplies.
In addition to corks, you’ll need a foam cone to serve as the base structure of your tree. These are available at craft stores and even online. You might want a few different sizes if you’re planning on making multiple trees or experimenting with designs. Don’t forget to gather your adhesive! Hot glue is your best friend here for securing the corks to one another and the foam cone efficiently.
To add a festive touch, consider purchasing decorative elements such as beads, ribbons, or glitter. A string of LED fairy lights can work wonders, bringing your creation to life with a magical glow. In total, here’s a handy list to compile your materials:
- Wine corks (30-40)
- Foam cone (various sizes)
- Hot glue gun and glue sticks
- Decorative embellishments (beads, ribbons, etc.)
- LED fairy lights (optional, but recommended)
By gathering these materials ahead of time, you’re setting yourself up for a seamless crafting experience that’s both joyful and productive. Whether it’s your first time crafting or you’re a seasoned DIY-er, the process of assembling your wine cork tree should be as enjoyable as the final result!
Essential Tools You’ll Need for DIY Success
To create your wine cork Christmas tree, having the right tools can make all the difference in your crafting experience. First and foremost, you’ll need a hot glue gun and glue sticks. This trusty tool is essential for securely attaching your corks to the foam cone and to each other. The fast-drying nature of hot glue ensures that you won’t be waiting around for your masterpiece to set. It also allows for flexibility-you can easily reposition corks if that perfect angle isn’t quite right!
Next up is the foam cone, which serves as the backbone of your tree. These are available in various heights and widths, so you can customize the size of your tree according to your space or style. Whether you choose a smaller cone for a tabletop display or a larger one to stand on the floor, the foam provides a sturdy base that can support your corks with ease.
Don’t forget about decorative embellishments! Items such as ribbons, beads, and glitter can really bring your tree to life. Plus, they offer a personal touch that showcases your creativity. For those who want to add a warm and festive glow, a string of LED fairy lights can transform your cork tree into a beautiful focal point in your home. These can be carefully woven through or draped around your finished tree for that magical effect, perfect for holiday gatherings.
Lastly, it’s always handy to have some crafting scissors or a sharp knife at your disposal. These will come in useful not only for cutting ribbon and embellishments but also for trimming corks if you want to create varying lengths for a more dynamic design. Gathering these tools before you start will help streamline your process and ensure that crafting your wine cork Christmas tree is as enjoyable as it is creative!
Step-by-Step Instructions for Crafting Your Tree
Bringing your wine cork Christmas tree to life is an exciting journey of creativity that can add a unique charm to your holiday decor. With your materials gathered, let’s dive into the simple steps for crafting this festive delight. It’s easier than it looks, and you don’t need to have prior crafting experience to achieve fantastic results.
Start by securing your foam cone in a stable working space. This serves as the skeleton for your tree. Take your hot glue gun, and carefully start at the base of the cone. Apply a generous amount of hot glue and firmly press the first cork against it. Make sure to leave a small gap between each cork as you continue working upward. This spacing allows for a fuller appearance once your tree is complete. Keep layering the corks around the cone, using glue as needed to ensure they adhere well.
As you ascend the cone, consider alternating the orientation of some corks for added texture and visual interest. For example, positioning a few corks sideways or angling them slightly can create a more dynamic look. Continue this pattern until you reach the top of the cone. Once there, use the mini corks or any leftover pieces to cap off the apex of your tree for a polished finish.
Now that your tree is assembled, it’s time to incorporate lights for that magical glow. Begin by carefully wrapping a string of LED fairy lights around your cork tree. Start at the base and work your way up, weaving the lights through and around the corks. This not only adds brightness but also highlights the contours of your tree beautifully. When you’re done, plug it in and watch your tree radiate warmth, instantly transforming your space into a cozy holiday haven.
Once the lights are in place, step back and admire your work! You can stop here or add decorative elements like ribbons, ornaments, or even a sprinkle of glitter to personalize your tree further. The beauty of crafting is that it’s entirely up to your vision, so don’t hesitate to experiment and make it your own. Enjoy the process, and get ready to share your festive creation with friends and family!
Creative Ways to Decorate Your Christmas Tree
When it comes to dressing up your wine cork Christmas tree, the possibilities are as limitless as your creativity. Not only does it allow you to showcase your unique style, but it also provides an opportunity to bring in textures and colors that reflect your holiday spirit. Whether you prefer a rustic look or something more modern, here are some creative ideas to transform your tree into a delightful holiday centerpiece.
Start by adding a touch of glam with sparkling ornaments. Consider using small, reflective baubles, beads, or even ribbons tied into bows. Attach them to the corks using hot glue or simply tuck them between the corks for a layered look. This adds depth and catches the light beautifully, especially when you incorporate string lights. For a more natural theme, you might opt for dried flowers or mini pinecones. These can be arranged along the branches of your cork tree, giving it an organic, woodland feel.
Another charming way to decorate is by incorporating themed elements that represent your family traditions. If you enjoy skiing, decorate your tree with mini skis or snowflakes. If you love the beach, hang small seashells or starfish. This personalization not only makes your tree visually appealing but also evokes fond memories and stories to share during gatherings.
For a whimsical touch, try crafting handmade ornaments. Simple shapes like stars and hearts can be cut from felt or cardboard and painted in vibrant colors. Alternatively, red and green buttons or craft wire twisted into fun shapes can hang delicately from your cork tree, enhancing its festive allure without overwhelming it. The key is to balance embellishments to ensure they complement the cork texture rather than hide it.
Lastly, don’t forget to consider layering textures. Mixing smooth, shiny finishes with natural cork and rustic twine can create a delightful contrast. A few strategically placed strands of string lights wrapped around or interspersed among your decorations will amplify the overall effect, making your wine cork tree not just a decoration, but a joyful beacon during the holiday season. So gather your supplies, let your imagination run wild, and enjoy crafting a tree that not only reflects your style but also becomes a cherished part of your holiday celebrations.
Adding Lights: Tips for a Magical Effect
Adding lights to your wine cork Christmas tree elevates the entire decoration, creating a warm, inviting ambiance that enchants everyone who sees it. Imagine your tree aglow with soft twinkling lights, bringing to life not just the design, but also the joy of the holiday season. The right lighting can transform your DIY project from simple craft to stunning centerpiece, making even the most casual gatherings feel more festive.
When choosing lights, opt for LED string lights; they are energy-efficient, long-lasting, and less likely to get hot, making them safer for holiday decorations. Lights come in various colors and styles, from warm white to vibrant multicolored options. For a rustic, cozy feel, soft white lights work wonderfully. If you’re aiming for a more modern twist, consider colored lights or even themed fairy lights shaped like stars or snowflakes.
Now, let’s talk about placement. Drape the lights carefully around and through the corks, starting from the bottom and working your way up for an even glow. You can hide the battery pack at the back of the tree, ensuring it doesn’t disrupt the aesthetic. Allow the lights to peek through branches and gaps, enhancing layers without overwhelming the tree. For an added magical effect, consider incorporating a timer to have your tree lights turn on and off automatically, adding convenience and ensuring your tree shines bright even when you’re not around.
Finally, don’t underestimate the impact of reflective surfaces. Place your tree near mirrors or shiny decor elements to amplify the twinkle of your lights even further. The interplay between the wood tones of the cork and the sparkling lights can create an enchanting effect, turning your simple craft into a stunning tribute to the festive season. So, gather those lights, and let them dance among your cork creations for a truly magical holiday display.
Exploring Different Tree Designs and Styles
Crafting a wine cork Christmas tree is not just a delightful way to repurpose those corks from your favorite bottles; it’s also an opportunity to explore various tree designs and styles that can perfectly fit your holiday decor. Whether you’re opting for a whimsical approach or a more elegant display, the versatility of wine corks allows for endless creativity.
Consider starting with a classic cone shape, which is the most recognizable tree design. This simple structure is excellent for beginners and provides a sturdy base for your corks. To add a unique twist, try creating a more contemporary geometric tree by stacking corks in abstract formations or using them to form a rectangular or triangular outline. This modern style can serve as a chic statement piece, drawing admiration from all who see it.
For those who enjoy a more rustic aesthetic, think about giving your tree a natural look by incorporating twigs and branches alongside the corks. These elements can be intertwined to create a woodland vibe, making your tree not only a symbol of the holidays but also a nod to nature. To further personalize your design, you can paint some corks in festive colors such as red and gold or even dip them in glitter for a touch of sparkle.
Another exciting idea is to create themed trees based on color schemes or motifs. For example, a monochromatic design using various shades of green corks can yield a sophisticated and cohesive look. Alternatively, mix in decorations that resonate with your holiday traditions-like miniature pinecones, ornaments, or even faux snow-to make the tree uniquely yours. No matter which style you choose, the process of crafting your wine cork Christmas tree will inspire your creativity and bring a personalized touch to your holiday celebrations.
Sustainable Crafting: Use of Upcycled Corks
Crafting a wine cork Christmas tree isn’t just a fun DIY project; it’s also an excellent way to be environmentally conscious by upcycling those corks instead of tossing them in the trash. Did you know that approximately 1 billion wine corks are produced each year? Rather than letting them accumulate dust in your kitchen drawer or end up in a landfill, turning them into festive decor is a bright idea that embraces sustainability while adding a personal touch to your holiday celebrations.
When you gather your corks, consider reaching out to friends or family who may have extras lying around. Wine enthusiasts might be thrilled to contribute, and it could turn into a fun social event when you host a cork-collecting wine night! Additionally, local restaurants or wine bars might be willing to donate their used corks. This not only saves them from disposal but also enriches your community connections.
For your wine cork tree, the first step is ensuring you have a variety of corks, which ranges from natural cork to synthetic varieties. If you want to enhance their eco-friendly appeal, consider painting some corks with non-toxic paints or using natural jute twine to create rustic accents. These small touches can elevate your tree while maintaining its sustainable roots. Integrating twigs or recycled items as part of your tree’s structure can further emphasize the upcycled spirit, presenting an opportunity to blend creativity with environmental stewardship.
As you embark on this crafting journey, remember that every cork has a story. Each one represents a good time spent with friends and family over a glass of wine. Embracing this narrative in your decor not only makes your tree unique but also highlights the importance of reusing materials for a greener holiday season. Your wine cork Christmas tree will not only dazzle with lights and embellishments but also serve as a testament to the beauty of sustainable crafting.
Personalizing Your Tree: Custom Ornaments Ideas
Creating a wine cork Christmas tree is already a splendid way to showcase your creativity, but adding custom ornaments can truly elevate your project to a personal masterpiece. Imagine adorning your cork tree with unique, handcrafted ornaments that tell your story! From simple ideas that anyone can tackle to more intricate designs for the crafty at heart, the possibilities are endless.
Start with DIY cork ornaments. You can slice some corks into circles or shapes and decorate them with paint, glitter, or even mod podge for a glossy finish. Attach a string or ribbon for hanging, and you can customize them to reflect your family’s traditions-maybe using each ornament to represent a memorable wine experience or a family vacation. Personalizing these items might even include writing special messages or dates on them, turning your corks into mini keepsakes.
Another charming idea is to incorporate nature elements. Gather pine cones, twigs, or dried flowers from your garden or local area. You can glue these to corks or attach them with twine to create rustic ornaments that complement the natural look of the cork. This addition not only aligns with the eco-friendly theme of your project but also brings a delightful outdoor essence indoors. Consider creating a few themed clusters-like snowy white glitter on some, while others have rich greens and browns for an earthy touch.
For a twist, think about photo ornaments. Use small circle cuts from corks as frames for tiny family photos or holiday-themed images. You can easily glue a small picture onto one side and again attach a string for hanging. These will add a layer of nostalgia and personal connection, making your tree a focal point of warm memories.
No matter how you choose to personalize your wine cork tree, the key is to have fun and express your creativity. You might want to carve out some time for a crafting session with friends or family, turning it into a festive gathering. Celebrate the beauty of creating something special, knowing each ornament brings a piece of your story to your seasonal display!
Frequently Asked Questions About DIY Wine Cork Projects
Creating a wine cork Christmas tree is not only a delightful crafting project but also a conversation starter about the art of DIY and sustainability. Here are some frequently asked questions to help guide you through the process and inspire your creativity.
What materials do I need for my wine cork tree?
To get started on your wine cork tree, you’ll need the following materials:
- Wine Corks: Gather a collection of corks. You can collect these from friends or local vineyards!
- Foam Cone: This acts as the base for your tree and provides structure.
- Hot Glue Gun and Glue Sticks: Essential for attaching the corks to the cone.
- Acrylic Paint: Optional, for painting the foam cone or adding color to corks.
- Embellishments: Consider beads, ribbons, or natural elements like pinecones to decorate.
How do I securely attach the corks?
For a sturdy build, start gluing from the bottom of the foam cone and work your way up. Apply glue to the cork and press it firmly against the foam, holding it for a few seconds until it sets. This will create a solid base that can support the upper layers. For added stability, consider applying glue to multiple corks at once to form clusters before attaching them.
Can I add lights to my tree?
Absolutely! Adding lights can bring a magical touch to your cork tree. Opt for battery-operated fairy lights for ease of use. Carefully thread the lights through and around the corks, securing them with small bits of clear tape if needed. Ensure the battery pack is discreetly hidden at the back or bottom of the tree for a clean look.
What are some creative decoration ideas?
Personalizing your tree is where the real fun begins. Here are a few ideas:
- Nature-Inspired Decor: Use small pinecones, dried flowers, or twigs to adorn your tree.
- Photo Ornaments: Create mini frames from corks to hold family photos or festive images.
- Painted Corks: Paint some corks in brighter colors to create contrast and visual interest among the natural cork color.
How can I make this project eco-friendly?
The use of recycled wine corks makes your project inherently eco-friendly. To enhance this, source other materials locally, such as decorative items from nature or repurposed craft supplies. Share your completed project online to inspire others in sustainable crafting!
By addressing these common questions, you’re now better equipped to embark on your wine cork Christmas tree adventure. Remember, the beauty of DIY lies in your ability to express your personality through your creations. Enjoy the process and let your creativity shine!
Showcasing Your Tree: Best Display Tips
The way you display your wine cork Christmas tree can make all the difference in showcasing its charm and the effort you put into creating it. To make your cork tree a true centerpiece, consider placing it at eye level on a mantelpiece or dining table where it can be appreciated. If you’re using lights, a dimly lit area can enhance its magical glow and create a warm atmosphere.
When it comes to arranging your tree, think about the background. A neutral wall or a soft fabric backdrop can help your tree stand out. You might consider wrapping a simple strand of garland or tinsel around the base of the tree for an added festive touch. If you have space, place complementary decor nearby, like festive candles or themed ornaments, to create a cohesive look that draws the eye.
For a unique presentation, consider using a pedestal or tiered cake stand to elevate your tree, allowing it to stand out even more. This approach creates visual interest and allows for easier viewing from all angles. If you’re using lights, ensure the battery pack is hidden creatively beneath the stand, perhaps wrapped in a bit of fabric that matches your decor.
Lastly, capturing the moment is part of the fun! Share your crafting journey and the finished product on social media. Use hashtags related to DIY crafts and holiday decor, and tag friends who might enjoy your project. Engaging with others not only showcases your creativity but can also inspire pottery lovers and fellow crafters. Enjoy displaying your wine cork Christmas tree-it’s a celebration of your creativity and a perfect addition to your holiday traditions!
Sharing Your Creation: How to Engage on Social Media
There’s something undeniably joyful about sharing your crafting projects, especially a whimsical wine cork Christmas tree. Not only does it celebrate your creativity, but it can also inspire friends and family to join in on the fun. Start by documenting your journey-take photos at different stages of your project. A before-and-after series can be particularly engaging, showing the transformation from a simple collection of corks to a festive, illuminated centerpiece.
When you’re ready to share, consider posting to platforms like Instagram, Facebook, or Pinterest. Use bright, eye-catching images that showcase your finished piece to draw attention. Include engaging captions that describe your crafting process, any challenges you faced, and tips for others who want to create their own. Inviting followers to comment or share their projects creates a sense of community, so make sure to end your posts with open-ended questions. For example: “What was your favorite part of creating your holiday decor?”
Utilize relevant hashtags to reach a broader audience interested in DIY projects and festive decor. Tags such as #WineCorkCrafts, #ChristmasDIY, and #HandmadeHoliday can help others discover your work. You might also consider creating your own unique hashtag for your projects, making it easier for your followers to find your posts over time.
Lastly, consider hosting a virtual crafting event or challenge! Invite friends on social media to join you in making their own wine cork trees. Sharing before and after pictures, progress updates, or even hosting live crafting sessions can foster a fun and engaging atmosphere where everyone can share ideas and encouragement. By creating this sense of connection, you not only enrich your crafting experience but also build a supportive community of fellow crafters ready to share their love for homemade creations.
Frequently asked questions
Q: What are the best lights to use for a wine cork Christmas tree?
A: The best lights for a wine cork Christmas tree are *warm white LED string lights*, as they provide a cozy glow. Opt for *battery-operated lights* for flexibility in placement and to avoid visible cords. Ensure the lights are lightweight and can be easily wrapped around the cork structure for a festive effect.
Q: How can I secure the lights on my wine cork Christmas tree?
A: Secure the lights on your wine cork tree by using *small, clear adhesive clips* that can be attached to the corks or by *tying the lights* with thin twine. This keeps them in place without damaging the corks, ensuring a neat and polished look for your festive DIY project.
Q: Can I make a wine cork Christmas tree without glue?
A: Yes, you can create a wine cork Christmas tree without glue by using a *foam cone* as the base. Simply stack the corks onto the cone, securing them with *toothpicks* if needed. This allows for easy assembly and disassembly, plus it’s a great option for anyone looking to avoid adhesives.
Q: What size foam cone works best for a wine cork Christmas tree?
A: A *12 to 18 inch foam cone* typically works best for a wine cork Christmas tree, depending on how tall you want your tree to be. This size allows for a full appearance while being manageable for decorating. Adjust according to your space or design preferences.
Q: How long does it take to make a wine cork Christmas tree?
A: Making a wine cork Christmas tree usually takes about *2 to 4 hours*, depending on the tree size and your crafting experience. *Planning out the design* beforehand can help streamline the process and keep everything organized for a quicker assembly.
Q: What can I use to decorate my wine cork Christmas tree besides lights?
A: Besides lights, consider using *ribbons, beads, or small ornaments* to decorate your wine cork Christmas tree. You can also add *natural elements* like pinecones or artificial garlands. Combining various textures and colors will enhance the festive appeal and make your tree unique.
Q: How do I ensure my wine cork Christmas tree is stable?
A: To ensure stability, make sure to *choose a wide base* for your tree. You can attach the tree to a sturdy base, like a wooden board or plate, keeping it anchored. Additionally, arranging the corks in a balanced manner can prevent tipping and ensure that your tree remains upright.
Q: Can I use colored wine corks for my Christmas tree?
A: Yes, you can definitely use colored wine corks for your Christmas tree! Colored corks can add a *vibrant touch* and a personalized flair to your design. If you don’t have colored corks, consider painting or dyeing them with *non-toxic paints* to achieve your desired look.
Future Outlook
Congratulations on creating your own stunning Wine Cork Christmas Tree with Lights! This festive DIY project is not just a charming decor item; it’s a unique way to celebrate your creativity during the holiday season. If you loved this tutorial, don’t miss our guides on DIY holiday wreaths and homemade ornaments to further enhance your festive atmosphere.
Ready to take the plunge and add a personal touch to your holiday decoration? Gather your supplies today, and transform your space with this delightful project! If you have any questions or want to share your tree design, we’d love to hear from you in the comments below.
Join our community by signing up for our newsletter to get the latest DIY tips and tricks right in your inbox. Happy crafting, and remember, the holiday spirit shines brightest when you make it your own!
Get our latest guides, news, and insights highlighted in your Google Search & AI Overviews.










