

Did you know that elderberries are not just delicious but also packed with health benefits? Making elderberry wine at home is an enjoyable project that not only taps into your creativity but also allows you to boost your wellness in a flavorful way. This simple, rewarding process can lead to a delightful beverage that is rich in antioxidants, vitamins, and immune-boosting properties. Whether you’re looking to impress guests at a dinner party or simply enjoy a taste of your efforts, this guide will walk you through the steps needed to craft your own elderberry wine. You don’t need professional winemaking equipment or expertise-just fresh elderberries, a few kitchen staples, and a willingness to experiment. Get ready to discover the joy of homemade elderberry wine and elevate your culinary repertoire while supporting your health. Let’s dive in!
How Elderberry Wine Supports Your Health Goals
Elderberry wine is more than just a delicious homemade treat; it’s a supportive ally in your health journey. Rich in antioxidants, elderberries are known for their immune-boosting properties, making elderberry wine a flavorful way to enhance your well-being. Regular consumption can help fend off colds and flu, thanks to the berry’s natural capability to reduce the severity and duration of these illnesses. The fermentation process, which brings out the rich flavors of the elderberries, also increases bioavailability, allowing your body to absorb these beneficial compounds more effectively.
When crafting your elderberry wine, you’re not just enjoying the fruits of your labor, but you also tap into the medicinal qualities of this ancient berry. Elderberries are packed with vitamins A, B, and C, along with phenolic acids and flavonoids, all of which contribute to their health-promoting properties. Enjoying a glass of this homemade wine can support cardiovascular health by improving circulation and potentially lowering cholesterol levels. However, moderation is key, as excessive alcohol consumption can negate these benefits.
Incorporating elderberry wine into your routine can be a delightful experience. For those chilly nights or festive gatherings, serve a glass alongside cozy meals or dessert to not only please your palate but also give your immune system a little boost. Pairing your wine with foods rich in other nutrients-like garlic, leafy greens, or citrus-can create a harmonious blend that further enhances its health benefits. While you enjoy the process of making elderberry wine, remember that each sip is a step towards supporting your health goals in a vibrant and flavorful way.
Essential Ingredients for Elderberry Wine Making
The delightful craft of making elderberry wine starts with a few essential ingredients that will not only help you create a delicious beverage but also ensure it’s packed with health benefits. At its core, elderberry wine is simple, making it an enjoyable project for both novice and experienced winemakers. With just a handful of ingredients, you can create a homemade elixir that celebrates the unique flavors of elderberries while supporting your wellness goals.
To create a batch of elderberry wine, you will need:
- Fresh or Dried Elderberries: The star ingredient! Fresh berries are ideal, but dried elderberries work well too. Aim for about 3 to 4 pounds of ripe elderberries for a 1-gallon batch.
- Water: Pure and filtered water is best for extraction and fermentation. You’ll typically use about 2 to 3 quarts.
- Sugar: This is your primary fermentable ingredient. Depending on the sweetness you desire, you might add anywhere from 1 to 3 pounds of sugar.
- Yeast: Opt for a wine yeast variety, like champagne or a specific fruit yeast. One packet (approximately 5 grams) is sufficient for a standard batch.
- Acid blend: This mixture of citric, tartaric, and malic acids helps balance the flavor. Use around 1 tablespoon to enhance acidity and promote fermentation.
- Campden tablets (optional): These help to sanitize the must before fermentation. One tablet per gallon of must is a good rule of thumb.
- Additional flavorings (optional): If you like, incorporate other fruits (like apples or citrus) or spices (like cinnamon or cloves) to create a signature flavor for your wine.
Each ingredient plays a vital role, not just in the creation of elderberry wine, but in your health journey as well. The elderberries themselves are rich in vitamins and antioxidants that can bolster your immune system. The sugar gives fuel to the yeast, resulting in alcohol and carbonation during the fermentation process. The acid blend adds depth to the flavor profile, making your finished wine sophisticated and enjoyable. It’s all about balance-finding the right proportions of each ingredient will lead you to your very own perfect batch of elderberry wine.
Embrace the process! Making elderberry wine is not only about the ingredients; it’s also about the joy of creation in your kitchen. You don’t need fancy equipment-just a little patience and a willingness to experiment. Remember, the beauty of winemaking lies in personalization, so don’t hesitate to play with flavors and adjust the quantities to suit your taste. Enjoy the journey, and savor the results in every glass of your homemade elderberry wine!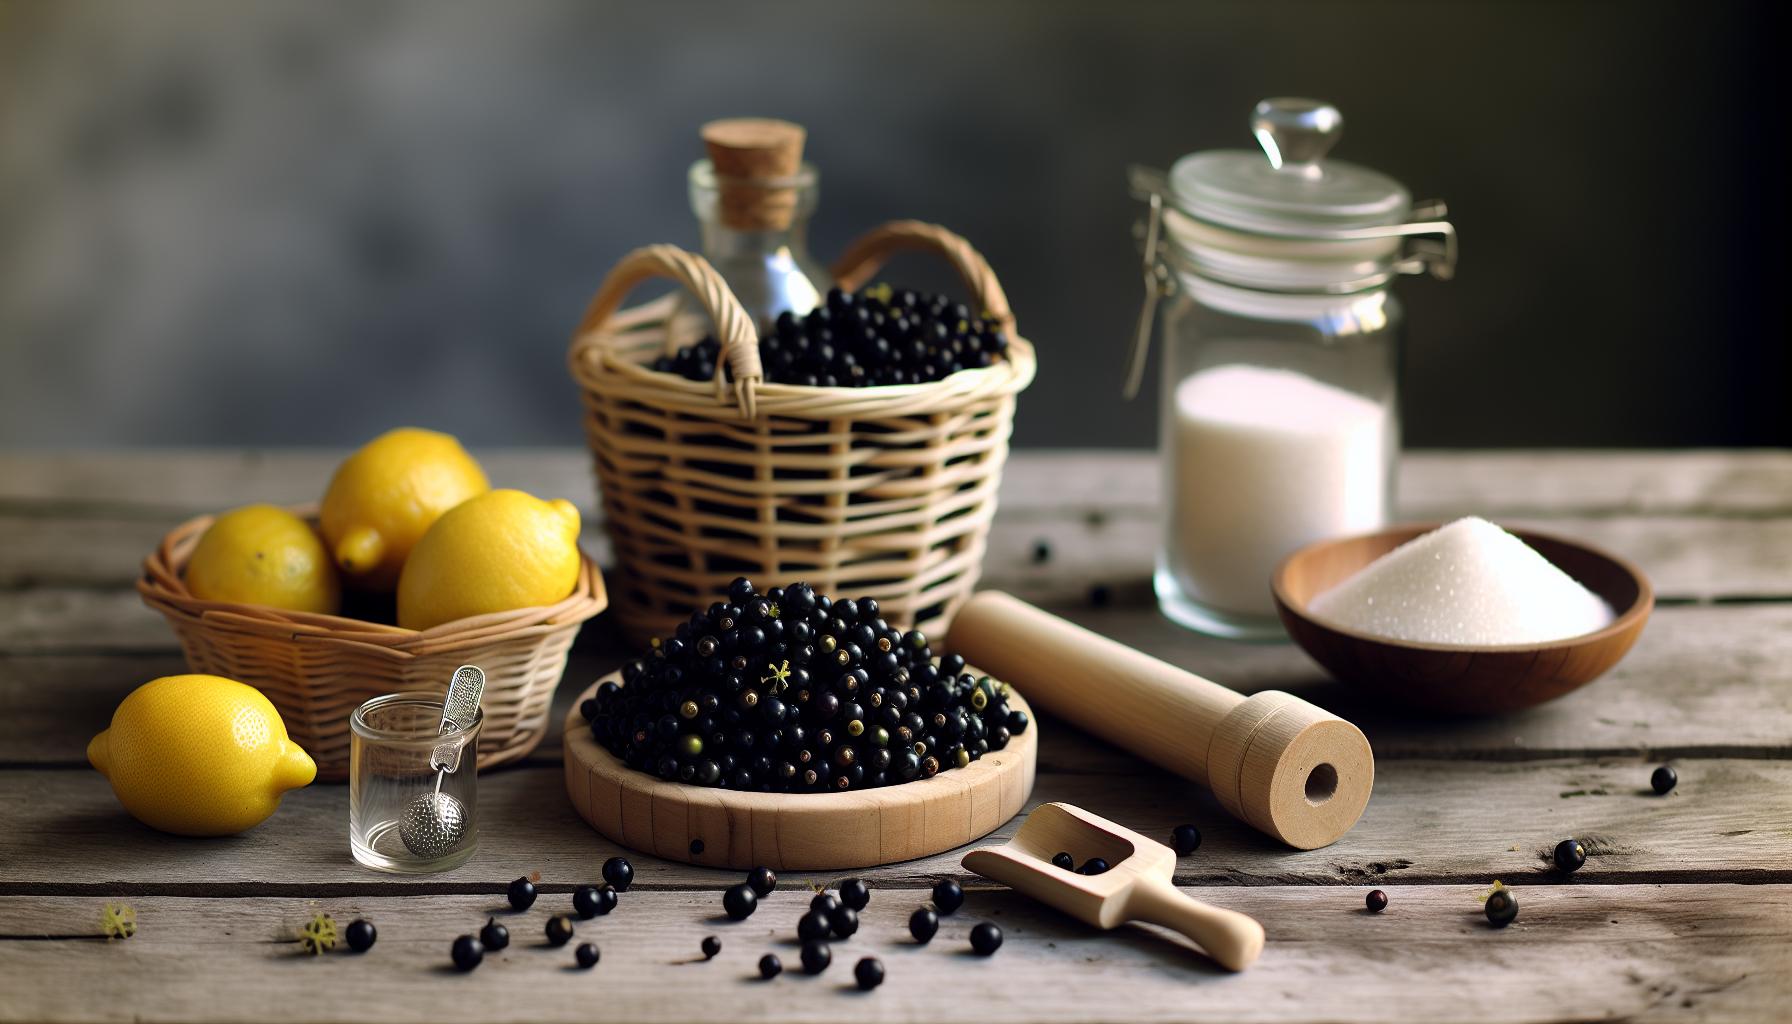
Step-by-Step Guide to Crafting Elderberry Wine
Creating your own elderberry wine is a rewarding and satisfying experience that not only yields a delicious beverage but also connects you with an age-old tradition of winemaking. With a little enthusiasm and some straightforward steps, you’ll be on your way to enjoying your own handcrafted wine in no time. Here’s how to embark on this flavorful journey.
Start by preparing your workspace and gathering all your ingredients and equipment, which include a fermentation vessel, a stirring spoon, and a fine mesh strainer. You can use a clean bucket or a glass carboy as your fermentation vessel. Begin by rinsing your elderberries-if you’re using fresh ones-removing any stems and leaves. If you opted for dried elderberries, simply soak them in warm water for a few hours to rehydrate them. This process helps maximize their flavor during fermentation.
Next, combine your elderberries with water in your fermentation vessel. Typically, you’ll want about 3 to 4 pounds of elderberries for each gallon of wine you’re making. Start mashing the berries gently with a potato masher or the back of a spoon to release their juices. Once mashed, stir in your sugar-1 to 3 pounds depending on your sweetness preference-and the acid blend to ensure a well-rounded flavor. After everything is mixed well, dissolve one Campden tablet in some water and add it to the mix to help eliminate any wild yeasts and bacteria.
Time to Ferment!
Once your mixture is prepared, it’s time to add your yeast. Sprinkle your yeast on top of the must (the term for your mixture) and gently stir to incorporate. Cover the fermentation vessel with a clean cloth or airlock to prevent contaminants while allowing gases to escape. The fermentation process begins, usually taking about one to two weeks. You’ll notice bubbling as the yeast converts sugar into alcohol, which is a good sign that everything is progressing nicely.
After the bubbling has slowed down, it’s time for the next step: racking. Carefully siphon (or pour) your liquid into a clean container, leaving behind the sediment at the bottom of your fermentation vessel. This sediment, primarily made up of dead yeast and other solids, can impart unwanted flavors if left to sit with your wine. If you have some extra berries or spices you’d like to add for flavoring, now is a great time to incorporate them before letting the wine age.
Aging and Bottling
Once you have racked your wine, it’s best to allow it to age for at least a month, with many home winemakers suggesting several months for optimal flavor development. Store your wine in a dark, cool place, and check occasionally for any additional sediment. When you’re satisfied with the aging process, it’s time to bottle your wine. Use sanitized bottles and caps to ensure your product remains as delicious as when you crafted it.
Making elderberry wine is truly a delightful craft that blends simplicity with the potential for creativity. Each step offers an opportunity to engage with the process, whether it’s tweaking the recipe with other fruits or spices or simply enjoying the anticipation of savoring the fruits of your labor. So gather those elderberries and start your winemaking adventure-cheers to your health and homemade creations!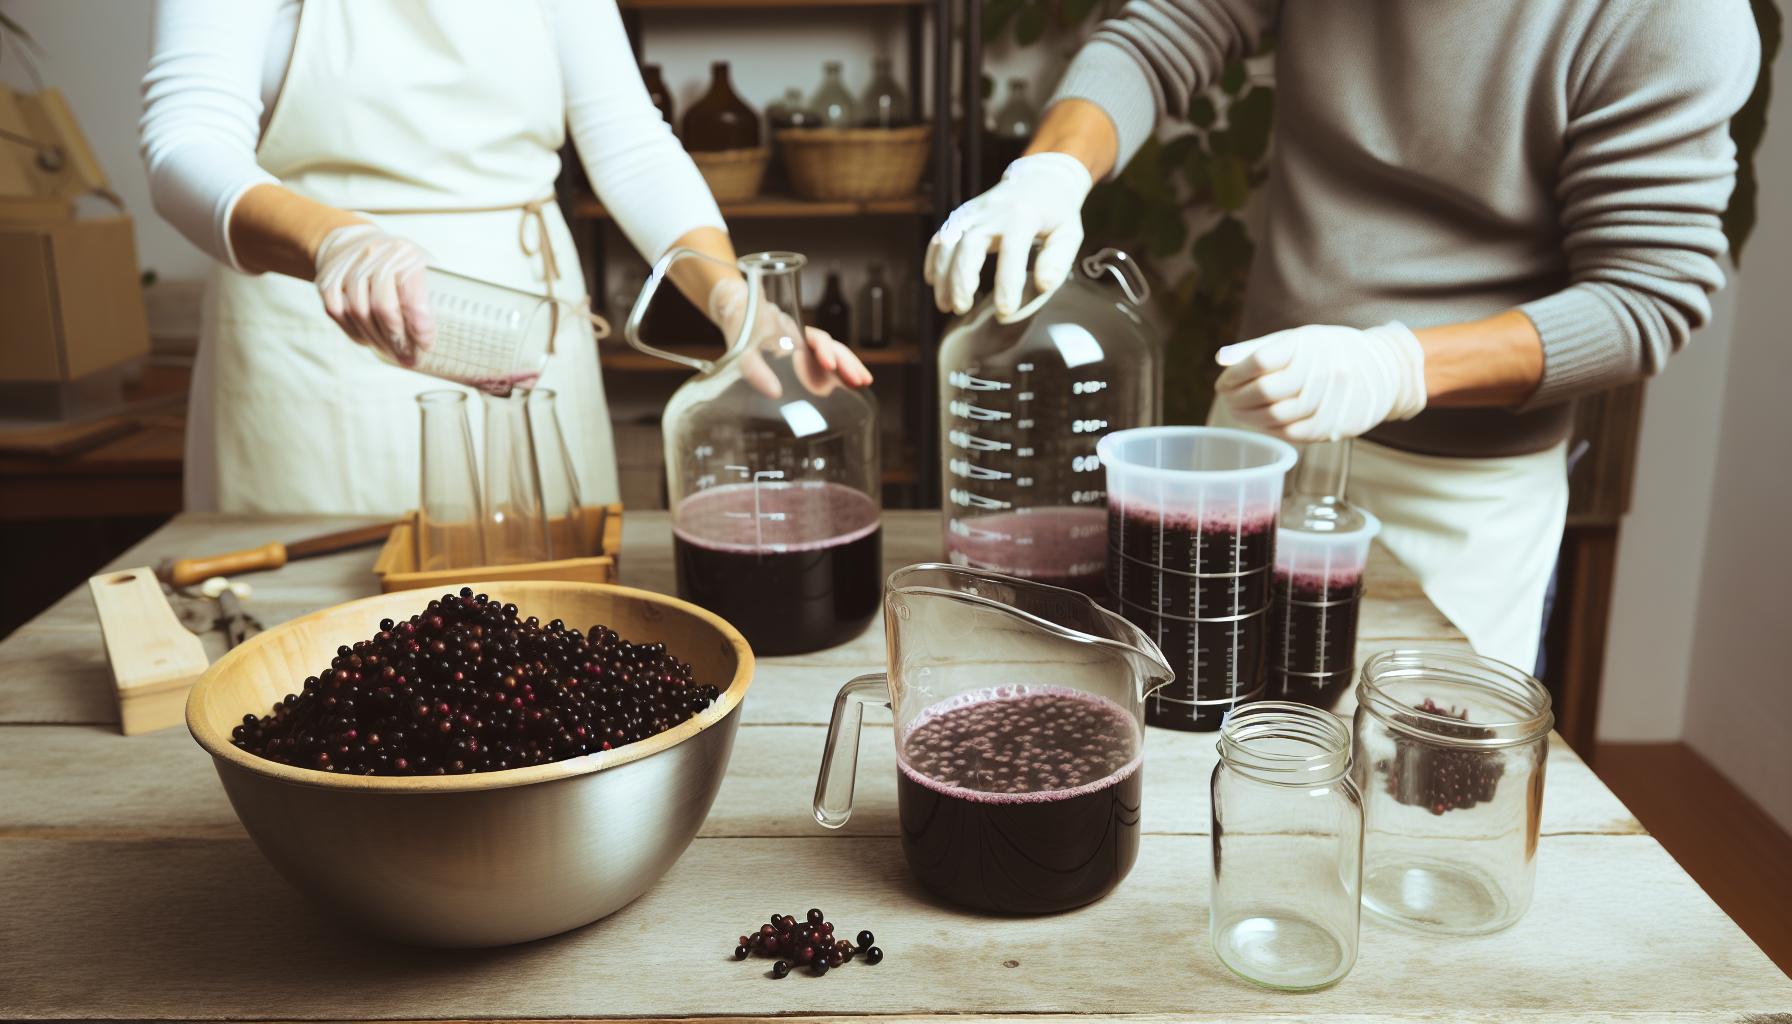
Choosing the Right Elderberries for Maximum Flavor
Choosing the right elderberries is key to crafting a vibrant and flavorful elderberry wine. Not all elderberries are created equal, and the type you select can significantly affect the final taste and health benefits of your homemade brew. Fresh, ripe elderberries are your best bet-they’re plump, juicy, and bursting with flavor. When foraging or purchasing, look for elderberries that are deep purple to black in color, as this indicates optimal ripeness. Avoid red berries, as they can be unripe and may contain toxic components.
When sourcing elderberries, consider growing your own if you have the space. Elderberry bushes are relatively low-maintenance and can thrive in a variety of climates. If you’re buying elderberries, seek them out from local farmers’ markets or reputable suppliers to ensure quality. Fresh elderberries can be harvested from late summer to early autumn. If you’re using dried elderberries, make sure they are organic and from a trusted source, as this will enhance the flavor and ensure you’re avoiding any unwanted additives.
As you prepare to make your wine, remember that elderberries from different regions or varieties may have unique flavor profiles. Experimenting with varieties like Sambucus nigra or Sambucus canadensis can lead to delightful results, each offering a slightly different taste experience. Seasonality matters too! If you have access to fresh elderberries during peak ripeness, you’re likely to create a more flavorful wine.
To extract the maximum flavor during the winemaking process, mash your elderberries gently to release their juices, which are rich in flavor and nutrients. Adding a touch of citrus, like lemon or orange zest, can also enhance the aroma and complexity of your wine. Don’t forget to adjust your sugar levels based on the natural sweetness of your berries; experimentation is part of the fun! Each batch can be a little different, allowing you to refine your technique and tailor the flavor to your preference.
In summary, the right elderberries set the foundation for a memorable elderberry wine. Pay attention to variety, ripeness, and sourcing to ensure a delicious result that not only celebrates the fruit’s natural flavors but also aligns with your health goals. Embrace the joy of discovery in winemaking, and have fun exploring the delightful nuances that elderberries have to offer!
Exploring Flavor Variations in Elderberry Wine
Crafting elderberry wine opens a delightful world of flavor exploration that can elevate your homemade brew to new heights. With the rich, deep notes of elderberries at its core, you have a canvas to paint with myriad flavor variations. From incorporating additional fruits to exploring spices and herbs, the key to a unique elderberry wine lies in the creativity of your combinations.
One popular approach is to blend elderberries with complementary fruits that enhance the overall taste. Consider adding cherries for a slight tartness or peaches for a touch of sweetness. These fruits not only boosts flavor complexity but also contribute their own vitamins and antioxidants, aligning with your health goals. For those who love the zest of citrus, a hint of orange or lemon zest can brighten the wine, adding a refreshing lift that balances the natural earthiness of the elderberries.
Experimenting with spices can also introduce an exciting layer to your elderberry wine. A pinch of cinnamon or a few whole cloves can add warmth, making your wine perfect for sipping on cozy evenings. Don’t shy away from adding ginger either-its spicy kick creates a dynamic contrast that dances on your palate. As with all winemaking, the process is about balance, so start with small amounts, taste, and adjust as you go.
Lastly, consider the influence of fermentation and aging on flavor. Allow your elderberry wine to rest in a glass or wooden vessel under optimal conditions, and you’ll find that it matures beautifully. The flavors will meld, soften, and develop over time, rewarding your patience with a more rounded profile. Whether you’re using just elderberries or infusing additional elements, each batch presents a unique opportunity to learn and savor the art of winemaking. Let your taste buds guide you, and enjoy the journey of crafting something truly personalized!
Tips for Fermentation Success Every Time
Successfully fermenting elderberry wine can be a rewarding journey, leading to a delicious and health-boosting beverage. Start with clean and sterilized equipment-this is crucial as any unwanted bacteria can spoil your brew. A simple wash with hot, soapy water followed by a rinse and air dry will do wonders. For extra precaution, consider using a food-safe sanitizer to ensure everything is squeaky clean before you begin.
Temperature control is key during fermentation. Yeast thrives best at temperatures between 68°F and 75°F (20°C to 24°C). If your kitchen is on the cooler side, find a cozy spot for your fermentation vessel or use a heating pad set to low, wrapped around the container. Just be sure not to exceed 80°F (27°C) to prevent stressing the yeast. Keep an eye on your fermentation activity, which should start within a day or two. Look for bubbling, which indicates that the fermentation is off to a good start!
Timing is also essential. A typical primary fermentation lasts anywhere from one to three weeks, depending on your recipe and conditions. Be patient, but also vigilant: use a hydrometer to check the specific gravity and monitor fermentation progress. Once it stabilizes (the readings remain constant over a few days), you’re ready for the next step!
Lastly, always taste along the way! This is your chance to learn and adjust. If the wine seems too tart, consider adding a bit of sugar or honey to balance it. If you want more character, feel free to add a tiny pinch of spices or additional fruit to enhance the flavors. Remember, winemaking is as much art as it is science, so let your creativity flow-there’s no one right way to make it! Enjoy the fermentation process, and look forward to the wonderful homemade elderberry wine awaiting you.
Storing and Aging Your Elderberry Wine
When your elderberry wine is ready to be bottled, the next exciting phase begins: storing and aging. Proper storage is crucial, as it ensures that your wine matures gracefully, developing deeper flavors and complexity over time. Imagine cracking open a bottle months later, only to savor the unique notes that have evolved from your initial fermentation!
First things first, find a cool, dark place to store your bottles. Ideally, the temperature should remain constant, between 55°F and 65°F (13°C to 18°C). Too much fluctuation can spoil the wine. Avoid areas like the kitchen or garage that might experience drastic temperature changes. A wine cellar or a designated wine cooler is perfect, but if those aren’t available, even a closet in a climate-controlled space can work.
Once you’ve chosen the right storage location, pay attention to how you store the bottles. It’s commonly recommended to keep them horizontally, especially if you’re using corks. This position keeps the cork moist, preventing it from drying out and allowing air to seep into the bottle, which could spoil the wine. If you’re using screw caps, however, it’s fine to store them upright.
Aging your elderberry wine is where the magic truly happens. Typically, you’ll want to wait at least six months before tasting, as this allows the flavors to mature. Some enthusiastic winemakers might even wait up to a year or more for a richer experience! During this time, your wine will continue to develop, softening sharper notes and enhancing the sweetness. Don’t forget to check in with your bottles occasionally. While it’s essential not to disturb them too often, a little monitoring can help you gauge the aging process. When the time feels right, pour yourself a glass and relish the fruits of your labor.
Lastly, make a note of the flavor profiles and characteristics you notice with age. This will help you refine your process for the next batch. Enjoying your homemade elderberry wine is not just about savoring a drink; it’s about celebrating your creativity and dedication to crafting something uniquely yours!
Common Mistakes to Avoid in Winemaking
Crafting elderberry wine at home can be an incredibly rewarding experience, but there are a few common pitfalls that can turn your winemaking adventure into a frustrating ordeal. Learning from others’ mistakes can save you time, effort, and money. Here’s what to watch out for as you embark on your elderberry winemaking journey.
One of the biggest faux pas in winemaking is neglecting sanitation. The importance of keeping everything clean cannot be overstated; any stray bacteria can spoil your wine. Ensure all your equipment-fermentation vessels, bottles, and utensils-are sterilized before you even start. A simple solution of water and unscented bleach, followed by thorough rinsing, usually does the trick. This step is crucial to avoid off-flavors and spoilage in your finished product.
Another mistake is not accurately measuring your ingredients. Wine making is a science, and precision is key. If you skimp on sugar or yeast, the fermentation process may struggle, resulting in a flat taste or insufficient alcohol content. Use a hydrometer to measure specific gravity and ensure fermentation progresses correctly. It’s also important to track how much elderberry juice you’re adding; a rough estimate can lead to inconsistencies in flavor and sweetness.
Temperature control is also vital throughout the fermentation process. If your environment is too warm, fermentation could happen too quickly, yielding undesirable flavors, whereas a cold environment may slow fermentation to a crawl. Aim to keep your wine in a stable temperature range, ideally around 70°F (21°C), for the best results. Often, a dark corner of your kitchen can work, but if fluctuating temperatures are a concern, consider investing in an inexpensive thermometer to monitor conditions.
Finally, patience is your greatest ally in this process. Many novice winemakers are eager to sample their creation too soon; however, elderberry wine typically needs at least six months to a year to mature properly. Rushing can lead to harsh flavors. Instead, resist the urge to open that first bottle too early. Dedicate a special spot in your kitchen for an aging stash, where you can check in on it occasionally, jot down flavor notes, and anticipate the delicious reward waiting for you.
By avoiding these common mistakes, you can enhance both your winemaking craft and the enjoyment of your homemade elderberry wine. Remember, it’s all about experimentation, so embrace the journey and celebrate those small victories along the way!
Pairing Elderberry Wine with Food: Best Combinations
Elderberry wine is a delightful creation that pairs beautifully with a range of foods, enhancing both the flavors of the meal and the wine itself. Imagine serving your homemade elderberry wine at dinner; its rich, fruity notes can elevate even the simplest dishes, making them feel gourmet without any fuss. One of the best things about elderberry wine is its versatility-it complements various cuisines, whether you’re hosting a casual gathering or a more formal affair.
When it comes to pairing, consider the sweetness and acidity of your elderberry wine. Generally, it has a medium sweetness with a balanced acidity, making it a perfect match for both savory and sweet dishes. For a savory pairing, try it with roasted meats like duck or pork. The fruitiness of the wine elevates the richness of the meat. You can also serve it alongside cheese platters, particularly with creamy cheeses such as brie or goat cheese-ideal for a delightful contrast that will impress your guests.
If you delight in spicy or bold flavors, elderberry wine pairs wonderfully with dishes like Asian stir-fries or Moroccan tagines seasoned with cinnamon and coriander. The sweetness of the wine helps to mellow out the spice, creating a wonderful balance that enchants the palate. For those looking to indulge in something more intimate, serve elderberry wine alongside chocolate desserts. The fruity undertones harmonize beautifully with dark chocolate, enticing even the most discerning chocolate lover.
Lastly, don’t forget about the joy of experimenting-try different flavor combinations and see what resonates with you and your friends. Perhaps a charcuterie board with cured meats, nuts, and your favorite dips will spark a new favorite. The key is to have fun and enjoy the process of discovering how your homemade elderberry wine can elevate your mealtime experiences. With each sip and bite, you’re not just tasting; you’re celebrating your craft and the creativity that went into making that bottle.
Enhancing Your Elderberry Wine with Other Fruits
One of the joys of making elderberry wine is the opportunity to enhance its flavor profile by incorporating other fruits. Mixing in additional fruits not only creates a more complex and exciting beverage but also allows you to customize your wine to your taste preferences. Imagine your pantry filled with ripe fruits ready to be transformed into delicious liquid gold. Let’s explore how to blend flavors and create a unique elderberry wine that reflects your culinary spirit.
To get started, consider fruits that complement the naturally rich and tart notes of elderberries. Some popular choices include:
- Apples: Their crispness adds a refreshing contrast, while their sweetness can balance the tartness of the elderberries.
- Pears: Similar to apples, they offer a smooth, subtle sweetness and can lend a lovely perfume to your wine.
- Cherries: Sweet or tart cherries can amplify the fruity character of your wine, making it particularly vibrant.
- Peaches: The juiciness and floral notes of peaches provide a summer-like essence, making your elderberry wine feel bright and lively.
- Raspberries: Add a hint of tartness and a burst of color, creating a visually stunning and flavorful blend.
When selecting your fruits, aim for those that are in season for the best flavor and quality. You can experiment by using fresh, frozen, or even dried fruits; just adjust the quantity according to their flavor intensity. A good starting point is to use equal parts elderberries and your chosen fruit, but feel free to tweak this based on your personal taste.
For a simple application, mash the fruits slightly before adding them to your elderberry mixture to release their juices. This helps create a more homogeneous blend and enhances the overall fermentation process. Keep in mind that the fruits will also introduce sugars, so monitor the fermentation closely to achieve the desired sweetness. Don’t hesitate to take notes on your experiments-this way, you’ll have a record of what combinations you love, allowing for future refinements.
Incorporating other fruits into your elderberry wine is not just about flavor; it’s also about creating an experience. When serving your enhanced wine, it can become a conversation starter, bringing friends together through shared tastes and discoveries. So, gather your fruits, get creative, and enjoy the refreshing journey of crafting your personalized elderberry wine!
Health Benefits of Elderberry Wine You Didn’t Know
Elderberry wine isn’t just a delicious treat; it also boasts a range of health benefits that you might not be aware of. Known for its rich antioxidants, elderberries are packed with vitamins and minerals that contribute to overall wellness. When enjoyed in wine form, these benefits continue to shine, making elderberry wine not just a creative homebrew but also a healthy choice for your palate.
One of the standout advantages of elderberry wine is its potential immune-boosting properties. Elderberries are renowned for their ability to support the immune system, thanks to their high levels of vitamin C, which can help fend off colds and infections. A glass of elderberry wine can offer a delightful way to incorporate these benefits into your diet, especially during those colder months when colds tend to circulate.
Additionally, elderberry wine is believed to have anti-inflammatory properties. Inflammation can lead to various health issues, including heart disease and arthritis. By including elderberry in your evening routine, you may help reduce inflammation levels. Plus, the moderate consumption of wine has been associated with heart health benefits, potentially lowering the risk of cardiovascular diseases while you enjoy your homemade creation.
Rich in Antioxidants
Another remarkable aspect of elderberry wine is its richness in antioxidants. These compounds play a crucial role in fighting free radicals in your body, which can lead to chronic diseases and premature aging. The antioxidants found in elderberries help neutralize these harmful elements, making your elderberry wine not just a beverage but a natural ally in promoting longevity and health.
Overall, elderberry wine can serve as a flavorful addition to your wellness routine. It brings together the joys of crafting your own drinks with the satisfaction of knowing you’re treating your body well. So next time you pour yourself a glass, savor the flavors and the health benefits in every sip!
Sharing and Enjoying Your Homemade Elderberry Wine
There’s nothing quite like the satisfaction of sharing a homemade elderberry wine with friends and family. It’s not just a beverage; it’s a story, a labor of love, and a gateway to vibrant conversations. Whether you’re celebrating a special occasion or simply enjoying a cozy evening at home, your elderberry wine provides a delightful experience that brings people together.
When it comes to serving your elderberry wine, presentation matters. Consider using elegant glasses that showcase the rich ruby color of your brew. A simple garnish, like a sprig of mint or a few elderberries (if available), can elevate the aesthetic. Pair the wine with a selection of cheeses, charcuterie, or dark chocolate to enhance the tasting experience. These pairings not only complement the wine’s flavors but also create a beautiful table spread that encourages sharing and enjoyment.
Don’t be shy about discussing your winemaking process! Most guests appreciate learning about the effort that went into creating the wine they’re sipping. Share little anecdotes, like the day you picked the elderberries or how you experimented with the fermentation. This narrative adds depth to your gathering, making your wine even more memorable. You might even inspire others to try their hand at homemade beverages, turning your evening into an impromptu winemaking workshop.
For those who prefer a lighter touch, you can also mix your elderberry wine into cocktails. A refreshing elderberry spritz-made with sparkling water and a slice of lemon-can be a delightful alternative to heavy mixed drinks. This not only showcases the unique flavor of your wine but offers a refreshing twist that’s perfect for warmer months or festive occasions. Whatever the setting, your homemade elderberry wine is sure to spark joy and connection. Enjoy the fruits of your labor and the special moments created around the table!
Q&A
Q: What type of elderberries are best for making wine?
A: The best elderberries for winemaking are black elderberries (Sambucus nigra). They provide a rich flavor and higher antioxidant content, enhancing both taste and health benefits. Always ensure the berries are fully ripe and free of any mold to achieve the best results. For more on selecting ingredients, check out our section on Essential Ingredients for Elderberry Wine Making.
Q: How long does it take to ferment elderberry wine?
A: Fermenting elderberry wine typically takes about 4 to 6 weeks. During this time, yeast converts sugars into alcohol. Monitor the fermentation process closely and taste periodically to assess development. For tips on fermentation success, see our guide on Tips for Fermentation Success Every Time.
Q: Can you add other fruits to elderberry wine?
A: Yes, adding other fruits like apples or blackberries can enhance the flavor of your elderberry wine. These fruits complement the elderberries and add complexity. Experiment with different combinations for unique flavors; learn more about enhancing your wine in our Exploring Flavor Variations section.
Q: What are the signs that elderberry wine is ready to bottle?
A: Your elderberry wine is ready to bottle when it has cleared and stopped bubbling in the fermentation vessel. This indicates that the fermentation process is complete. A taste test can also confirm that the flavors are well-balanced. For tips on bottling, refer to our Storing and Aging Your Elderberry Wine section.
Q: What are common mistakes when making elderberry wine?
A: Common mistakes include using unripe or improperly cleaned elderberries, which can lead to off-flavors. Additionally, failing to monitor temperature and sanitation can spoil your batch. For a detailed list of pitfalls to avoid, check out our Common Mistakes to Avoid in Winemaking section.
Q: How should I store homemade elderberry wine?
A: Store homemade elderberry wine in a cool, dark place. Ideal conditions are around 50-60°F (10-15°C) with consistent humidity. Use dark glass bottles to prevent light exposure, and ensure caps or corks are secure. See our tips on Storing and Aging Your Elderberry Wine for more insights.
Q: How can elderberry wine boost my health?
A: Elderberry wine is rich in antioxidants and vitamins that may support your immune system, fighting off colds and flu. Moderate consumption can also provide heart health benefits. For more health-related benefits, refer to our Health Benefits of Elderberry Wine You Didn’t Know section.
Q: Can I use dried elderberries for winemaking?
A: Yes, you can use dried elderberries to make wine, but rehydrate them first. Use about 1/3 of the amount required for fresh berries, as dried ones are more concentrated. Adjust your recipe accordingly. For a detailed winemaking process, consult our Step-by-Step Guide to Crafting Elderberry Wine.
Closing Remarks
Congratulations on discovering the delightful art of elderberry winemaking! As you blend health benefits with flavor, remember that this process is as much about creativity as it is about following a recipe. With just a few ingredients and simple steps, you can craft a vibrant beverage that not only tastes great but also supports your well-being. So, why wait? Gather your ingredients today and kickstart your elderberry wine journey!
For more culinary inspiration, check out our guides on making refreshing elderberry syrup and crafting gourmet fruit butters. Don’t forget to sign up for our newsletter for exclusive tips, recipes, and the latest updates from our community of passionate home cooks. We encourage you to share your winemaking experiences or ask any questions in the comments below. Together, let’s celebrate the joy of homemade creations and empower each other in the kitchen!
Get our latest guides, news, and insights highlighted in your Google Search & AI Overviews.










