
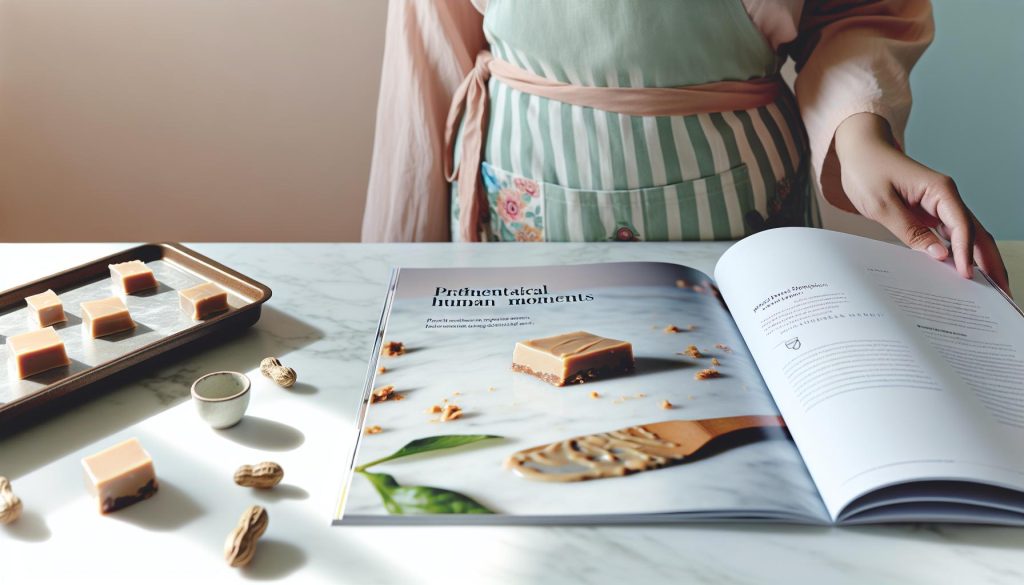
Peanut butter fudge is a timeless treat that brings a smile to faces young and old. What makes it even better? It’s incredibly easy to make and requires just a few simple ingredients! This no-fail recipe is perfect for anyone, whether you’re a novice in the kitchen or a seasoned pro looking for a quick sweet fix. Imagine a creamy, melt-in-your-mouth fudge that you can whip up without any fancy equipment or complicated techniques. It’s a wonderful way to indulge your sweet tooth, impress friends, or even create a heartfelt homemade gift. So roll up your sleeves and get ready to enjoy a fun and rewarding cooking experience that will leave your kitchen smelling delicious and your taste buds singing!
Peanut Butter Fudge Made Simple: A Beginner’s Guide
Peanut butter fudge is one of those magical treats that blends simplicity with deliciousness in every bite. It’s perfect for beginners because it requires minimal ingredients and equipment, making success almost a guarantee. With just a few pantry staples, such as sugar, milk, and peanut butter, you can create a creamy, dreamy fudge that will impress friends and family alike. In fact, many people find that making fudge at home is not only simpler than they expected but also a rewarding endeavor that kicks off countless kitchen adventures.
Essential Ingredients
To whip up a classic peanut butter fudge, you’ll need:
- 2 cups of granulated sugar
- ½ cup of milk
- 3 tablespoons of creamy or crunchy peanut butter
These three simple ingredients form a solid base. While this traditional approach is tried and tested, feel free to explore and customize your fudge with additional flavors or textures once you’re comfortable with the basics.
Step-by-Step Making Fudge
Creating this delightful treat can be broken down into simple steps:
- Combine Ingredients: In a medium-sized pot, mix the sugar and milk. Stir gently until well combined.
- Heat: Bring the mixture to a boil over medium heat, stirring constantly to prevent burning. Allow it to boil for about 2-3 minutes.
- Add Peanut Butter: Remove the pot from heat and stir in the peanut butter until fully melted and smooth.
- Pour and Set: Pour the fudge into a lined baking dish, smoothing out the top with a spatula. Allow it to cool at room temperature until set, or refrigerate for faster results.
This basic method ensures a soft and creamy texture while letting the rich peanut flavor shine through.
Creating your own peanut butter fudge is not just about following a recipe; it’s about embracing the joy of cooking. Each batch you make comes with endless possibilities for personalization, so once you master the fundamentals, let your creativity flow and infuse your fudge with flavors that excite your palate!
Essential Ingredients for Peanut Butter Fudge
To create a peanut butter fudge that stands out for its simplicity and delightful flavor, you need just a few essential ingredients that are likely already in your pantry. The beauty of this recipe is in its ease-no fancy equipment or techniques necessary. With just 2 cups of granulated sugar, ½ cup of milk, and 3 tablespoons of peanut butter, you’re on your way to a rich and creamy treat that practically melts in your mouth.
The sugar is crucial for that sweet, indulgent base that gives fudge its signature texture. When heated with milk, it creates a smooth caramel-like mixture that sets beautifully. The addition of peanut butter not only enhances the flavor with its nutty richness but also adds to the creaminess of the final product. Whether you prefer creamy or crunchy peanut butter, both options can work wonderfully-just let your personal taste guide you!
Once you’ve mastered the fundamentals with these primary ingredients, you can explore a world of possibilities. Consider incorporating flavors like vanilla extract, a pinch of salt to elevate the sweetness, or even a splash of chocolate or caramel for a fun twist. The essentials serve as a canvas for your creativity, allowing each fudge batch to be uniquely yours. Don’t hesitate to experiment-this is all part of the joy of homemade fudge!
Step-by-Step Instructions for Perfect Fudge
To create peanut butter fudge that is as effortless as it is delicious, follow these simple yet effective steps. This recipe is perfect for both novice and experienced cooks, allowing you to whip up a batch in less than an hour with minimal fuss.
Gather Your Ingredients
Start by assembling the essential ingredients, which include:
- 2 cups of granulated sugar
- ½ cup of milk
- 3 tablespoons of peanut butter
- 1 teaspoon of vanilla extract (optional for extra flavor)
- 1 tablespoon of butter (for greasing the pan)
Prepare Your Workspace
Before you begin cooking, prep your workspace for success. Grease an 8-inch square baking dish with butter or line it with parchment paper for easy removal later. This step is crucial to prevent sticking and make cleanup a breeze.
Cook the Mixture
In a medium saucepan over medium heat, combine the sugar and milk. Stir continuously until the sugar has dissolved completely. Bring the mixture to a gentle boil, then stop stirring and allow it to boil for about 4-5 minutes. You want it to reach soft-ball stage, which means it should be between 234°F and 240°F on a candy thermometer. If you don’t have a thermometer, test by dropping a small amount of the mixture into cold water; it should form a soft ball that can be easily squished.
Add Peanut Butter and Mix
Once your mixture has reached the right temperature, remove it from the heat. Quickly stir in the peanut butter and vanilla extract, mixing vigorously until the peanut butter is fully melted and incorporated. The mixture should become smooth and glossy. This is where you can let your creativity shine! If you’d like to add chocolate chips or nuts, now is the time to fold them in.
Transfer and Set
Pour your fudge mixture into the prepared baking dish, spreading it evenly. Let it cool at room temperature for about 2 hours or until set. For quicker cooling, you can place it in the refrigerator. Once set, cut into squares and enjoy your homemade peanut butter fudge!
These easy steps ensure that you create a creamy, satisfying treat that highlights the rich flavor of peanut butter while keeping the process friendly and approachable. Don’t be afraid to experiment with different flavors or mix-ins to make the fudge uniquely your own!
Common Mistakes to Avoid When Making Fudge
Making peanut butter fudge is a joy, but even the best of us can run into a few hiccups during the process. Understanding common pitfalls can help ensure your fudge turns out perfectly every time. One of the most frequent mistakes is not achieving the right sugar and milk mixture consistency. It’s essential to stir the mixture continuously until the sugar dissolves completely. If you skip this step or rush the process, you might end up with gritty fudge because undissolved sugar can create a grainy texture.
Another key consideration is boiling the mixture to the correct temperature. The fudge should reach soft-ball stage, between 234°F and 240°F. If it’s too hot, you risk making hard candy instead of creamy fudge. Using a candy thermometer is a smart move, but if you’re without one, you can test the mixture by forming a small drop in cold water; it should hold its shape but still be pliable. If your fudge sets too soft, this might indicate that it didn’t boil long enough, while if it’s too hard, it may have cooked beyond ideal temperatures.
Timing is also crucial! Once you’ve removed the pan from heat, work quickly to stir in the peanut butter and any mix-ins. If the mixture sits too long, it can start to firm up, making it difficult to blend smoothly. Remember, once you’ve poured it into the prepared pan, let it cool undisturbed. Avoid the temptation to cut it too early; patience is key here, as letting it set for a couple of hours ensures the best texture.
Lastly, don’t forget the importance of greasing the pan or lining it with parchment paper. This step not only prevents sticking but also makes clean-up a breeze. By keeping these tips in mind, you’re well on your way to creating a delicious, homemade peanut butter fudge that you can be proud of!
Creative Variations on Classic Peanut Butter Fudge
Experimenting with peanut butter fudge can elevate this classic treat into something truly special. One of the easiest ways to add a twist is by incorporating chocolate. You can swirl melted chocolate into your fudge mixture before it sets, creating a beautiful marbled effect and a delectable chocolate-peanut butter flavor combination. This not only enhances the taste but also makes your fudge visually appealing.
If you’re feeling adventurous, consider adding mix-ins for extra texture and flavor. Chopped nuts, such as walnuts or almonds, can add crunch, while ingredients like mini marshmallows or crispy rice cereal introduce a delightful surprise with each bite. You could even sprinkle a bit of sea salt on top of your fudge before it cools to balance out the sweetness and elevate the flavor profile.
Another fun variation is to explore different flavorings. For a tropical twist, try adding some shredded coconut or a hint of coconut extract. For a spicier kick, a dash of cinnamon or even a little cayenne pepper can create an intriguing flavor contrast, surprising your family and friends.
Don’t forget about layering! Creating layers of peanut butter and chocolate fudge can give your treat a gourmet touch. Pour a layer of chocolate fudge into your pan, let it set slightly, and then add a layer of peanut butter fudge on top. This can be both visually stunning and deliciously satisfying.
With these creative variations, your peanut butter fudge will not only be simple to make but also an exciting treat that brings smiles to everyone’s faces! Enjoy the process and have fun experimenting!
How to Add Flavor: Mix-Ins and Toppings
Elevating your peanut butter fudge is a delightful journey limited only by your imagination. A simple batch can be transformed into a gourmet experience with just a few creative mix-ins and toppings. Think about what you love-this is your canvas!
Mix-Ins That Surprise
Adding mix-ins not only enhances flavor but can also introduce exciting textures. Here are some ideas to get your creativity flowing:
- Chopped Nuts: Finely chopped walnuts, almonds, or pecans can add a satisfying crunch. Toast them lightly before mixing for an extra depth of flavor.
- Chocolate Chips: Incorporate semi-sweet or milk chocolate chips right before pouring the fudge into the pan for a melty, decadent surprise.
- Crispy Rice Cereal: For a delightful crunch, add crispy rice cereal. This gives your fudge that sought-after texture reminiscent of classic chocolate treats.
- Mini Marshmallows: Fold in mini marshmallows for a chewy sweetness that contrasts beautifully with the creamy fudge.
Finishing Touches with Toppings
Toppings can add both flair and flavor to your fudge. Consider these options:
- Drizzle of Chocolate: A simple drizzle of melted chocolate on top can transform the look and taste of your fudge. Use dark, milk, or even white chocolate for a striking contrast.
- Sea Salt: A sprinkle of flaky sea salt on top can enhance the flavors and provide a lovely salty-sweet balance.
- Coconut Flakes: Shredded coconut offers a tropical twist and adds a bit of chewiness that contrasts nicely with the smooth fudge.
- Cinnamon Sugar: For a warm touch, sprinkle a mix of cinnamon and sugar over the top before it sets; it’s a warm hug in every bite.
The key is to use what you love and what you have on hand. A little creativity goes a long way in the kitchen, and adding personal touches to your fudge makes it uniquely yours! Enjoy the process, and don’t be afraid to experiment-the results might surprise you!
Storing and Freezing Your Peanut Butter Fudge
To keep your homemade peanut butter fudge fresh and delicious, it’s important to know how to store it properly. This sweet treat is not only a delight to make but also a joy to share, so extending its shelf life can allow you to enjoy it longer or gift it to friends and family.
For shorter storage, place the fudge in an airtight container and store it at room temperature. It will remain good for about a week. Just ensure that it’s kept in a cool, dry place away from direct sunlight, which can alter its texture and flavor. If you want to stretch that time, moving your fudge to the refrigerator is an excellent option. In the fridge, your fudge can last for up to two weeks, maintaining its creamy texture and rich flavor.
If you want to keep your peanut butter fudge even longer, freezing it is a fantastic way to lock in its goodness. Cut the fudge into squares or use a baking dish, then wrap it tightly in plastic wrap and place it in a freezer-safe bag or container. It can last for up to three months in the freezer! When you’re ready to enjoy it, simply transfer the fudge to the refrigerator to slowly thaw overnight; this way, you preserve its consistency. Avoid microwaving it to defrost, as this could lead to uneven textures and melting. With these storage tips, you’ll ensure that your peanut butter fudge remains a delightful treat whenever you crave a sweet bite!
Vegan and Healthy Alternatives for Fudge
Whether you’re vegan, health-conscious, or simply want to try something new, there are plenty of delicious alternatives to traditional peanut butter fudge that can cater to various dietary preferences. You can create a rich and satisfying fudge without compromising on flavor or texture. Here’s how!
To start, natural ingredients are your best friends. For a healthy base, consider using natural nut or seed butters like almond butter or sunflower seed butter-these can be just as creamy as peanut butter. If you’re looking for sweetness without added sugar, mashed bananas or a bit of applesauce can work wonders. They not only sweeten your fudge but also add a moist, fudgy texture.
When it comes to binding your fudge, coconut oil is a fantastic choice thanks to its health benefits and slight hint of sweetness. For a nut-free option, coconut milk or cashew cream can create that creamy consistency you’re after. Combine your chosen base with cocoa powder for a chocolatey twist, or use vanilla extract for a classic flavor.
If you’re feeling playful, here are some additive ideas to kick your healthy fudge up a notch:
- Chopped nuts or seeds: Add crunch and healthy fats.
- Dried fruit: Chop up your favorites-like cranberries or apricots-for a chewy texture.
- Nutmeg or cinnamon: Enhance flavors with warming spices.
- Protein powder: Boost nutrition for a post-workout treat.
Experiment with different combinations, keeping the ratios balanced to ensure that your fudge sets properly while still being deliciously indulgent. If you’re wary of sugar, options like maple syrup or agave nectar can serve as wonderful natural sweeteners.
With these tips, you can whip up a batch of vegan and healthy fudge that not only satisfies your sweet tooth but also aligns beautifully with your dietary needs. Whether you share it with friends or keep it all for yourself, this fudge will be a guilt-free delight that everyone can enjoy!
Serving Suggestions: Pairing Peanut Butter Fudge
Peanut butter fudge is a versatile treat that pairs well with a variety of flavors and accompaniments, making it a delightful addition to your dessert table or snack platter. One of the simplest yet most satisfying ways to enjoy this creamy confection is with a glass of milk, whether it’s classic cow’s milk or a nut-based alternative like almond or oat milk. The richness of the fudge and the soothing coolness of the milk create a timeless combination that pleases both kids and adults alike.
If you’re looking to elevate your fudge experience, consider serving it alongside a scoop of your favorite ice cream. The contrasts in temperature and texture are deliciously enjoyable. Imagine a warm slice of fudge melting into a scoop of vanilla or chocolate ice cream, creating a delightful gooey mess that’s hard to resist. For a bit of crunch, sprinkle on some crushed pretzels or nuts right before serving to add a unique twist and an unexpected crunch.
Another fun idea is to serve your fudge with a side of fresh fruits like strawberries, bananas, or apples. The sweetness of the fruits complements the rich taste of the fudge beautifully while also adding a bit of freshness to each bite. This fruity pairing not only enhances the flavors but also makes your treat feel a bit lighter and more balanced. Drizzling a bit of honey or caramel sauce over the fruits can add extra decadence if you’re feeling indulgent.
For a festive touch, consider incorporating your fudge into a charcuterie board. Accompany it with an assortment of cheeses, crackers, and even other sweets like chocolate-covered pretzels or mini cookies. This creates an inviting spread perfect for gatherings or holiday celebrations, showcasing the peanut butter fudge as a star attraction that everyone will want to try. Whether enjoyed on its own or as part of a larger spread, peanut butter fudge never fails to impress.
Why Peanut Butter Fudge is a Great Gift Idea
Peanut butter fudge makes for an exceptional gift that’s sure to delight anyone who receives it. The combination of rich peanut butter and sweet chocolate creates a nostalgic treat that can transport your loved ones back to their childhood. Unlike many store-bought confections, homemade fudge carries a personal touch that shows effort and care. Each piece is a little morsel of joy, perfect for sharing during celebrations or simply as a sweet surprise.
One of the best aspects of gifting peanut butter fudge is its versatility in presentation. You can easily dress it up for any occasion. Consider wrapping pieces in colorful cellophane tied with a ribbon for a festive look, or place cubes in a decorative tin for a charming homemade gift. For an even more elevated presentation, layer the fudge with fun toppings like crushed nuts or drizzles of chocolate before packaging. Not only does this add to the aesthetic, but it also shows your creativity and thoughtfulness.
Additionally, making peanut butter fudge is a straightforward process, making it accessible for cooks of all skill levels. Typically requiring just a few ingredients-peanut butter, sweetened condensed milk, and powdered sugar-you can whip up a batch in no time. This ease encourages even the busiest home cooks to get involved and share their creations. Moreover, you can customize flavors by adding mix-ins like sea salt, vanilla, or chocolate chips, allowing each batch to be uniquely tailored for its recipient.
Incorporating homemade fudge into holiday traditions or gifting it alongside other homemade items can make your gesture even more meaningful. Imagine delivering a holiday basket filled with peanut butter fudge, cookies, and preserves. Such heartfelt gifts are priceless and create lasting memories for both the giver and the recipient. Whether for birthdays, holidays, or just because, peanut butter fudge is a treat that brings joy, sweetness, and a personal touch to any gift-giving occasion.
Troubleshooting: Fixing Fudge Disasters
Have you ever poured your heart into making a batch of peanut butter fudge only to find it didn’t turn out as expected? Don’t worry; it happens to the best of us! Whether your fudge is grainy, too soft, or has a strange texture, there are simple solutions to bring your creation back from the brink of disaster.
First, if your fudge is gritty, it’s likely due to sugar not dissolving fully. This can happen if your mixture heats too quickly or if the sugar is added too soon. To rescue this batch, try gently reheating it. Place the fudge back in the pot, add a splash of water (about a tablespoon at a time), and heat on low until the mixture softens. Stir continuously to help dissolve the sugar crystals. This method can smooth out those unwanted granules!
If you encounter fudge that has hardened too much, it may be nearly impossible to cut into neat squares. In such cases, feel free to re-melt your fudge with the same water-dissolving technique mentioned above, or even add a bit of milk or cream for richness and moisture. Just remember to keep stirring to prevent scorching. Once it’s nice and gooey again, pour it into a lined dish and let it set gently in the refrigerator.
Oily fudge can be another common issue. This often results when too much fat has been added, or if the mixture separates during the cooking process. The good news is you can often blend this back together. Reheat the fudge gently and stir it continuously to incorporate the oil back in. If the texture is too far gone, consider swirling in a little more confectioners’ sugar to help mop up excess oil while stabilizing the consistency.
Finally, if your fudge is too soft and won’t hold its shape, it may need additional time to set. You can place it in the fridge for a couple of hours to firm up. Alternatively, adding a bit more powdered sugar or cocoa can help absorb some excess moisture, creating a sturdier fudge.
Remember, every fudge-making experience is a chance to learn and improve your skills! With these troubleshooting tips in hand, you’re well on your way to delicious, homemade peanut butter fudge that’s a true delight. Happy cooking!
Frequently Asked Questions About Peanut Butter Fudge
Did you know that peanut butter fudge is one of the simplest treats you can whip up in your own kitchen? It requires just a few essential ingredients, making it perfect for beginners and experienced bakers alike. Here are some common questions that might pop up while you’re crafting this deliciously creamy treat.
What can I do if my peanut butter fudge is too soft?
If your fudge won’t hold its shape, it might need a bit more time to set. Try placing it in the refrigerator for a few hours to firm up. If it’s still too soft, consider adding a little more powdered sugar or cocoa powder, as these ingredients can help absorb excess moisture, resulting in a sturdier texture.
How can I prevent my fudge from being grainy?
Graininess often occurs when sugar doesn’t dissolve properly. To avoid this, heat your fudge mixture gently and ensure the sugar is fully dissolved before it cools. If you do end up with a gritty batch, simply reheat the fudge and stir in a splash of water, heating it slowly while stirring continuously. This can help dissolve any pesky sugar crystals.
Can I add mix-ins to my peanut butter fudge?
Absolutely! Peanut butter fudge is incredibly versatile. You can add chocolate chips, nuts, dried fruits, or even sprinkles. Just stir in your mix-ins after the fudge has been cooked and before it sets to create your own unique twist on this classic treat.
How should I store my peanut butter fudge?
To keep your fudge fresh, store it in an airtight container at room temperature for up to a week. If you want to keep it longer, you can refrigerate it for up to two weeks or freeze it for several months. Just be sure to wrap it well in plastic wrap or wax paper before placing it in an airtight container to prevent freezer burn.
These FAQs should help you navigate some of the common concerns you might have while making peanut butter fudge. Remember, baking is all about experimentation, so don’t hesitate to try different variations and make it your own! Enjoy the process and happy cooking!
Q&A
Q: Can I make peanut butter fudge without a microwave?
A: Yes, you can make peanut butter fudge on the stovetop! Simply melt your ingredients in a saucepan over low heat, stirring continuously until smooth. This method allows for precise temperature control and prevents burning, ensuring your fudge comes out perfectly. For more tips, check our Step-by-Step Instructions for Perfect Fudge.
Q: How long does peanut butter fudge need to set?
A: Peanut butter fudge typically requires about 2 to 4 hours to set at room temperature. For quicker results, you can place it in the refrigerator for about 1 hour. Ensuring it’s well-chilled will make slicing easier. Explore our Storing and Freezing Your Peanut Butter Fudge section for more tips!
Q: What can I do if my peanut butter fudge is too soft?
A: If your peanut butter fudge is too soft, it likely needs more time to cool and set. You can also refrigerate it for a firmer texture. If it remains too soft after that, consider adding a bit more powdered sugar or adjusting your recipe next time. For troubleshooting advice, see our Troubleshooting: Fixing Fudge Disasters.
Q: What types of peanut butter are best for fudge?
A: Creamy peanut butter works best for a smooth texture, while natural or crunchy varieties can add delightful texture. Make sure to stir the peanut butter well if using natural types. Check out our Essential Ingredients for Peanut Butter Fudge for detailed ingredient choices.
Q: Can I add flavorings to my peanut butter fudge?
A: Absolutely! Adding vanilla extract, cocoa powder, or even a splash of maple syrup can elevate your fudge’s flavor. Experiment with mix-ins like chocolate chips or nuts for variety. Visit our How to Add Flavor: Mix-Ins and Toppings for more creative ideas.
Q: How should I store leftover peanut butter fudge?
A: Store leftover peanut butter fudge in an airtight container at room temperature for up to a week. For longer shelf life, refrigerate it, where it can last for several weeks. Discover more preservation tips in our Storing and Freezing Your Peanut Butter Fudge section.
Q: Is peanut butter fudge gluten-free?
A: Yes, peanut butter fudge is typically gluten-free, provided that all ingredients are certified gluten-free. Always check labels to ensure no cross-contamination. For healthy alternatives, check our Vegan and Healthy Alternatives for Fudge section.
Q: Can I freeze peanut butter fudge?
A: Yes, you can freeze peanut butter fudge! Wrap it tightly in plastic wrap and store it in an airtight container. It can last up to 2 months in the freezer. For best results, thaw in the refrigerator before enjoying. See our Storing and Freezing Your Peanut Butter Fudge for more storage information.
In Summary
Thank you for joining us on this delightful journey to whip up peanut butter fudge that’s not just delicious but incredibly easy to make! With just a handful of ingredients and simple steps, this recipe is your ticket to satisfying your sweet tooth or impressing friends and family. Don’t wait-get into the kitchen and create your own batch today, because the only thing better than the taste is sharing it with loved ones!
To explore more delightful treats, check out our easy cookie recipes and festive dessert ideas. If you have questions or want to share your fudge-making experience, leave a comment below! And don’t forget to sign up for our newsletter for more tips, tricks, and tasty recipes delivered right to your inbox. Let’s keep the baking fun going-your next sweet adventure awaits!
Get our latest guides, news, and insights highlighted in your Google Search & AI Overviews.










