
✨ This article was AI edited. Editorial responsibility: RecipesFromTheHomestead.com.
Produced with AI. This article was artificially generated. Editorial responsibility: RecipesFromTheHomestead.com.
Home winemaking for dummies is the straightforward process of fermenting fruit juice—most commonly grape, berry, or apple—into drinkable wine using commercial yeast, sugar, and basic sanitation. By controlling cleanliness, specific gravity with a hydrometer, and ambient fermentation temperature (68°F–72°F), beginners can produce clean, balanced table wine within four to eight weeks.
The Core Science: Demystifying Fermentation for Beginners
Making wine at home does not require an advanced degree in enology or an underground cellar lined with French oak barrels. At its fundamental biochemical level, winemaking relies on a single biological equation: yeast consumes fermentable sugars and converts them into ethanol (alcohol), carbon dioxide gas, and heat. The art of the craft lies entirely in giving your chosen yeast strain the optimal environment to thrive while systematically barring wild bacteria and oxygen from spoiling the finished beverage.
For someone approaching winemaking for the first time, the biggest psychological hurdle is fear of spoilage. Historically, humans have fermented wine in clay amphorae and animal skins for over six millennia. Modern home vintners possess an immense advantage: food-grade plastics, precision hydrometers, calibrated sanitizers, and cultured yeasts selected for predictable, clean flavor profiles. If you can boil water, measure sugar, and follow a basic cleaning protocol, you can reliably craft delicious, crystal-clear wine right on your kitchen counter.
Essential Equipment: The Minimalist 1-Gallon Toolkit
While commercial wineries invest tens of thousands of dollars in stainless steel conical fermenters, a beginner should always begin with a simple 1-gallon (3.8-liter) glass jug batch. A single gallon yields approximately five standard 750ml bottles, allowing you to experiment with fruit varieties and yeast strains without risking substantial financial investment.
- Food-Grade Fermentation Bucket (2 Gallons): Primary fermentation creates vigorous foaming (the “krausen”). Using a 2-gallon bucket for the first 5 to 7 days prevents messy airlock overflows.
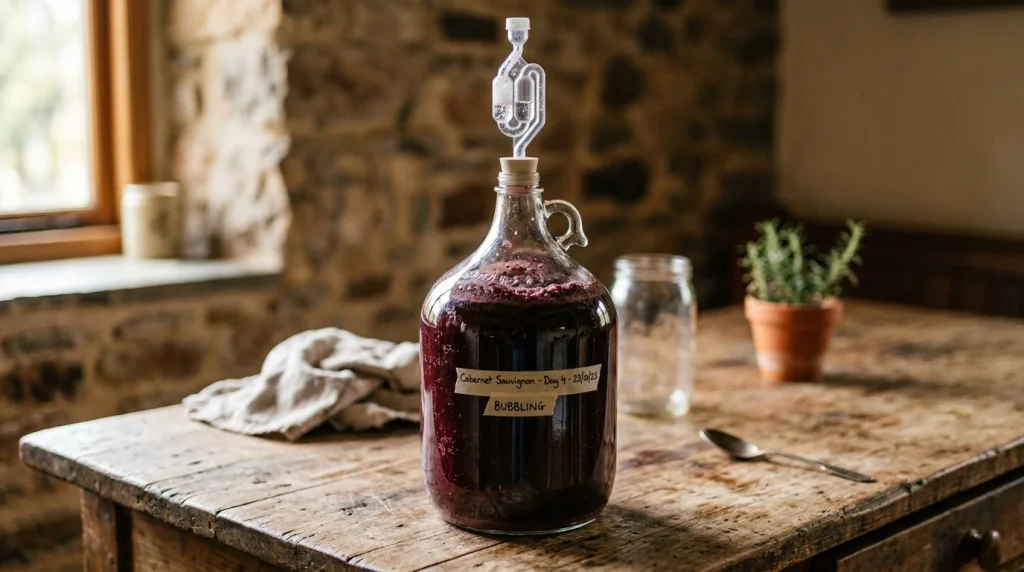
- 1-Gallon Glass Demijohn / Carboy: Used for secondary fermentation and clarifying once active bubbling slows.
- Three-Piece Airlock and Rubber Bung: Allows carbon dioxide to escape continuously while creating an airtight barrier against fruit flies (Drosophila melanogaster) and airborne acetobacter (vinegar bacteria).
- Triple-Scale Hydrometer & Test Jar: The indispensable navigational instrument of winemaking. It measures specific gravity (liquid density relative to water), revealing sugar content and potential alcohol percentage.
- Auto-Siphon and Food-Grade PVC Tubing: Transfers liquid cleanly between vessels without disturbing the settled yeast sediment (the lees) at the bottom.
- Oxygenating Sanitizer (Star San or Potassium Metabisulfite): A no-rinse sanitizer ensures that every surface coming into contact with your must is sterile.
- Wine Bottles, Corks, and a Hand Corker: Standard bottles and synthetic or natural agglomerated corks seal your vintage for maturation.
Beginner Comparison: Choosing Your Starter Fruit Base
Not all fruits behave identically during fermentation. Acidity, natural sugar concentration, and pectin content vary widely across produce. The following comparative matrix outlines the four most common entry points for novice vintners:
| Fruit Base | Starting Brix / Sugar | Acid Balance Difficulty | Clarification Speed | Best For |
|---|---|---|---|---|
| Commercial Grape Concentrate | High (pre-balanced) | Effortless (pH 3.4–3.6) | Fast (2–3 weeks) | Absolute first-time beginners |
| Frozen Blackberries / Berries | Moderate (needs sugar addition) | Easy (high natural acid) | Medium (needs pectic enzyme) | Homestead fruit harvests |
| Pasteurized 100% Apple Juice | Low-Moderate (1.045–1.050) | Gentle malic acid | Very Fast (10–14 days) | Low-budget kitchen experiments |
| Fresh Vineyard Grapes | Variable (20°–25° Brix) | Requires titration testing | Slow (requires heavy racking) | Intermediate to advanced vintners |
The Fail-Proof 1-Gallon Homestead Country Wine Recipe
This master formula uses frozen whole berries or pasteurized 100% grape juice without artificial preservatives like potassium sorbate or sodium benzoate (which inhibit yeast reproduction).
Ingredients Checklist:
- 4 lbs frozen blackberries or triple-berry blend (thawed and mashed)
- 2 lbs granulated white cane sugar (dissolved in warm filtered water)
- 1 gallon spring water or filtered tap water
- 1 packet Lalvin EC-1118 or Red Star Premier Classique yeast
- 1 tsp yeast nutrient (diammonium phosphate blend)
- 1/2 tsp pectic enzyme (breaks down plant cellular walls for clear wine)
- 1 Campden tablet (potassium metabisulfite) crushed
Step-by-Step Procedure:
- Sanitation First: Submerge every piece of equipment—spoons, siphon tubes, bucket, airlock—in freshly prepared sanitizer solution for at least 60 seconds.
- Preparing the Must: Place the crushed fruit into a sanitized nylon straining bag inside the fermentation bucket. Pour in the warm dissolved sugar water and cool spring water until total volume reaches roughly 1.2 gallons.
- Sulfite Treatment: Stir in the crushed Campden tablet and pectic enzyme. Cover the bucket with a clean towel. Wait 24 hours. The sulfite stuns wild microorganisms while the enzyme begins clarifying the juice.
- Inoculation (Pitching Yeast): Hydrate your wine yeast in 2 ounces of lukewarm water (100°F) for 15 minutes, then pitch it directly across the surface of the must. Add your yeast nutrient.
- Primary Fermentation (Days 1–7): Seal the bucket loosely with the lid and airlock. Within 18 to 36 hours, vigorous bubbling will occur. Once daily, gently push down the floating fruit bag (punching the cap) with a sanitized spoon to extract color and tannins.
- Racking to Secondary (Day 7): When the hydrometer reads between 1.010 and 1.000, remove the fruit bag. Siphon the cloudy wine off the bottom trub into your 1-gallon glass carboy. Fill the neck to minimize headspace and fit the airlock.
- Clearing and Degassing (Weeks 3–6): Allow the wine to sit undisturbed in a cool, dark cupboard (65°F–70°F). The remaining yeast will finish consuming microscopic sugars and drop to the floor of the vessel, creating brilliant clarity.
- Bottling: When specific gravity reaches 0.994–0.998 and remains steady across three consecutive days, siphon the pristine wine into sanitized bottles and cork firmly.
Hydrometer Mastery: Measuring ABV Without Guesswork
The hydrometer eliminates all mystery from alcoholic strength. To calculate potential alcohol, measure the specific gravity before fermentation begins (Original Gravity, or OG) and after fermentation halts (Final Gravity, or FG). Use the standard formula:
Alcohol By Volume (ABV %) = (Original Gravity – Final Gravity) × 131.25
For example, an OG reading of 1.090 fermented dry to 0.996 results in: (1.090 – 0.996) = 0.094 × 131.25 = 12.33% ABV. For further details on refining your home cellar operations, read our complete guide on winemaking at home.
Critical Mistakes to Avoid on Your First Batch
Novice vintners often make three avoidable mistakes that can impair flavor:
- Excessive Headspace in Secondary: While primary fermentation benefits from oxygen during initial yeast reproduction, secondary aging requires minimal air contact. Keep wine filled into the narrow neck of your glass carboy to prevent vinegar conversion.
- Bottling Too Early: Bottling wine that is still silently fermenting can build carbon dioxide pressure, causing corks to push out or glass bottles to burst. Always verify stable hydrometer readings below 1.000 over 72 hours.
- Using Bread Yeast: While active dry baking yeast can technically ferment sugar, it produces harsh fusel alcohols and leaves bread-like yeasty off-flavors. Commercial wine yeast costs only two dollars a packet and yields professional results.
Frequently Asked Questions
Can I make wine without added sugar?
If you use high-sugar vitis vinifera wine grapes, no chaptalization (adding sugar) is necessary because natural sugars are high enough to reach 12%–14% ABV. However, berries, apples, and wild fruits require supplementary sugar to achieve proper table wine strength and preservation.
How long should homemade wine age before drinking?
Light white wines and berry wines are enjoyable after 2 to 3 months of bottle conditioning. Rich red wines benefit from 6 to 12 months of maturation, which rounds out young tannins and harmonizes acidity.
Get our latest guides, news, and insights highlighted in your Google Search & AI Overviews.










