
✨ This article was AI edited. Editorial responsibility: RecipesFromTheHomestead.com.
Produced with AI. This article was artificially generated. Editorial responsibility: RecipesFromTheHomestead.com.
How to prepare homemade wine begins with meticulous fruit selection, sanitizing all contact vessels, crushing the fruit into a homogeneous “must,” testing specific gravity and acidity, and pitch-inoculating with cultured wine yeast. Proper preparation suppresses spoilage microbes, balances sweetness with acid, and kickstarts vigorous aerobic primary fermentation within 24 hours.
Phase 1: Fruit Sorting, Cleansing, and Destemming
The foundation of every extraordinary vintage is established before a single yeast cell is introduced. Whether harvesting backyard Concord grapes, foraging elderberries, or purchasing commercial orchard fruit, processing raw botanical material demands systematic sorting. Stems, green leaves, and underripe berries carry excessive amounts of harsh, bitter methoxypyrazines and astringent catechins that can impart vegetable-like off-flavors to wine.
Begin by inspecting fruit clusters under bright lighting. Discard fruit showing gray mold (Botrytis cinerea) or vinegar-smelling rot caused by wild acetobacter. Rinse firm fruit in cold filtered water to displace soil and agricultural residue. For delicate berries, a gentle dip in a mild potassium metabisulfite bath (50 ppm) neutralizes airborne molds without rupturing cell membranes prematurely. For an overview of overall home cellaring, consult our practical tutorial on how to make your own wine at home.
Phase 2: Crushing and Maceration: Extracting Flavor and Color
Crushing transforms whole fruit into “must”—the raw mixture of juice, skins, pulp, and seeds. The mechanical technique used depends on your wine style:
- Red and Country Berry Wines: The skin must remain in contact with the juice during initial fermentation. This maceration stage extracts anthocyanins (responsible for deep red pigments) and condensed tannins that provide structural body and aging potential. Use a sanitized manual fruit crusher or food-grade potato masher. Avoid motorized blenders or food processors, which shatter seeds and release unpleasantly bitter oils.
- White Wines: Whole-cluster or destemmed grapes are gently crushed and immediately pressed. The juice is separated from the skins within hours to avoid extracting unwanted astringency and vegetal notes.
- Pectic Enzyme Treatment: Fresh fruit contains high levels of pectin, a natural structural polysaccharide that causes permanent haze in finished wine. Stirring 1/2 teaspoon of dry pectic enzyme per gallon into the freshly crushed must breaks down these pectin chains within 12 to 24 hours, dramatically increasing juice yield and clarity.
Phase 3: The Chemistry of the Must: Sugar, Acid, and pH
Experienced vintners do not guess their ingredient ratios; they measure them using precision tools. Before adding yeast, three core chemical variables must be assessed and adjusted:
| Chemical Parameter | Target Range (Red Wine) | Target Range (White Wine) | Corrective Action if Low | Corrective Action if High |
|---|---|---|---|---|
| Specific Gravity (Brix) | 1.085–1.095 (21°–23° Brix) | 1.075–1.085 (19°–21° Brix) | Dissolve granulated cane sugar | Dilute with clean filtered water |
| pH Level | 3.40–3.60 | 3.20–3.40 | Add Potassium Bicarbonate | Add Tartaric Acid or Acid Blend |
| Titratable Acidity (TA) | 0.60%–0.70% (6.0–7.0 g/L) | 0.70%–0.85% (7.0–8.5 g/L) | Add Acid Blend (Malic/Citric) | Cold stabilization or dilution |
| Free SO2 (Sulfite) | 30–50 ppm (pre-pitch) | 30–40 ppm (pre-pitch) | Add 1 crushed Campden tablet/gal | Aeration and time (24h rest) |
Phase 4: Pre-Fermentation Sanitization with Campden
Wild yeasts inhabiting the skins of outdoor fruits are volatile and unpredictable; they rarely possess alcohol tolerance beyond 4%–5% ABV and frequently generate unpalatable acetic acid (vinegar) or hydrogen sulfide (rotten egg odor). To suppress these organisms, vintners add one crushed Campden tablet (potassium metabisulfite) per gallon of must.
Once dissolved, sulfur dioxide gas permeates the liquid, destroying delicate wild bacterial cell walls. It is critical to leave the primary fermenter loosely covered with a breathable lint-free towel for exactly 24 hours prior to pitching your cultured yeast. This incubation window permits excess sulfur dioxide to off-gas safely, preventing it from stunning your premium wine yeast.
Phase 5: Yeast Inoculation and Nutrient Feeding
Rehydrating dry active yeast ensures that cell membranes re-establish structural integrity before facing high-osmotic sugar concentrations in the must. Follow this proven protocol:
- Measure 50ml of clean spring water heated to precisely 104°F (40°C).
- Sprinkle the contents of one 5-gram yeast sachet (such as Lalvin Bourgovin RC-212 for structured reds or Lalvin K1-V1116 for fruity whites) across the water surface. Do not stir immediately.
- After 15 minutes, gently swirl the milky suspension. Slowly blend in two tablespoons of your room-temperature fruit must to temper the yeast, preventing temperature shock.
- Pour the active culture across the top of your must.
- Staggered Nutrient Addition (SNA): Yeast requires nitrogen, amino acids, and micronutrients to build cell biomass without generating stress-related sulfur defects. Add half your yeast nutrient (diammonium phosphate blend) on Day 1, and the second half once fermentation has consumed one-third of the initial sugar (around Day 3 or 4).
Managing the Primary Fermentation Cap
During the first 5 to 7 days, the release of buoyant carbon dioxide lifts fruit skins and pulp into a compact layer at the surface called the “cap.” Left unmanaged, a dry cap will dry out, cultivate acetobacter, or overheat the center of the fermenter. Punch down the cap twice daily using a sanitized long-handled plastic paddle, submerging the fruit into the cool bubbling liquid below. This keeps skins hydrated, dissipates heat, and enhances color extraction.
Transitioning to Secondary Fermentation
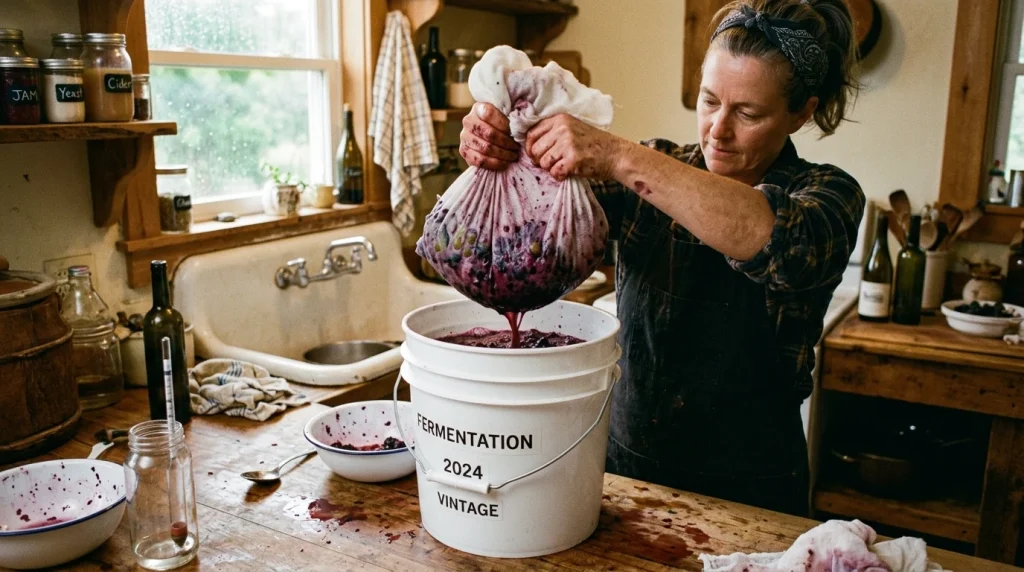
When daily hydrometer checks drop between 1.010 and 1.000, active primary fermentation is winding down. It is time to press the fruit pulp, separate the liquid, and rack the wine into an airtight glass carboy fitted with a water-filled airlock. This transition marks the end of fruit preparation and ushers in the quiet period of clarification, maturation, and flavor development.
Get our latest guides, news, and insights highlighted in your Google Search & AI Overviews.










